3D Printed Parts
I have been making and designing Patrol Torpedo (P.T.) boat models for over 30 years and torpedoes for even longer, in fact ever since my son and his friends looked like blowing themselves up at age 9 or 10 with a CO2 cartridge and some boxes of matches and I decided to make a torpedo out of the CO2 cartridge that I confiscated and some polystyrene. I then found a free plan for PT109 in a British modelling magazine, which I decided wasn't quite good enough for what I wanted but it gave me the inspiration and the basic shape. I had used Autocad for a few years to draw my house plan, commercial buildings, printed circuit boards, all sorts of metalwork designs and many other rectangular shapes but never for a boat. My first model was fully hand built using all sort of materials from Berocca tubes, roll on deodorant tubes, balsa wood, rubber strip, thin marine ply, K&S brass tube and many sub optimal parts from the local hobby shops (when there were some around).
As the Internet matured a little, more and more information became available so I decided to re-do the hull based on the available Rib drawings and photo's, hence Hull-2.
So after 10 or so years of all sorts of “digital” boat designs I set up a “shop” on the Shapeways website where I had some 500 different parts available, with a drop shipment system, where you could order, Shapeways would make and ship and I would get a small commission, things were working well for a few years, until Shapeways filed for bankruptcy, so after exploring all other options and trying a few other 3D print services, I could not find any system quite like the third party “shop” that Shapeways had, they have now re-emerged as a company but they have also stated, quite categorically, that they will not re-start the “shop” function due to the high cost of data storage, so I decided I had to make the files available on my own website and under my own control!
So I am in the process of re-generating all of the lost 3D files that were on Shapeways and making them available, initially in 20th scale, on the various model pricelists. There will be many hundreds of files in the fullness of time and in many scales! My son Paul has also spent many, many hours significantly upgrading the website (brought it into the 21st century, as he calls it) by adding all sorts of CSS code, site maps, meta tags and whatnot which have now seen it re- ranked by Google, back to a reasonable position in searches.
So now you can start your PT boat project from a very low cost, especially if you own your own 3D printer or your own Laser Cutter, many of the simpler parts are free to download and many are available for a very modest price. I MUST charge for some parts as I have been paying for the website hosting costs for some 30 years, while I was earning money but now that I am retired I need to pay for website hosting each month, as well as licenses for both Fusion and Autocad!
If you don't have your own equipment you can still use commercial 3D printing companies such as Shapeways, All3DP, Craftcloud, Sculpteo etc. I have used a few different companies and my favourite (but probably the most expensive) is Shapeways, although, that said, I have had some parts 3D printed in China, out of stainless steel that Shapeways couldn't or wouldn't do. You merely download the file from PT-Boat.com, then extract the 3D files from the .zip file and then upload the appropriate file to wherever you choose, to find the best quote.
All 3D printing files on the website are in the form of a downloadable .zip file that contains an .stl Stereolithography file for “slicing” and then 3D printing, as well as a .stp (step) “solid” file format that can be opened in a 3D design program such as Autodesk Fusion in order to edit the model / add your own features, change scales or otherwise edit as you want (for your own use).
Commercial Laser Cutting
Commercial Laser Cutting companies are also everywhere and all over the world, so I will leave it to you to find those yourselves with a local google or yandex search. You may need to physically visit them yourselves however. All Laser cutting files on the website are also in a .zip file and contain both a .dwg (AutoCAD drawing file) and a .dxf (AutoCAD transfer file). I have deliberately made these in 2004 compatibility format so that you are able to open them in older versions of Autocad, as I am aware that not everyone has the latest version available!
At this time the website payment method is limited only to Paypal (although you can use a credit or debit card through them as well). I chose this method as I have no idea how well the whole new project is going to work and all of the other commercial payment methods involve many hundreds of dollars per month. The only issue I see with Paypal (other than their greed and the difficulty of making those website payment buttons) is that I can't do a shopping cart for multiple digital downloads, as each button goes to a different download .zip file and there doesn't seem to be any way around that? I know many of you really don't like Paypal or have had issues with them and if you are really, really not into them send me an email and we can work out something else!
If you have never had anything 3D printed before, it can be a bit of a minefield but you will get the hang of it. Firstly once you have the .stl file you need to upload it to the vendors website, where it should show you a 3D image which you can usually rotate and view, then it will ask you to choose the material that you want to make it from and will give you a range of prices and printing technologies and I have two general rules, I mostly use a Nylon type material for parts for performance RC models (this gives a rough sand like finish though, although there are now some chemical smoothing methods available which help a bit) and Silicon Bronze for struts, rudders, propellers and other highly active parts, OR for a static model the smoothest material with very fine detail - but it will also be fairly brittle, so not really suitable for bashing around the lake, or unsteady hands. This then points you in the right direction for the printing technology that they need to use to produce it. I find it's best to only get a couple of parts made initially to test out your choices, it can be expensive otherwise! Most of my parts have been printed before so there shouldn't be any issues but they are subject to automated and human design reviews before printing, so again send me an email and we can work out something!
With Laser Cutting, all the .dwg/dxf files contain two main flat “layers”, there is a text layer that contains lettering and other “printing” details that need to be “etched” or cut at low power, only enough to mark into the top layer of the material and then the main layer 0, which contains the outline detail that is cut all the way through the material. The cutting layer has many little missing “tags” of about 0.25mm that keep the part in the sheet so that parts don't fall into the bottom of the Laser machine. All of the files are designed to fit my US Epilog 12” x 18” (304.8mm x 457.2) laser, so the active sheet size of each drawing is 300mm x 400mm with the grain running in the long direction. So what I have done for many years is that I buy 1220mm x 1220mm (that's 4 foot x 4 foot) sheets and I cut them into 4 across the grain and 3 along, or with, the grain, this then gives 12 small sheets of 304mm x 406mm (12” x 16”) per large sheet. I buy Aircraft Grade, Marine, Birch Ply mostly originating from a company in Finland called Koskisen, although I have bought other brands as well. You can look up the Koskisen reseller in your area. Please bear in mind that plywood does absorb moisture and can warp quite badly when the moisture content is high, so it's best to store it flat in a container with a lid and preferably with a moisture absorbent packet or two. The files tell you what thickness(es) to use and may be 0.6mm, 0.8mm, 1.0mm, 1.5mm and 2.0mm. Many of my newer Hull Rib designs use 3mm ply which can be something less expensive than Birch Ply if you prefer
I have used Pine based Marine Ply successfully and even MDF Sheets.
Elco Parts
These are just a few examples.
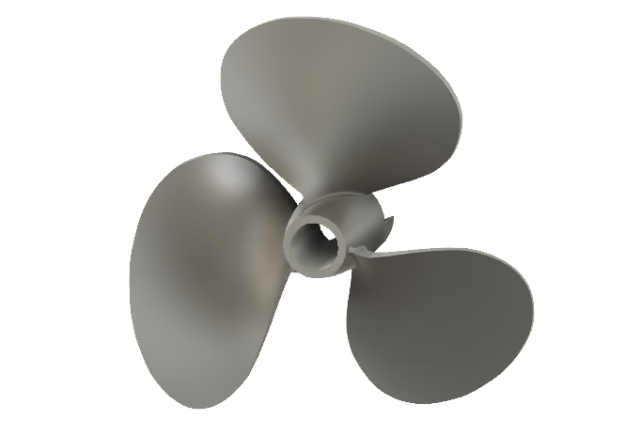
Propeller 1/20th scale 35.56 mm Diameter with a pitch of 35.56 mm with a 4mm drive shaft and slots for a 3mm "dog" drive.
It's taken me 30 years to be able to get a realistic scale replica of the 28" Equipoise Propeller that was used on the Elco and Higgins Boats with the correct overall diameter, pitch and blade shape, the blade thickness, particularly at the hub, is larger than it should be and the hub is larger so that it fits a 4mm shaft but that's what scale models have to have or they are just too fragile!
I have also test printed a 1/35th scale version and changed the hub to fit a 2mm shaft, again with a dog drive slot in the back and it is quite strong even in resin. These have been printed in brass and silicon bronze.

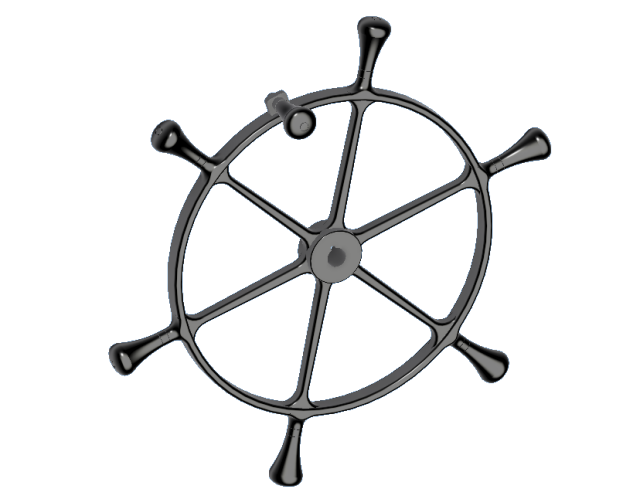
Elco Steering Wheel 1/20th scale - I have had this made in silver.
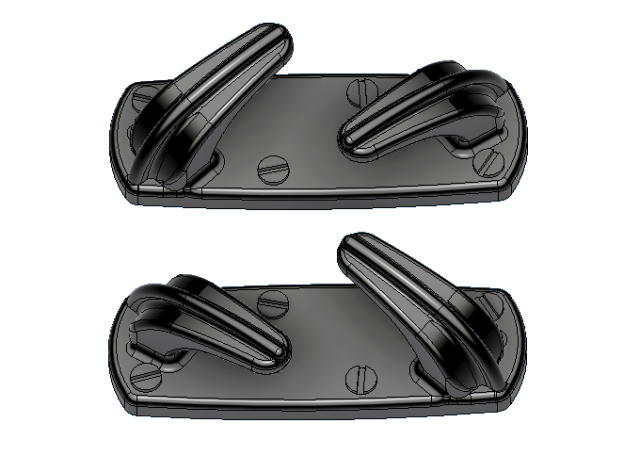
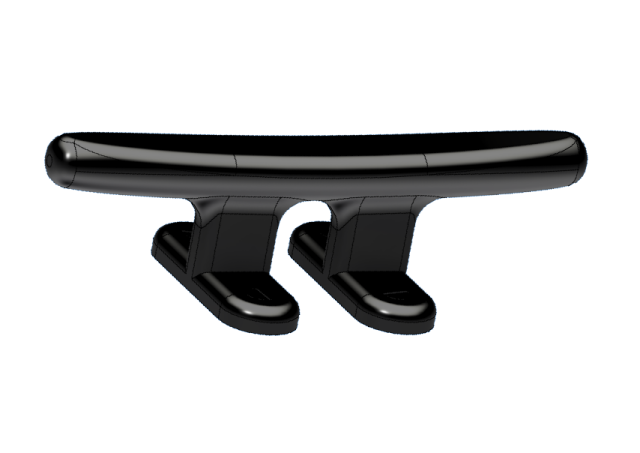
Elco Rear Deck Cleat, pair (left/right) 1/20th scale
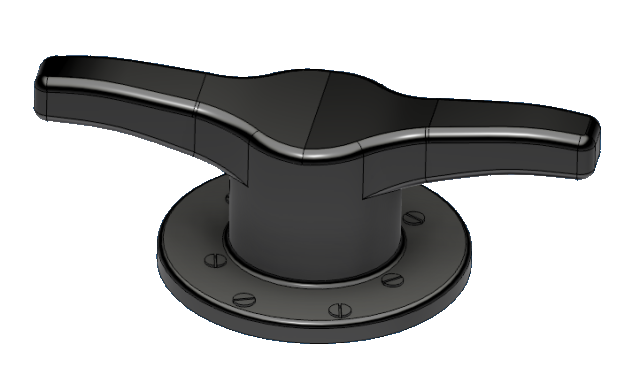
Elco Steering column 1/20th scale
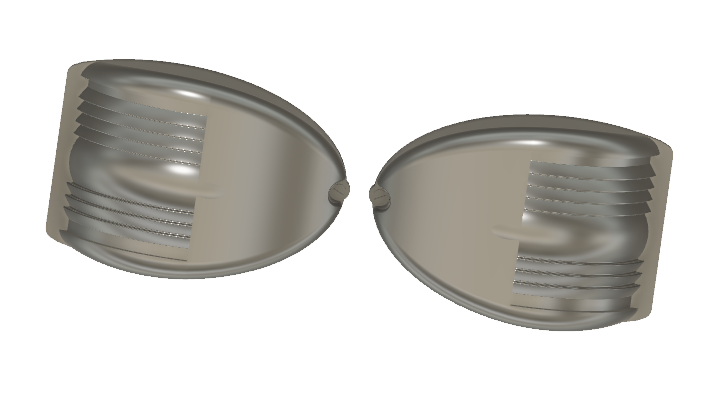
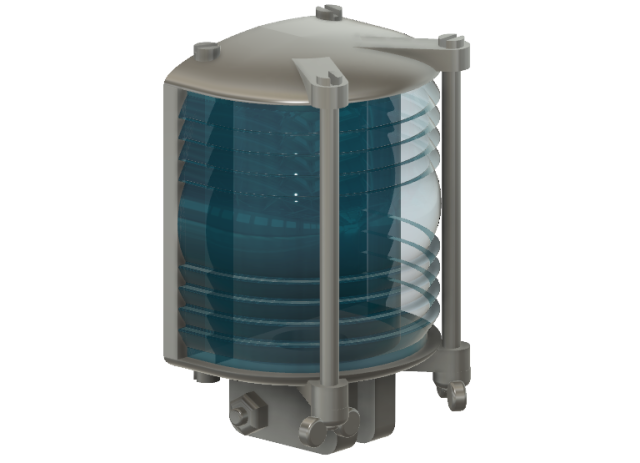
Elco Navigation Light. This is made in clear resin and has a hole behind the fresnel lens large enough for a 1mm red or green LED, the remainder of the body can then be painted over, leaving the lens clear, so that the LED can shine through the lens. Comes as a pair, left and right.
Elco Muffler, 1/20th scale comes as a set of 6, 3 right hand and 3 left hand.
Elco Deck Cleat, 1/20th scale.
Elco Mooring Bitt 1/20th scale
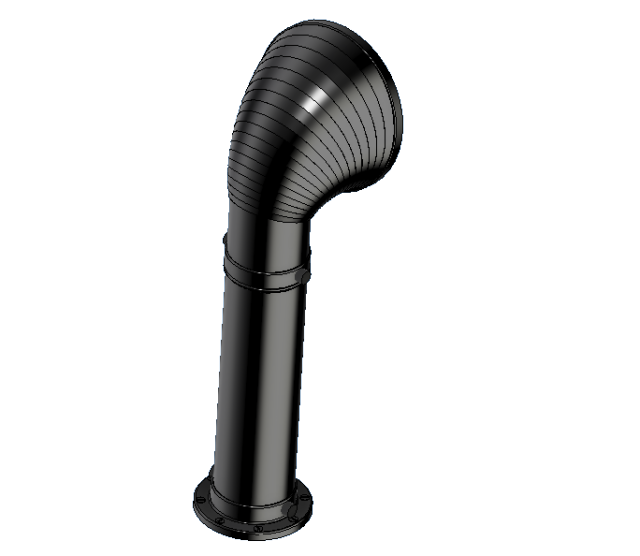
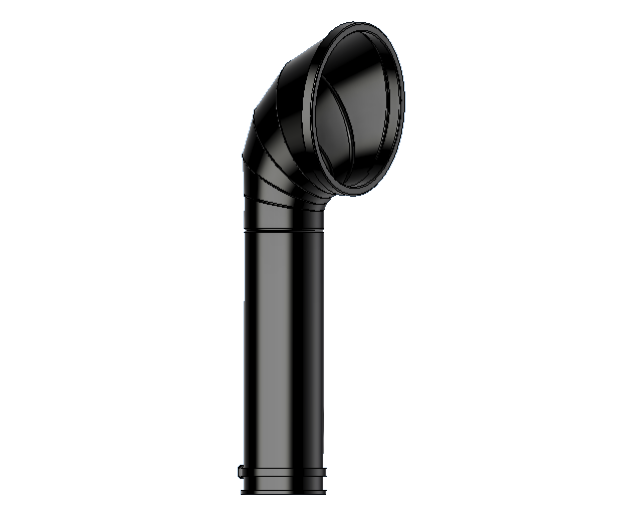
Elco Cowl, 1/20th scale.
Elco Bow Light, 1/20th scale, fits onto the Bow Fairlead.
This is printed in clear resin and is hollow inside with a hole in the bottom large enough for a 1mm LED, the body can be painted except from the lens and it ends up looking realy cool!
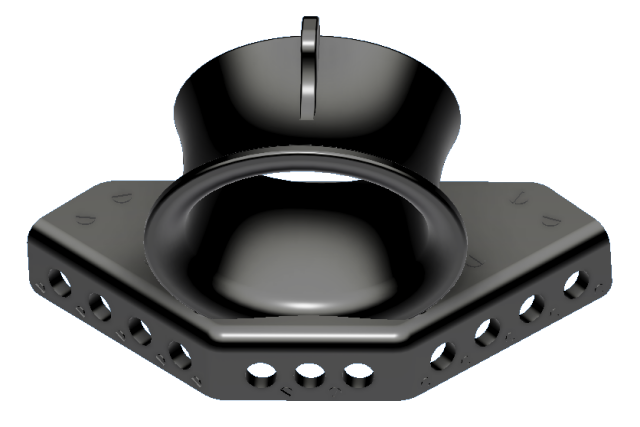
Elco Bow Fairlead
Elco Early PT59 style Deadlight, 1/20th scale
What you can do with Deadlights is first paint them in the desired colour and then, when fully dry, stand them on some clear plastic film and put a drop of superglue or clear casting resin in each hole and you will end up with a real waterproof transparent deadlight with a painted frame!
Elco Late PT103 style Deadlight, 1/20th scale.
Elco Early model Rudder
Higgins Parts
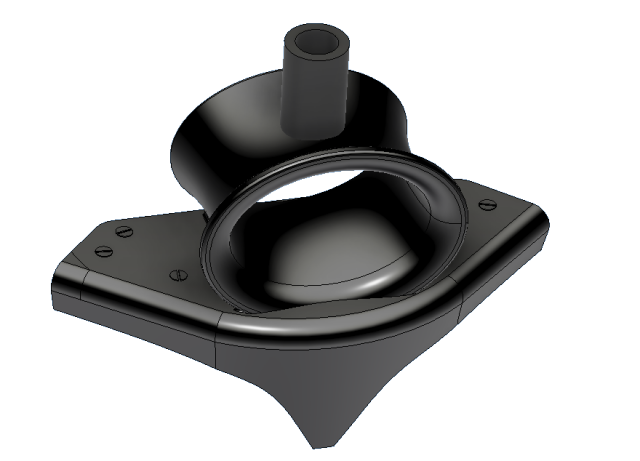
Higgins large deck Cowl, 1/20th scale.
Higgins small Cowl, 1/20th scale.

Higgins Bow Fairlead.
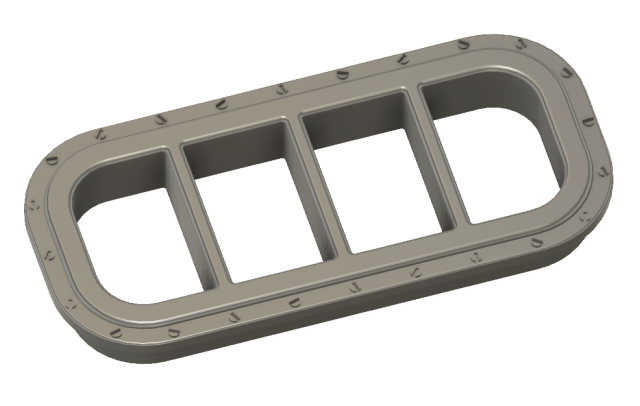
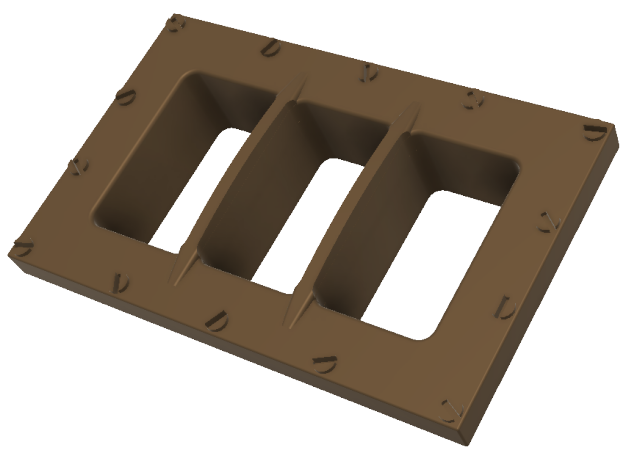
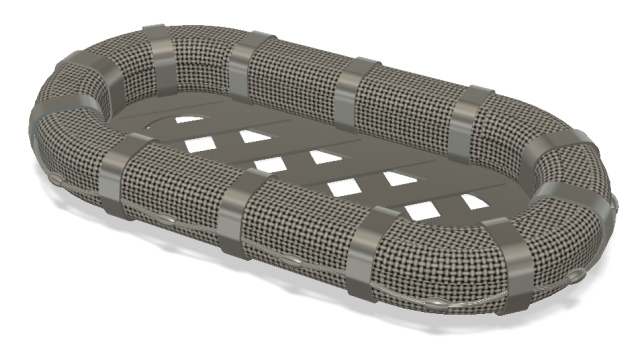
Higgins Raft
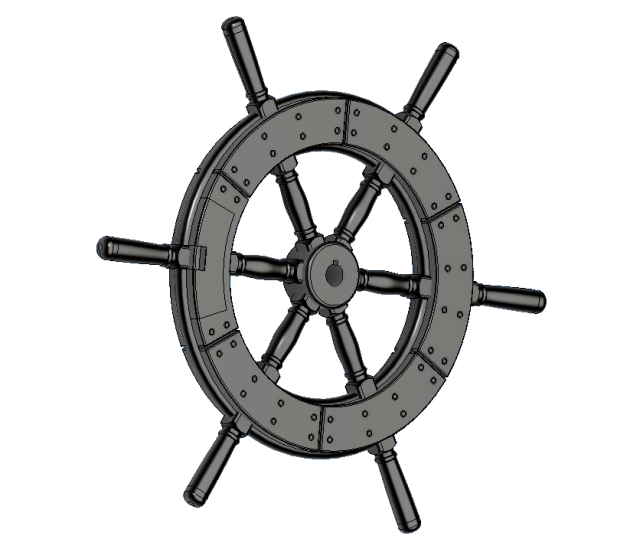
Higgins Steering Wheel, 1/20th scale.
I will do this in solid silver at some stage but it's pretty sturdy at 1/20th scale in resin.
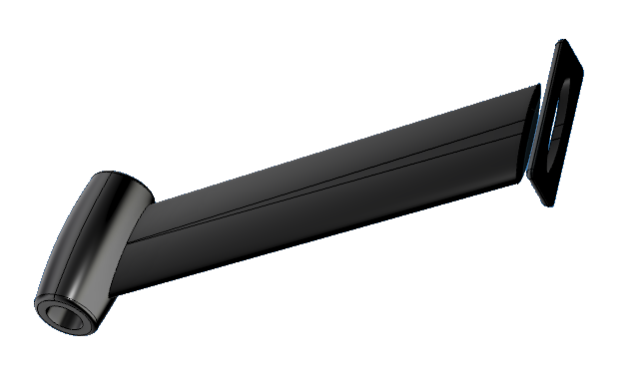
Higgins Propshaft Strut
I have made a new long strut, with a separate flange in two different shapes, one flat flange for the flat bottom and a wedge shaped flange for along the keel. The strut itself is made of silicon bronze but the flanges are just resin as they are really just covers. The advantage of doing the strut in this way is that the cover can slide anywhere down the strut shaft all the way to the propshaft hub and the excess strut can be cut off, so that it is universal and can be used in all 6 strut positions and can even be used as the forward struts on the Elco Hull. The slots in the keel are slightly larger so that the strut can be angled precisely to the propshaft. The shaft hole is a whisker under 4mm so it can be drilled out to 4mm or 5/32".
Schnellboot Parts
Schnellboot Vents

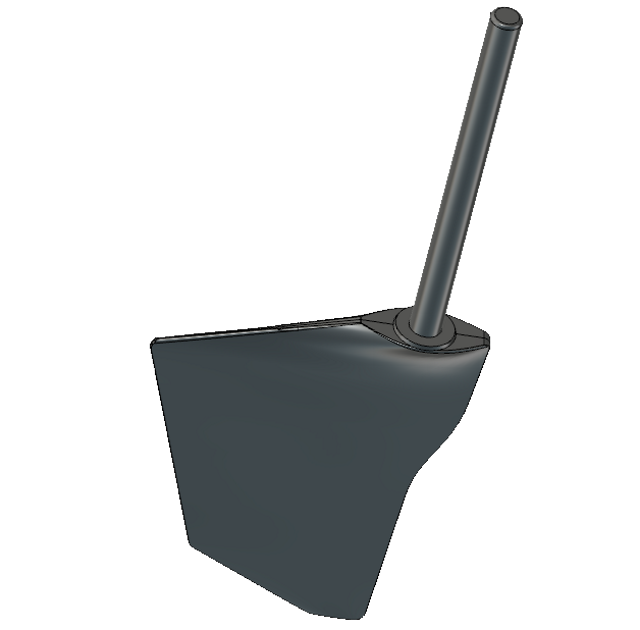
Schnellboot Boathook
This can be mounted on the end of a piece of thin walled brass or steel tubing.

Generic Parts
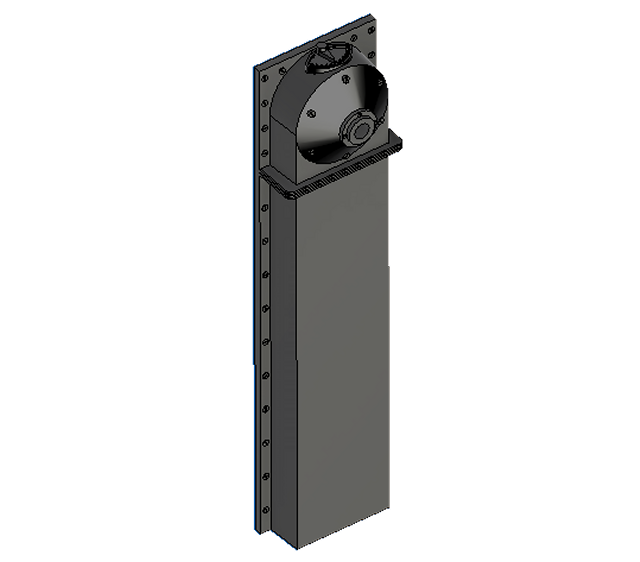
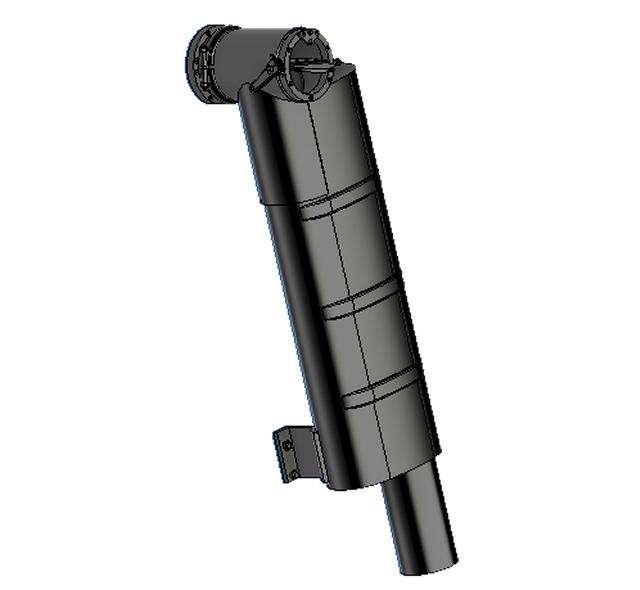
Mk 2 Smoke Generator, 1/20th scale.
Depth Charge, 1/20th scale.
Depth Charger at 1/20th scale.
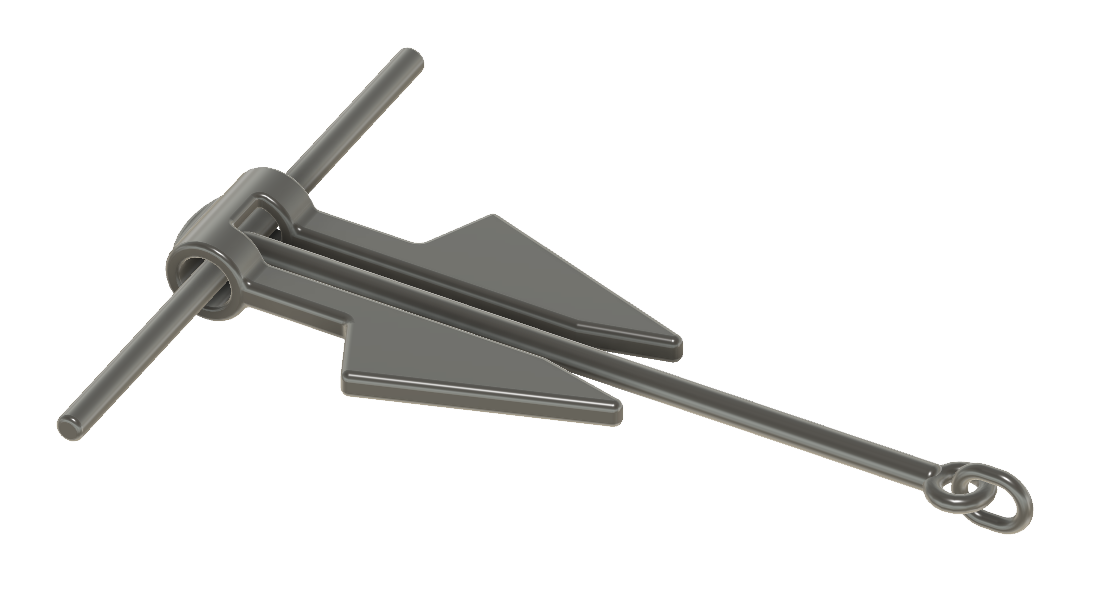
Danforth Anchor 1/20th scale.
This was my first attempt at an articulated part that is all printed together, first try was nearly succesful so I increased some clearances and tried again. The blades wiggle up and down and the connecting link moves!