Vosper 73' 1/20th Scale Hull
I have all but finished a 20th scale model of the British Vosper 73' version II boat, this is based on drawings of MTB 523 obtained for me by one of my cousins who worked there.
The Vospers were built in the Vospers Yard in my home town of Portsmouth England.
MTB523 was a late war production and I don't believe it saw any action. The type II was fitted with an Oerlikon 20mm on the stern, a British 6 pounder canon on the bow, with "Mullins" equipment, (an automatic shell feeder, designed and built by the Mullins Co. sewing machine company in the UK), a couple of twin .303 Vickers machine guns, one to port and one to stbd and two 18" torpedo tubes mounted further towards the stern than the type 1 boats. These later boats were powered by three late model USA built V12 Packard engines which developed around 1,500 HP at 2500 RPM.
The Vosper boats (type 1 and type II) hull had a relatively flat bottom with a hollow or slight tunnel on both sides and the keel was a fairly large radius rather than the sharp keel of the US P.T. boats, a flat vertical almost rectangular transom and much less superstructure than the Elco and a little bit like the Higgins and Huckins boats with no day cabin for the crew. So for the kit I have made provision for large hatches at the deck level, this is not strictly scale but we need to be able to get access to the motors, batteries and stearing gear, I have made all the Ribs with fixed tops so you can customise it any way you like and make it truly scale if you want to.
The engines were the same as the Elco, Huckins and the Higgins boats - Packard V12 M2500's, the two wing engines faced aft and were direct driving the propeller shafts and the centre engine faced forward and drove into a Vee drive gearbox and then back down under the engine, all propellers turned the same way, clockwise looking from aft. The engine exhausts were piped out to both sides through internal "Dumbflow" mufflers, two on the port side and one on the stbd side. The boat had three rudders.
I am not sure about the type or size of the propellers used on these boats, this will require more investigation.
In the 20th scale Hull I have allowed for three electric motors of up to 42mm diameter, this is larger than the 35mm motors in the Elco 20th scale.
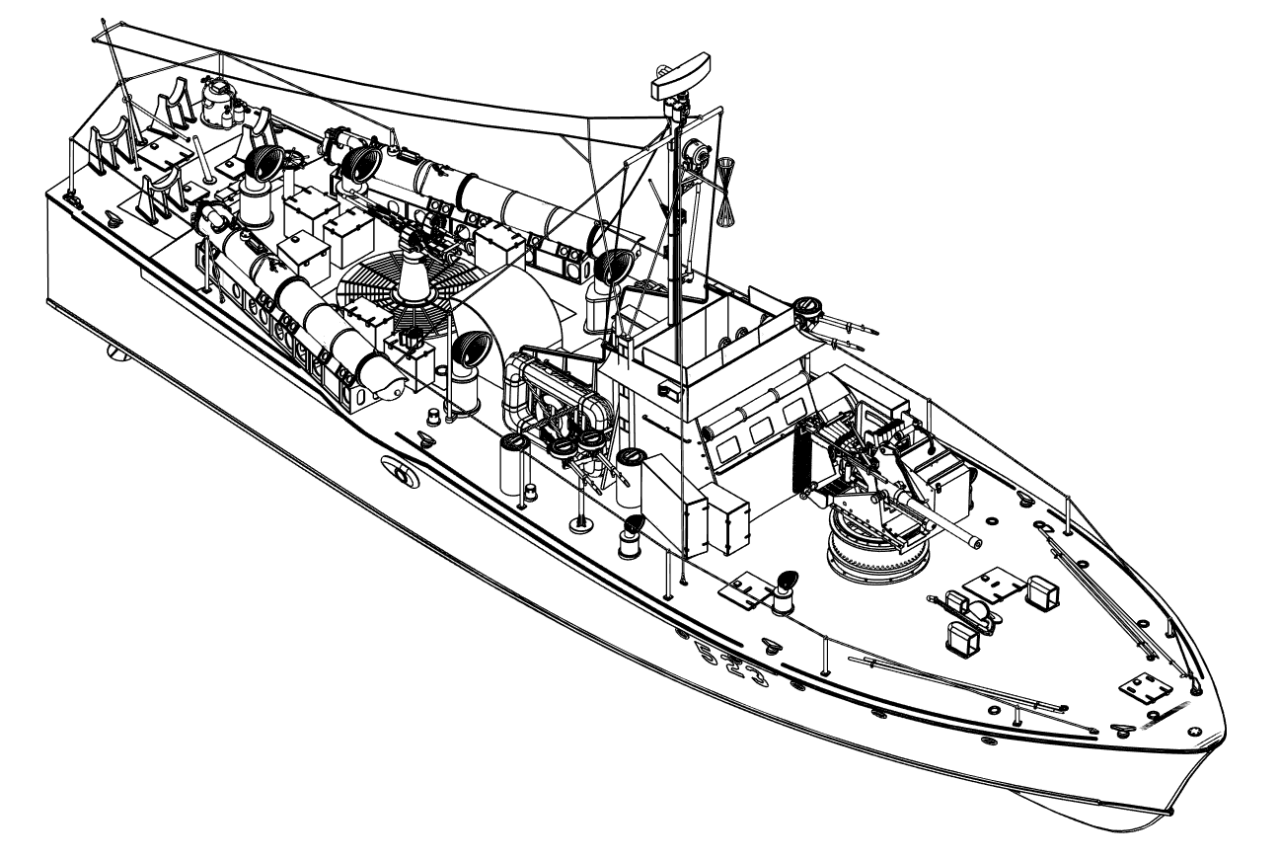
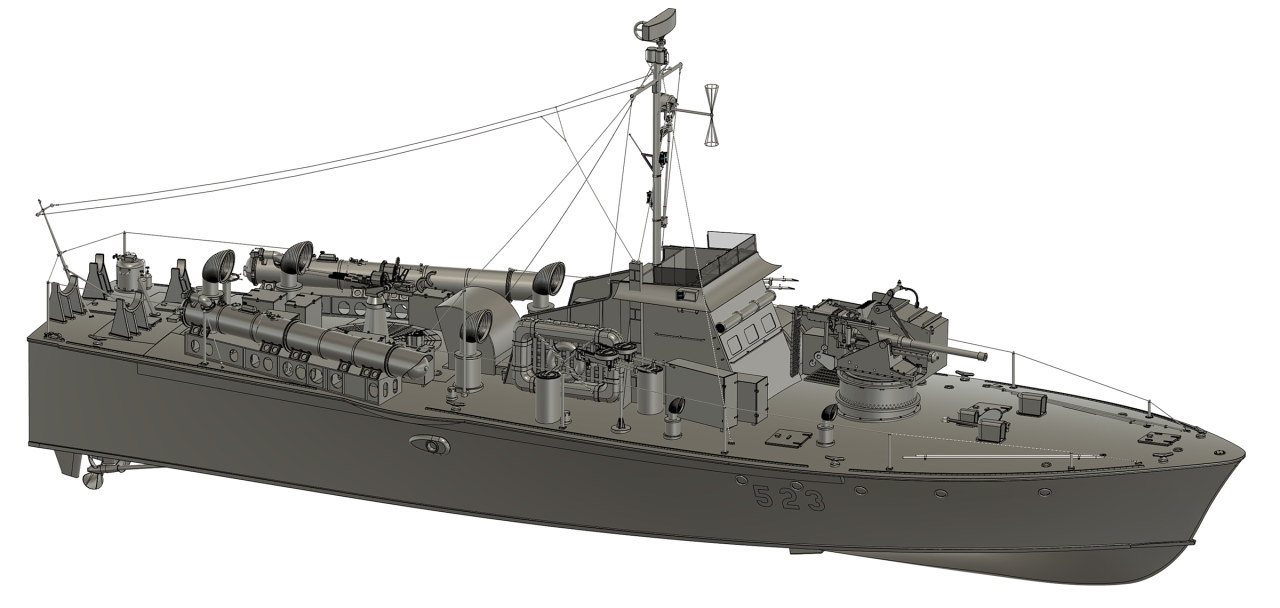
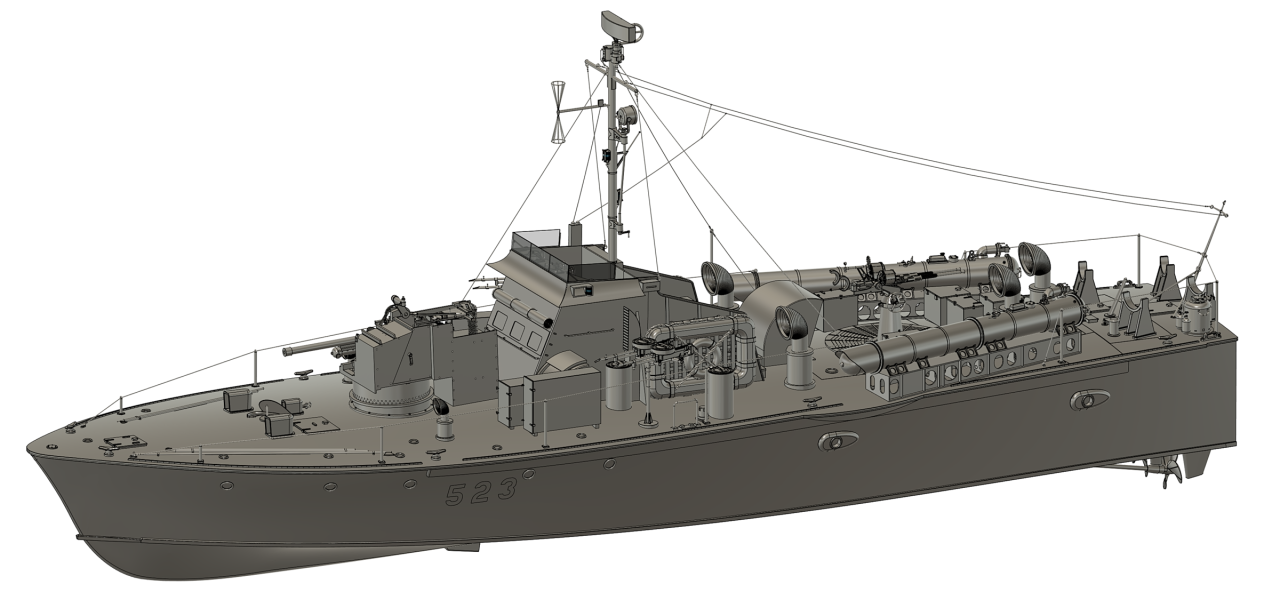
These three pictures (above) are exported from Autodesk Fusion and the 3D model that I have been working on for around a year (June 2024).
I have exported the 3D rib files and made them into a laser cut hull kit, many of the individual parts are already on my Shapeways shop https://www.shapeways.com/shops/pt-boat (July 2024 update - Shapeways has filed for bankruptcy, not sure what will happen there, January 2025 update - Shapeways is back but not the shop setup!)
I am in the process of making a 3D model, there is no tolerance at all in the hull lofting process, any lumps in the rib drawings causes a corresponding lump in the final surfaces, it has to be nearly perfect, so I have then reverse exported the cleaned up rib profiles back into AutoCAD Fusion and I have now completed a set of laser cutter files.
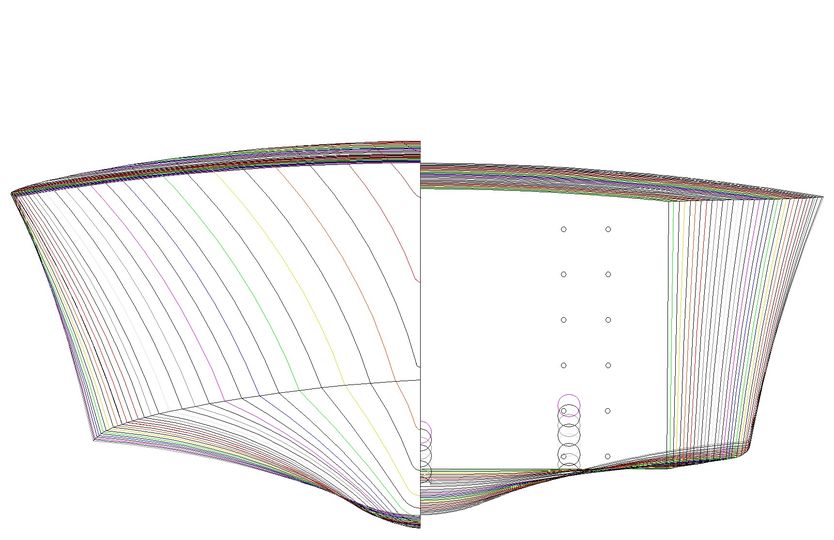
This is the reverse exported Rib profiles for all original ribs, these profiles allow for a 1.6mm even coverage of the hull skin. Should make a great hull!
The laser cut hull. (August 2024)
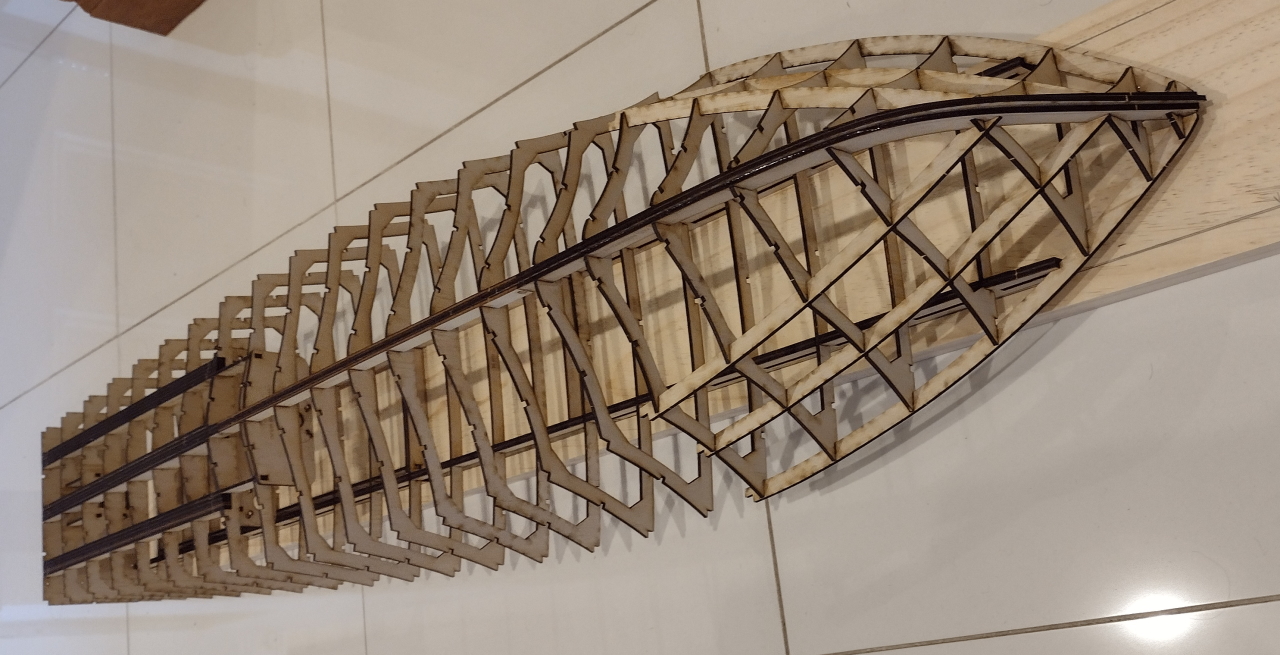
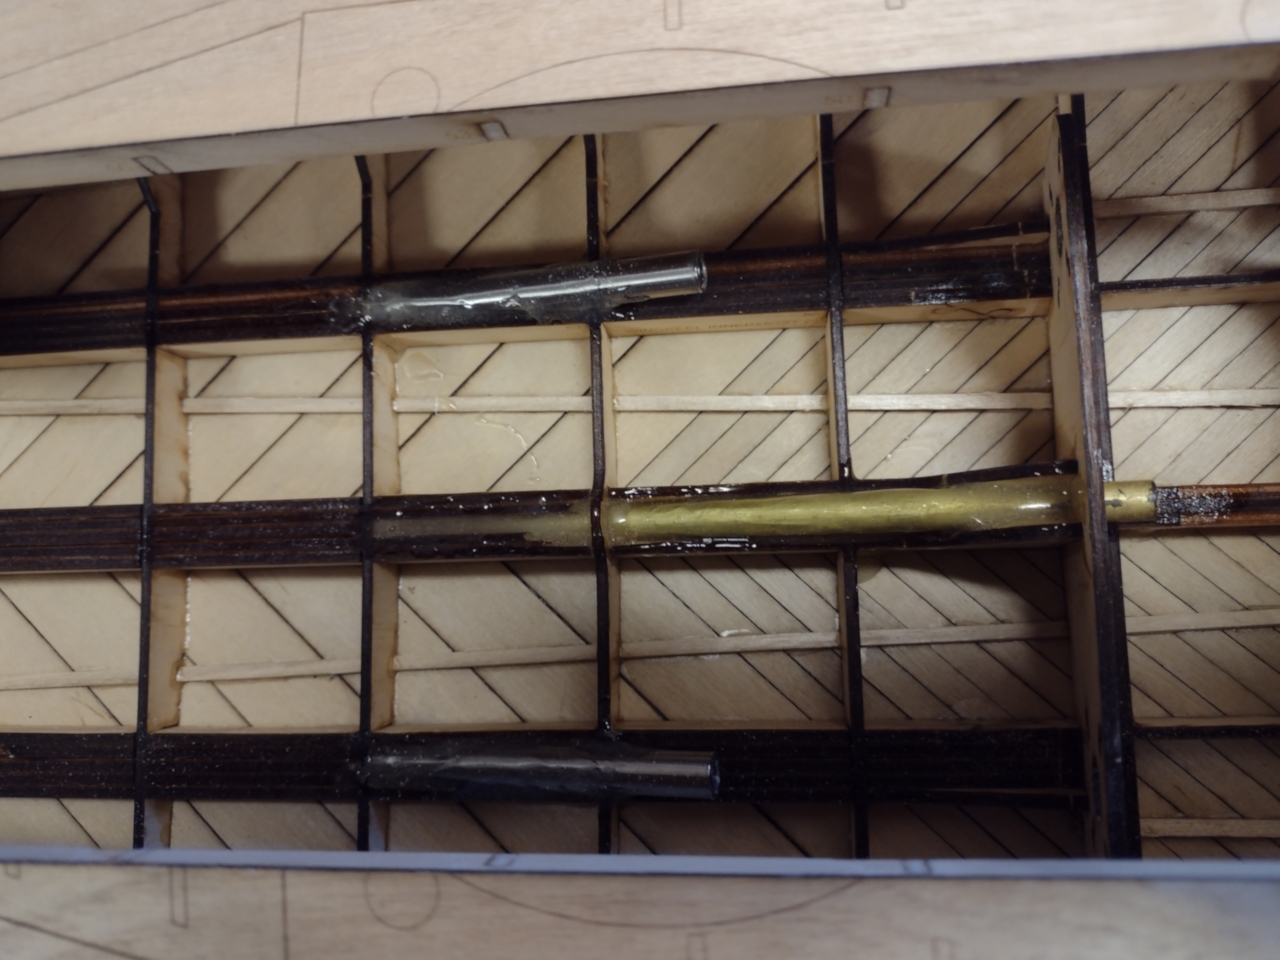
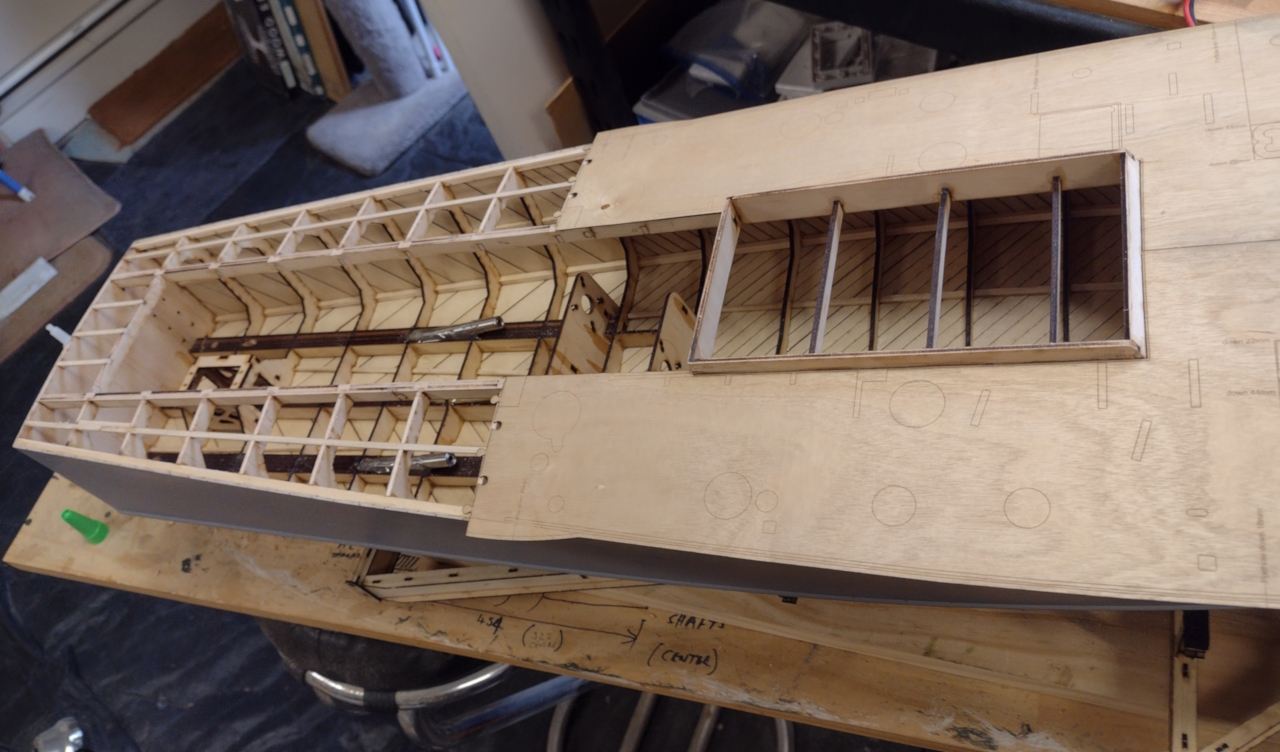
The full frame kit (the stand is not shown).
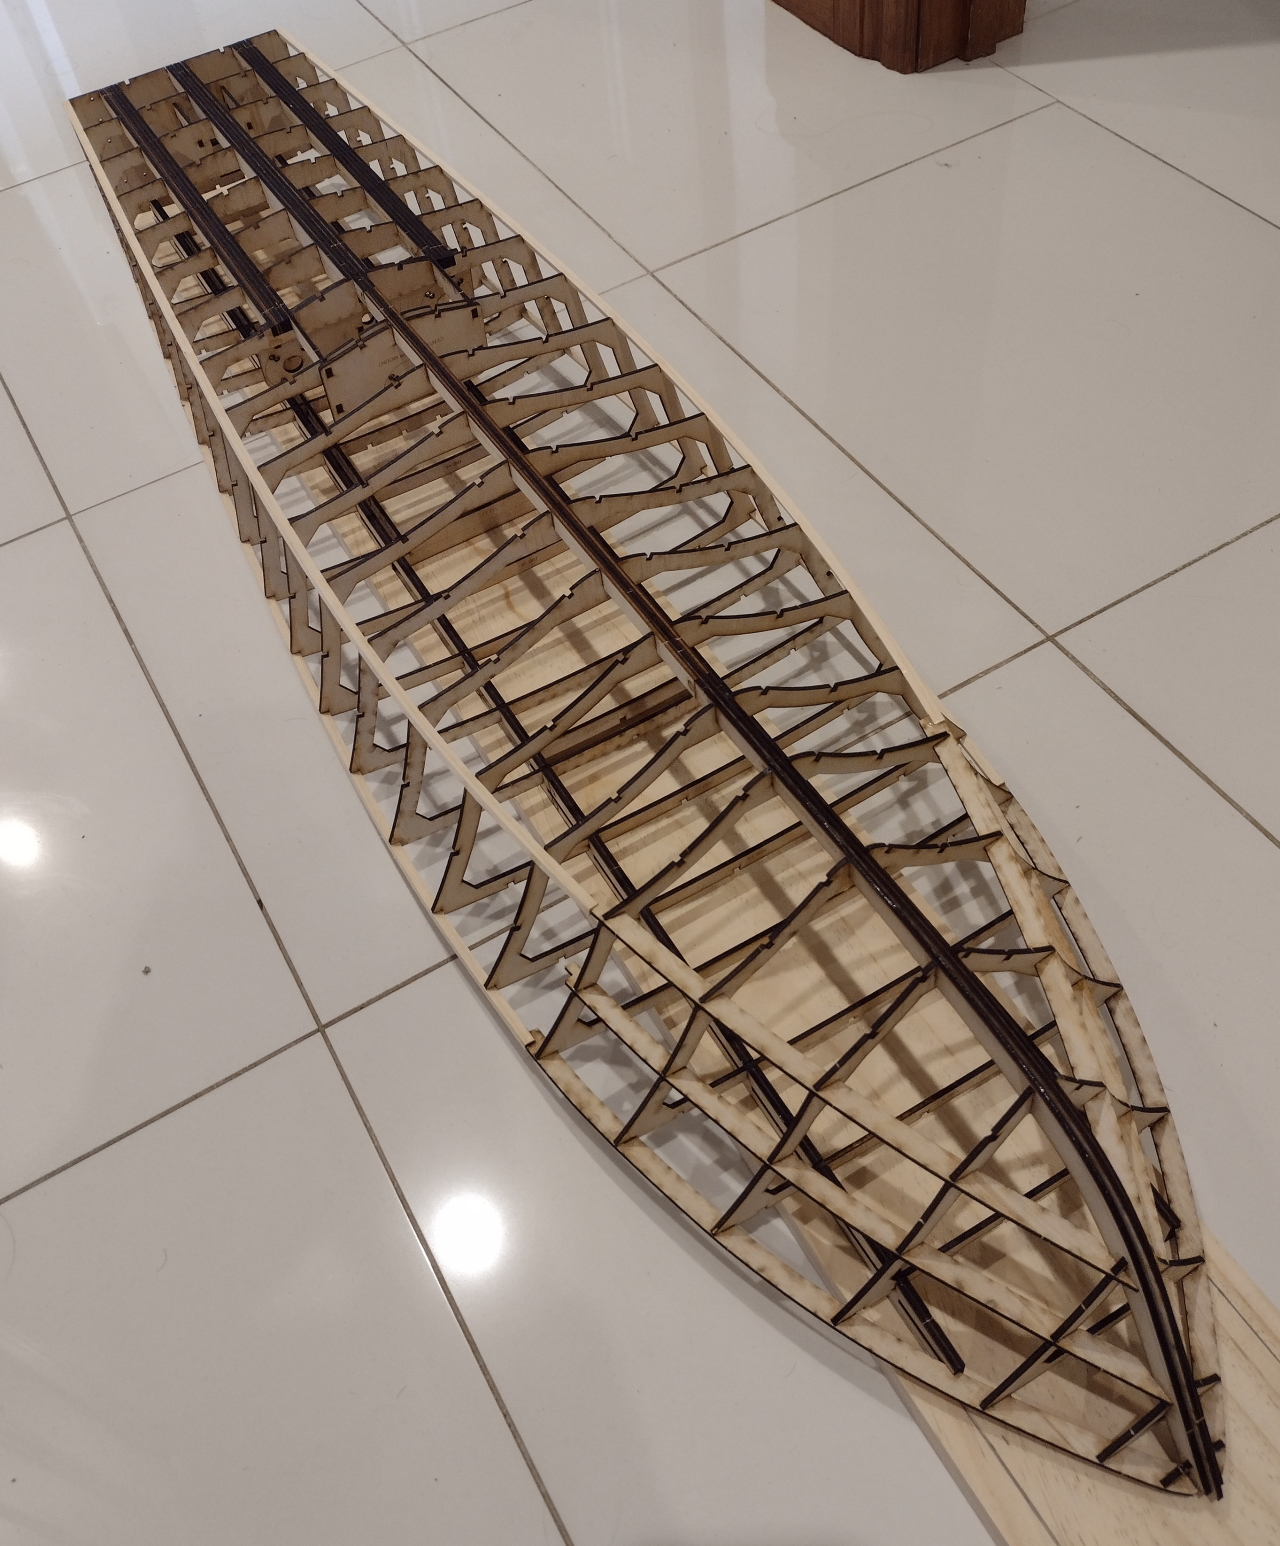
With deck edge and chine stringers added.
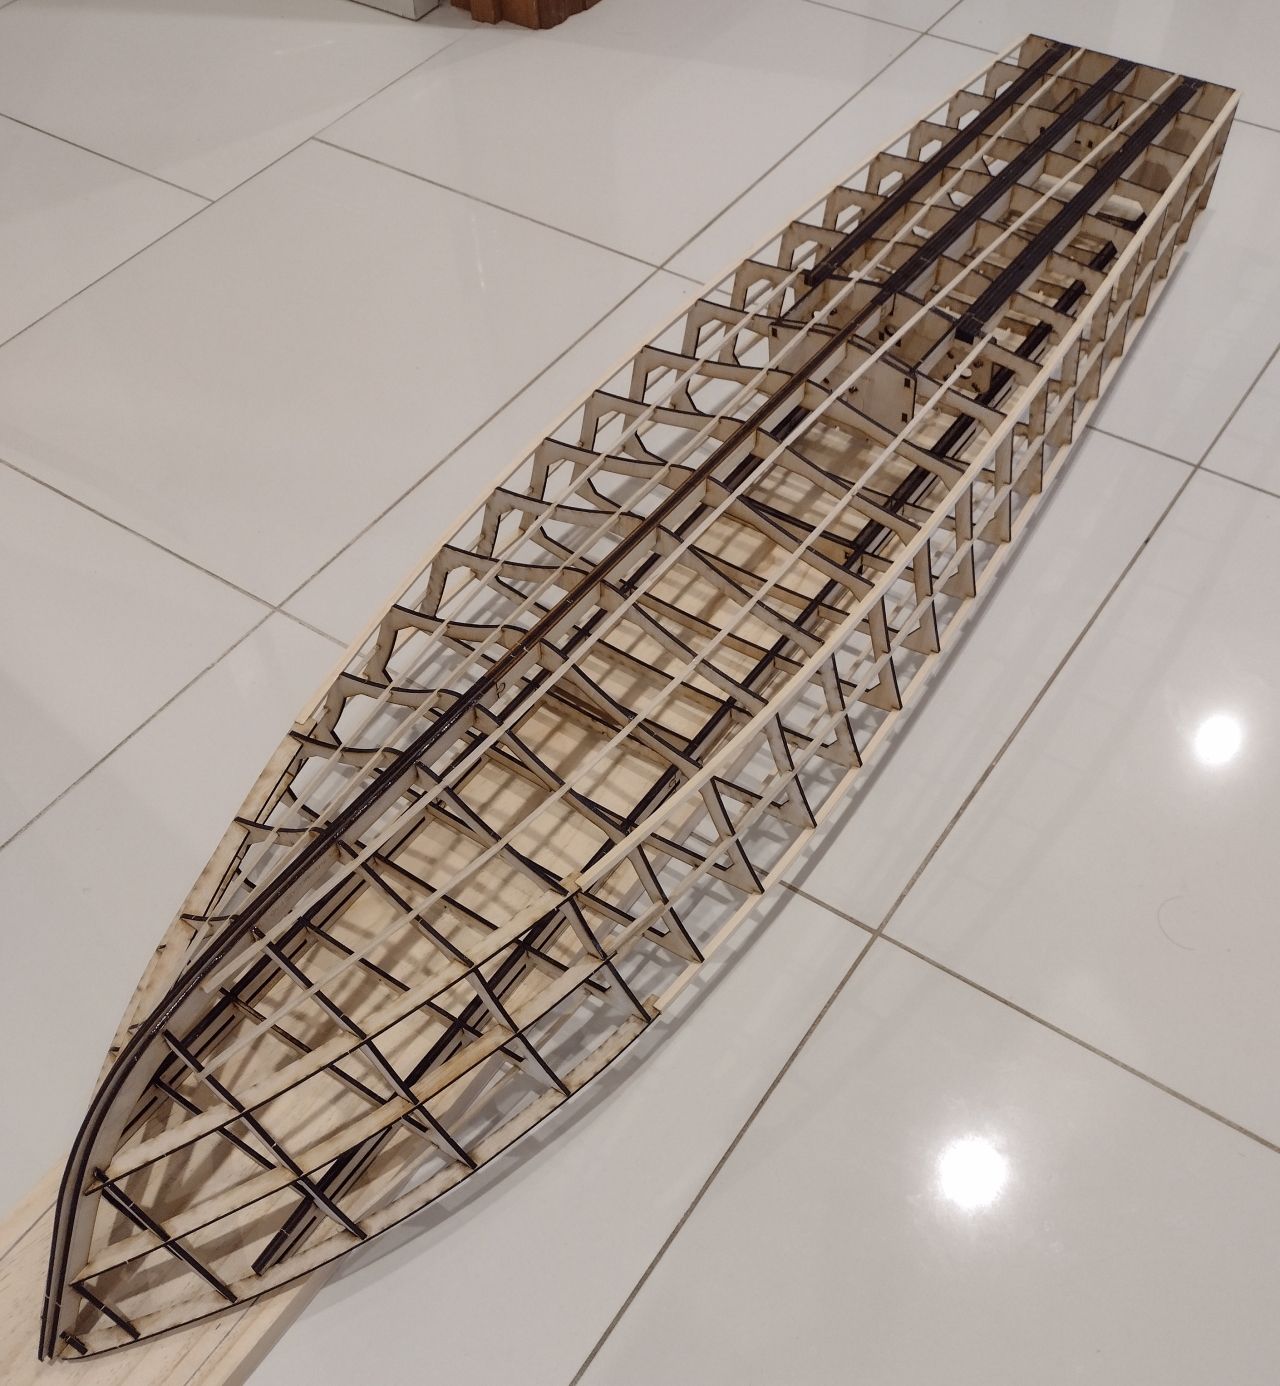
All side and bottom stringers added.

I am very pleased with this hull, it has great lines!
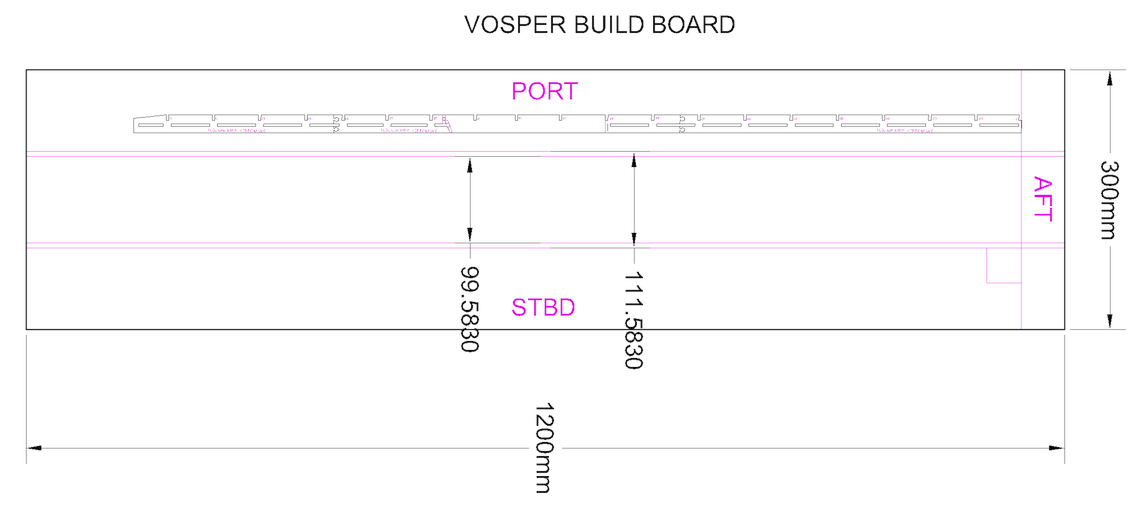
Above is the suggested build board for the 20th scale hull with deck runner spacings.

Click on the picture above to play the Vosper 20th scale Hull assembly video.
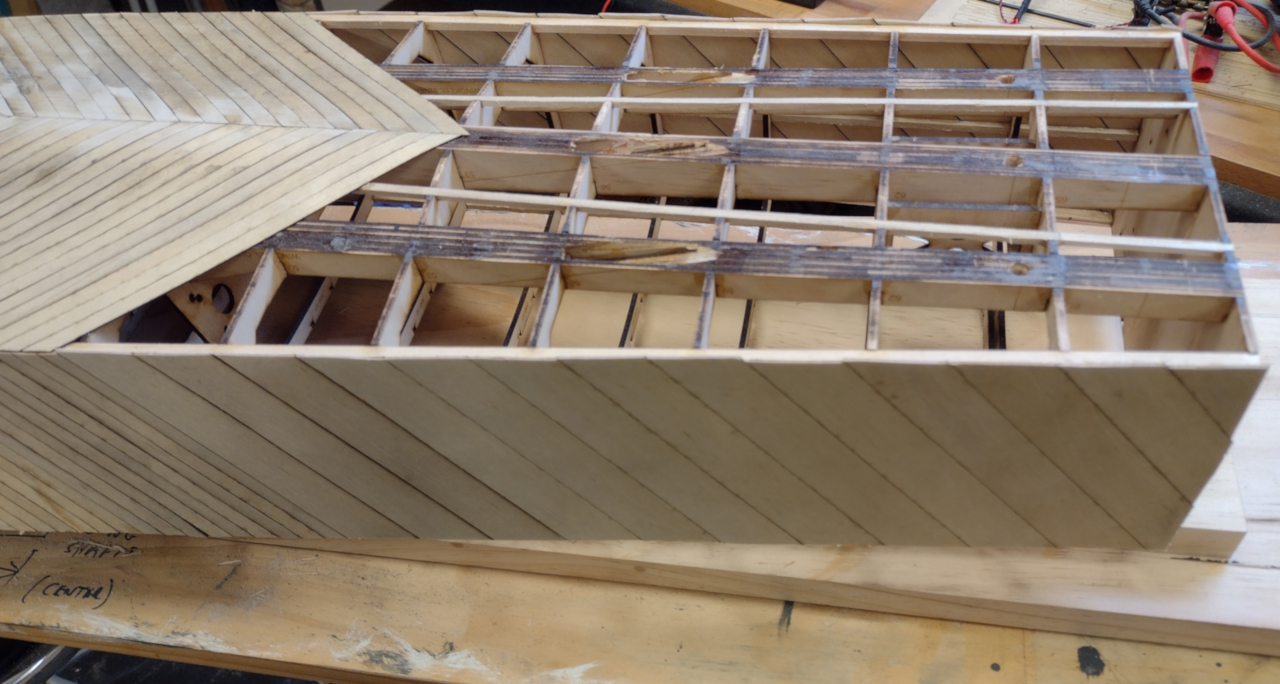
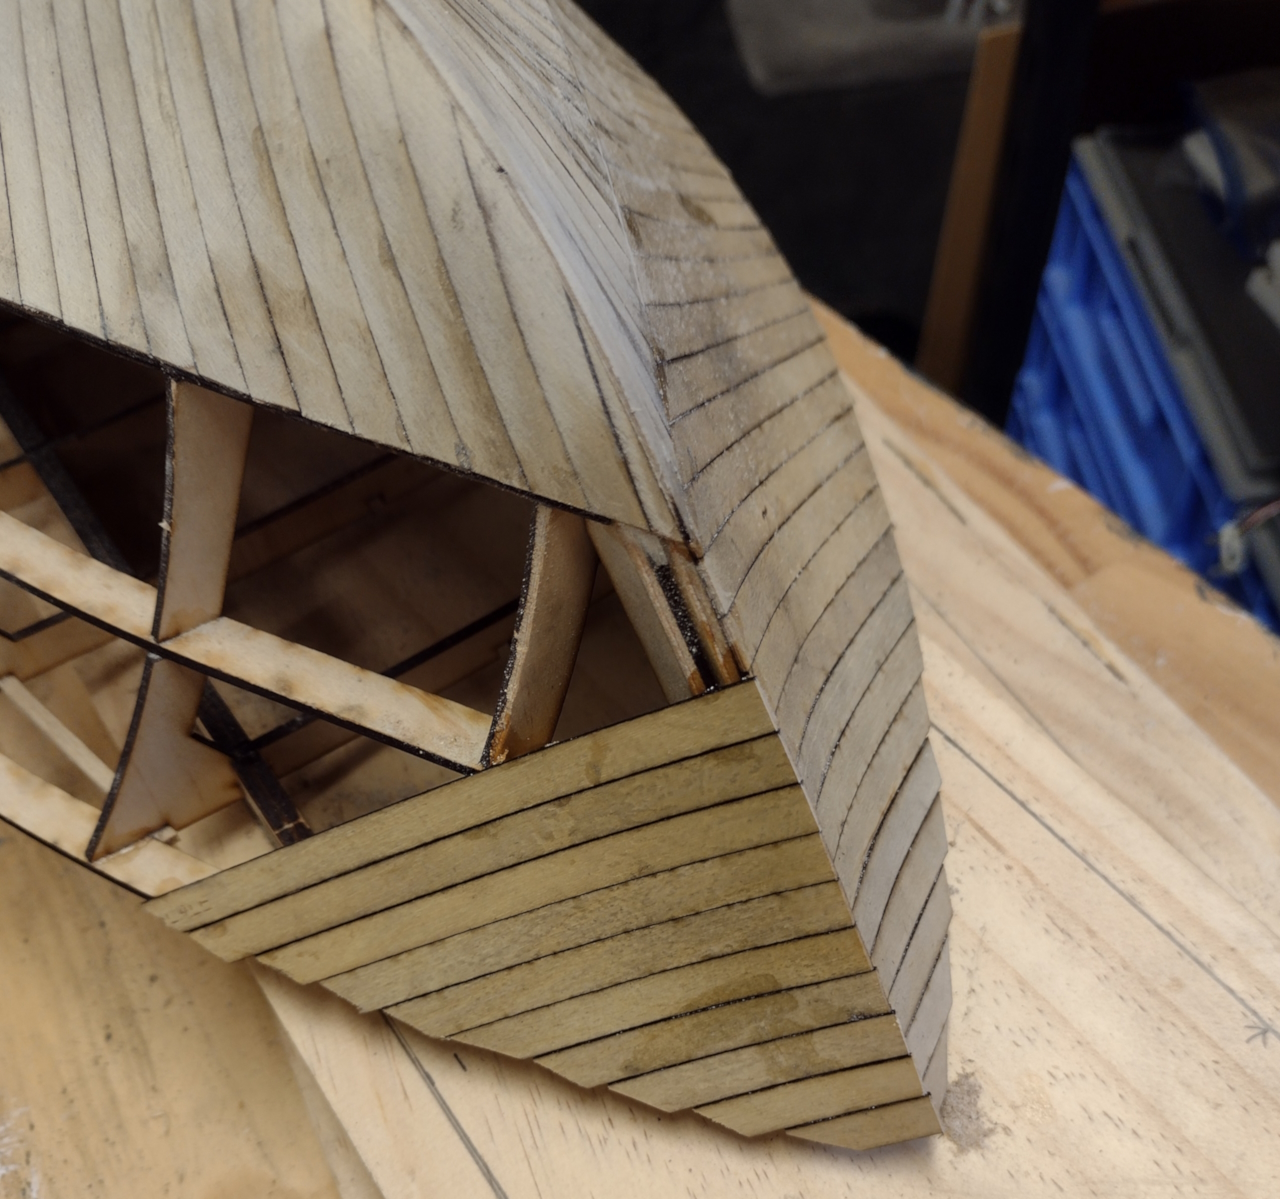
I started the bottom planking in the middle and planked towards the bow on both sides, this allowed me to get the best angle to maximise the material.
Planking the curved bottom is painful, especially as it has to butt together at the keel! I tried this approach but it didn't work out very well and I ended up sanding most of the way through a few planks, in the end I planked the bottom with three layers.'
Planking the sides is way easier, start at the bow and work towards the rear, at the bow the sides are "cut into" the bottom planking at the chine, further back they can overlap.
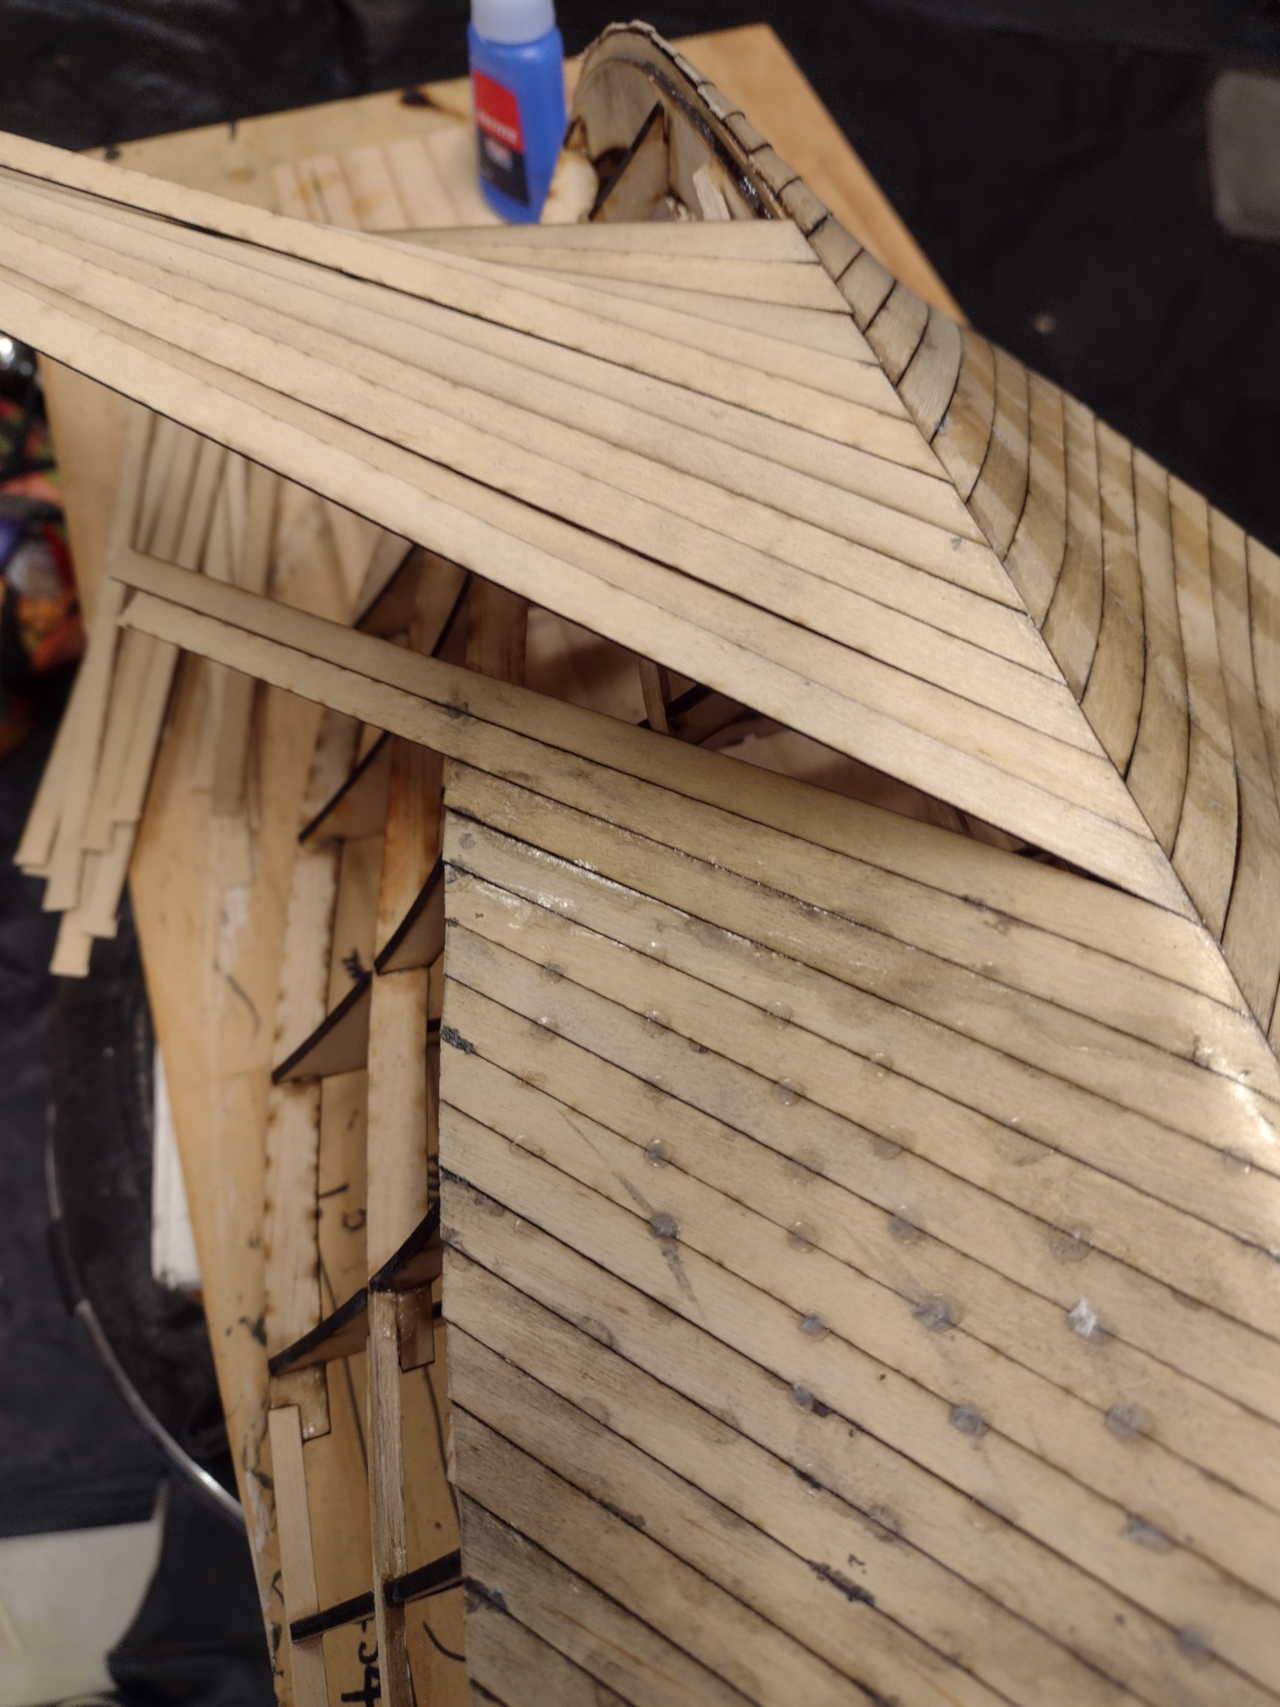
Planking the stbd side more.
Planking the port bow.

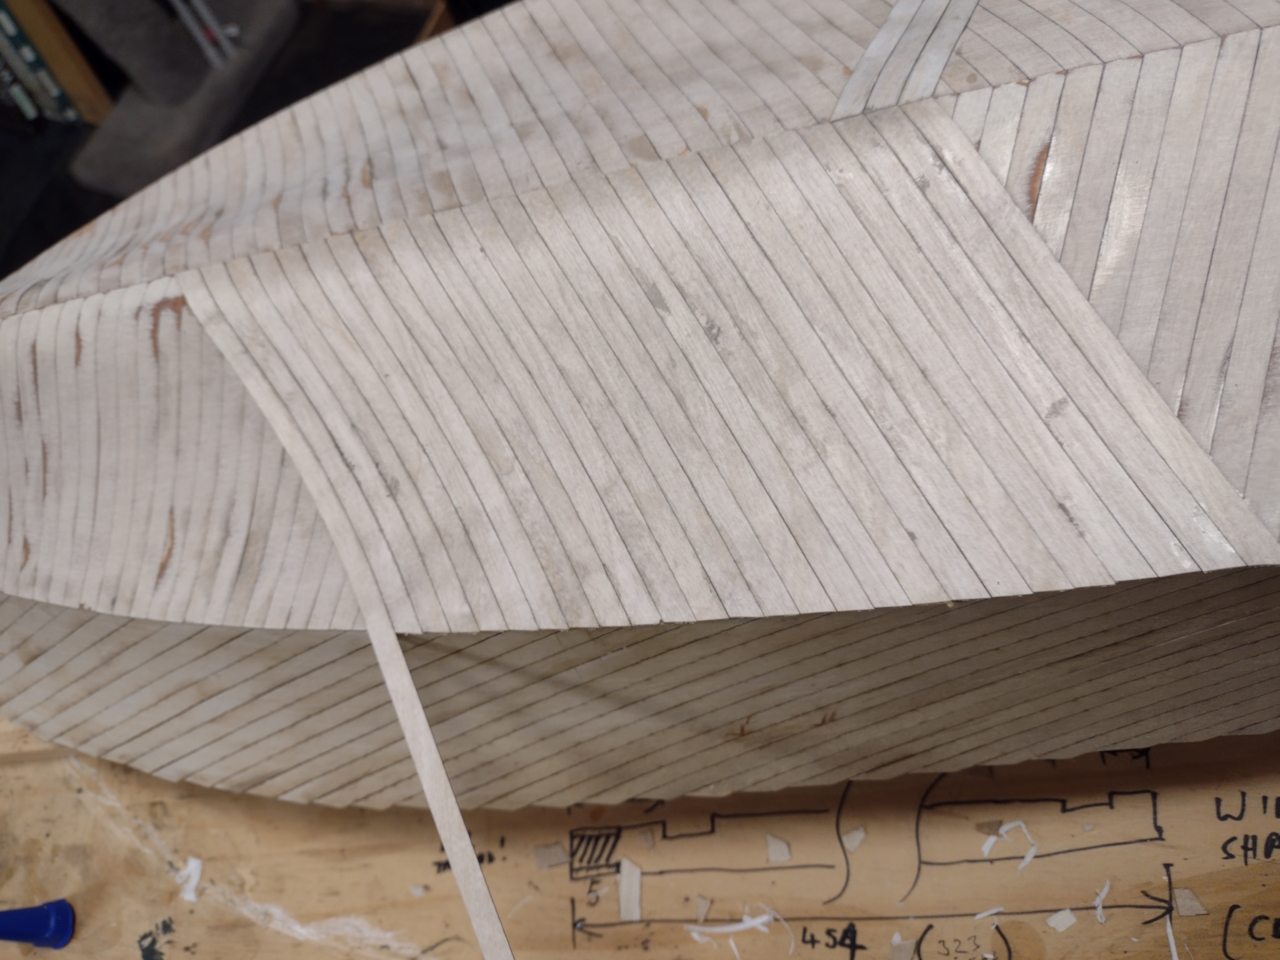
Planking the stbd side, second layer, you can see at this point the sides now overlap the bottom at the chine and you can see that I used much wider planks, on the first layer, at the aft of the hull where there is hardly any curvature.
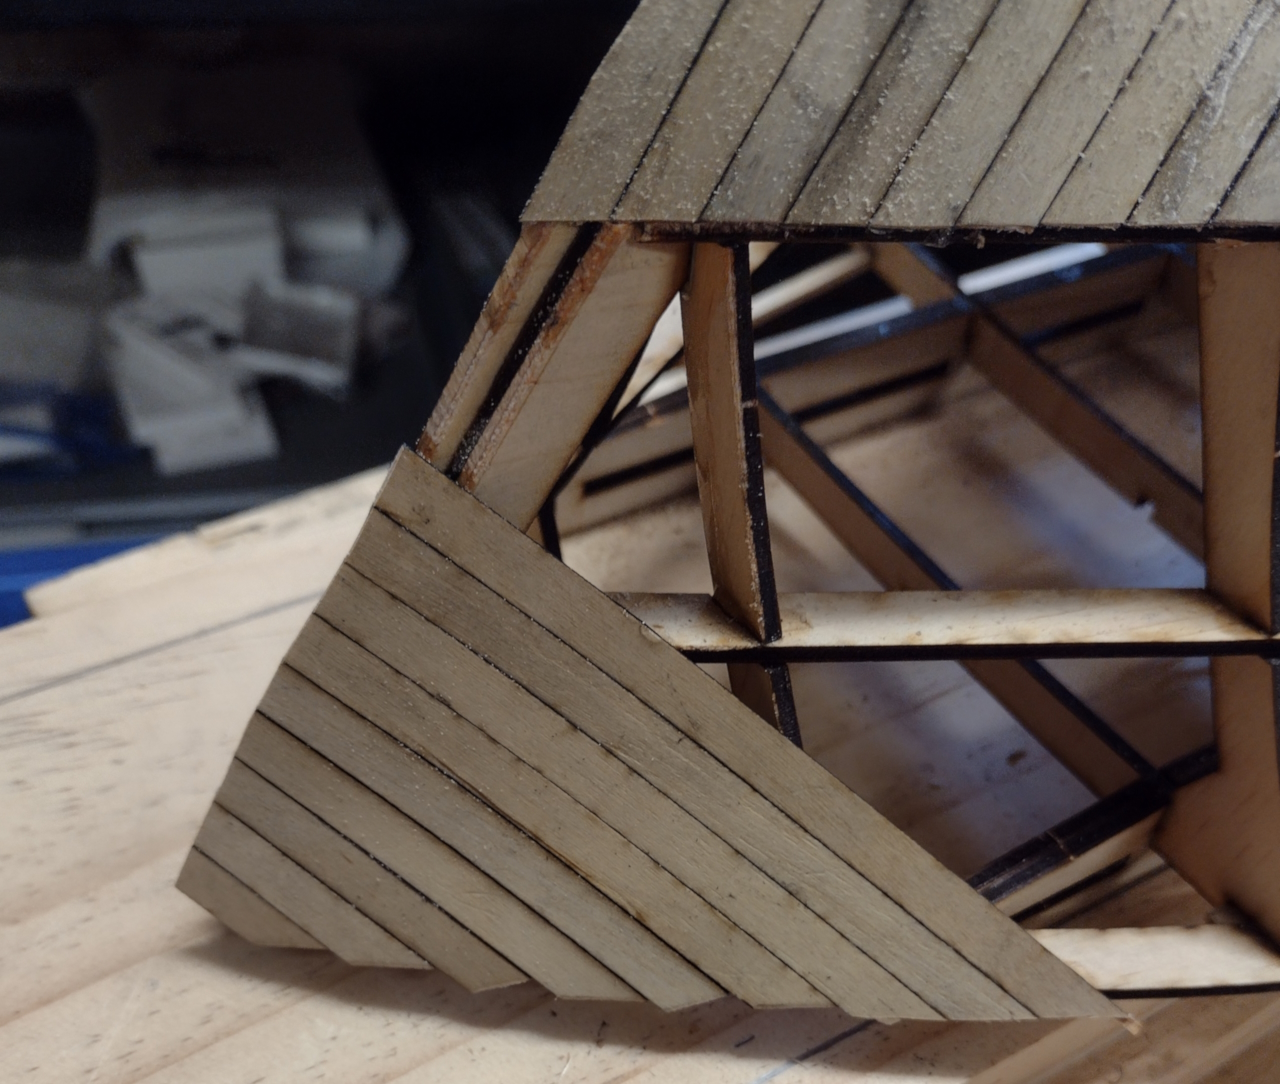
Planking the bottom, second layer, start in the middle and work forwards.
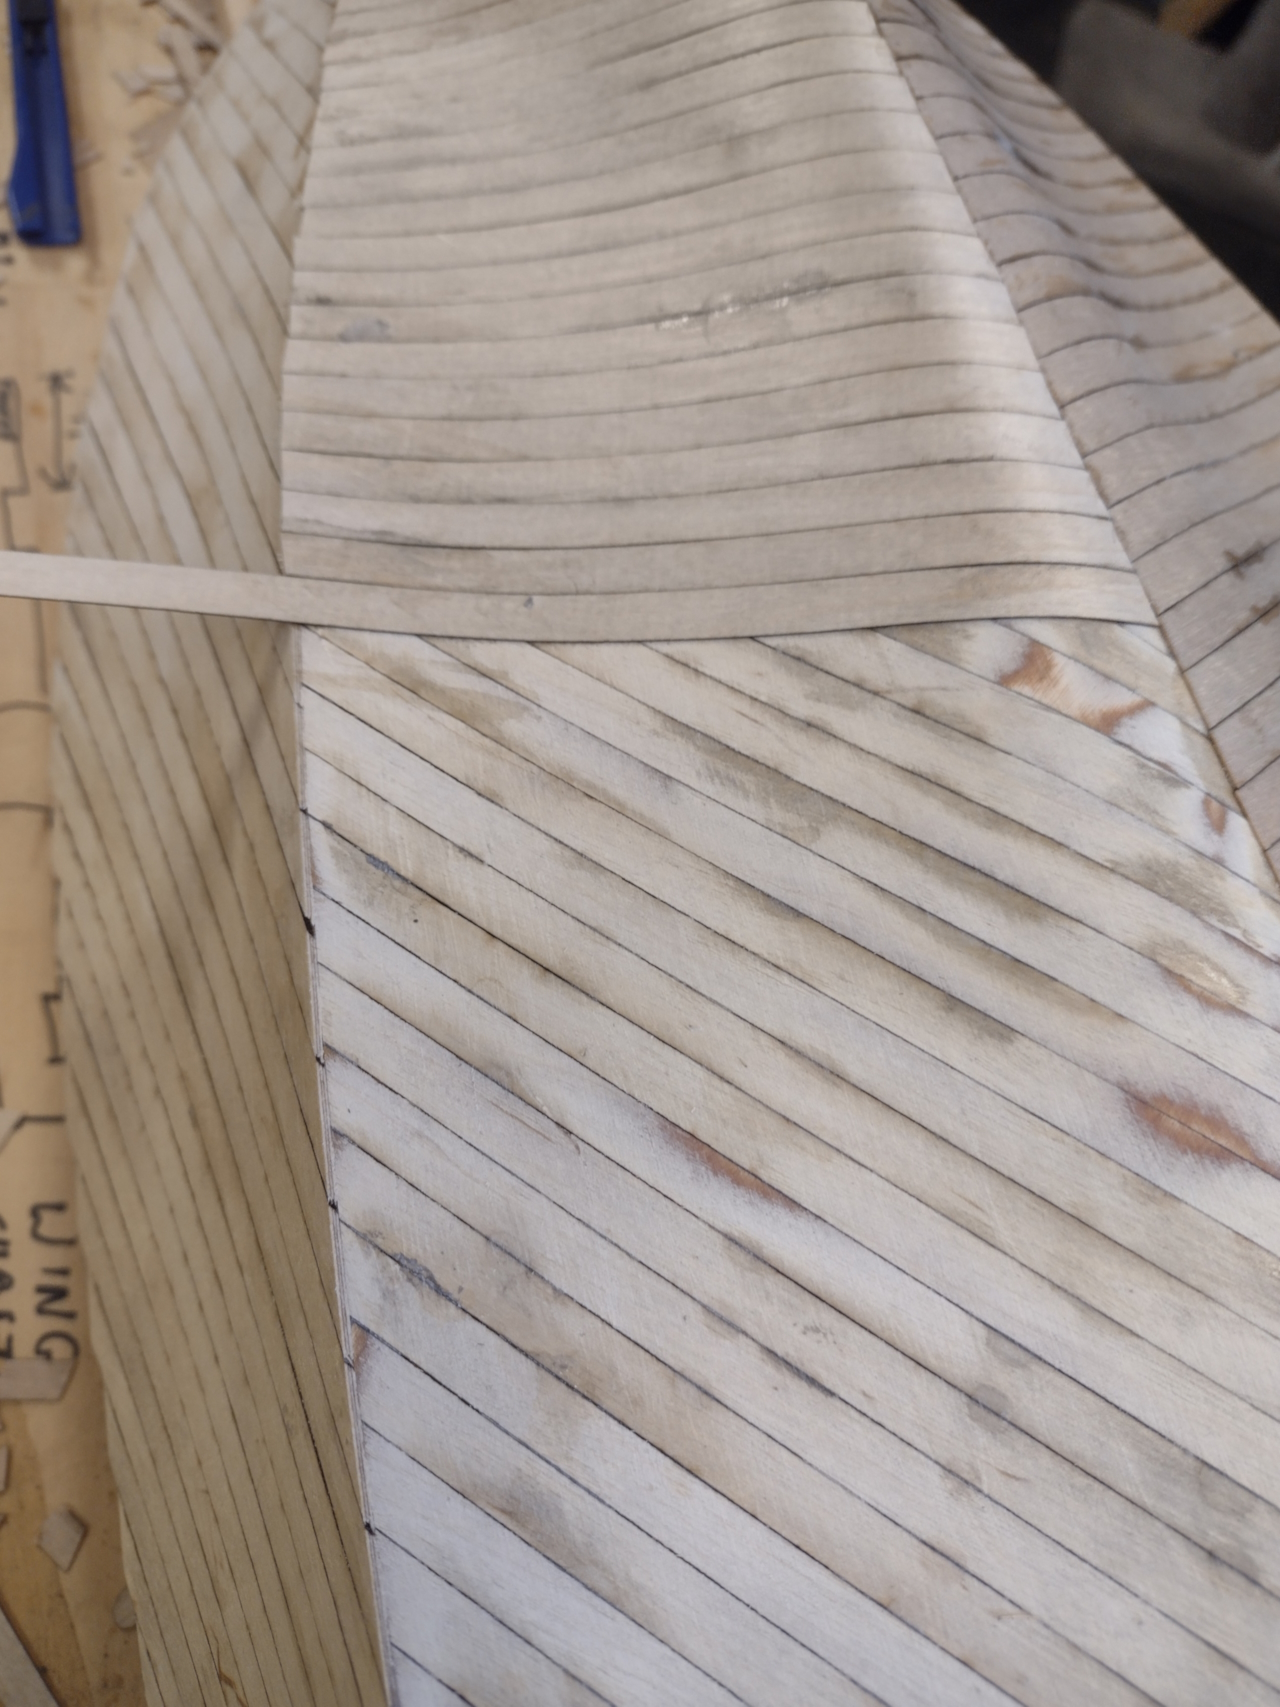
Planking the bottom, second layer from the middle aft.

Planking the transom, only one layer needed here.
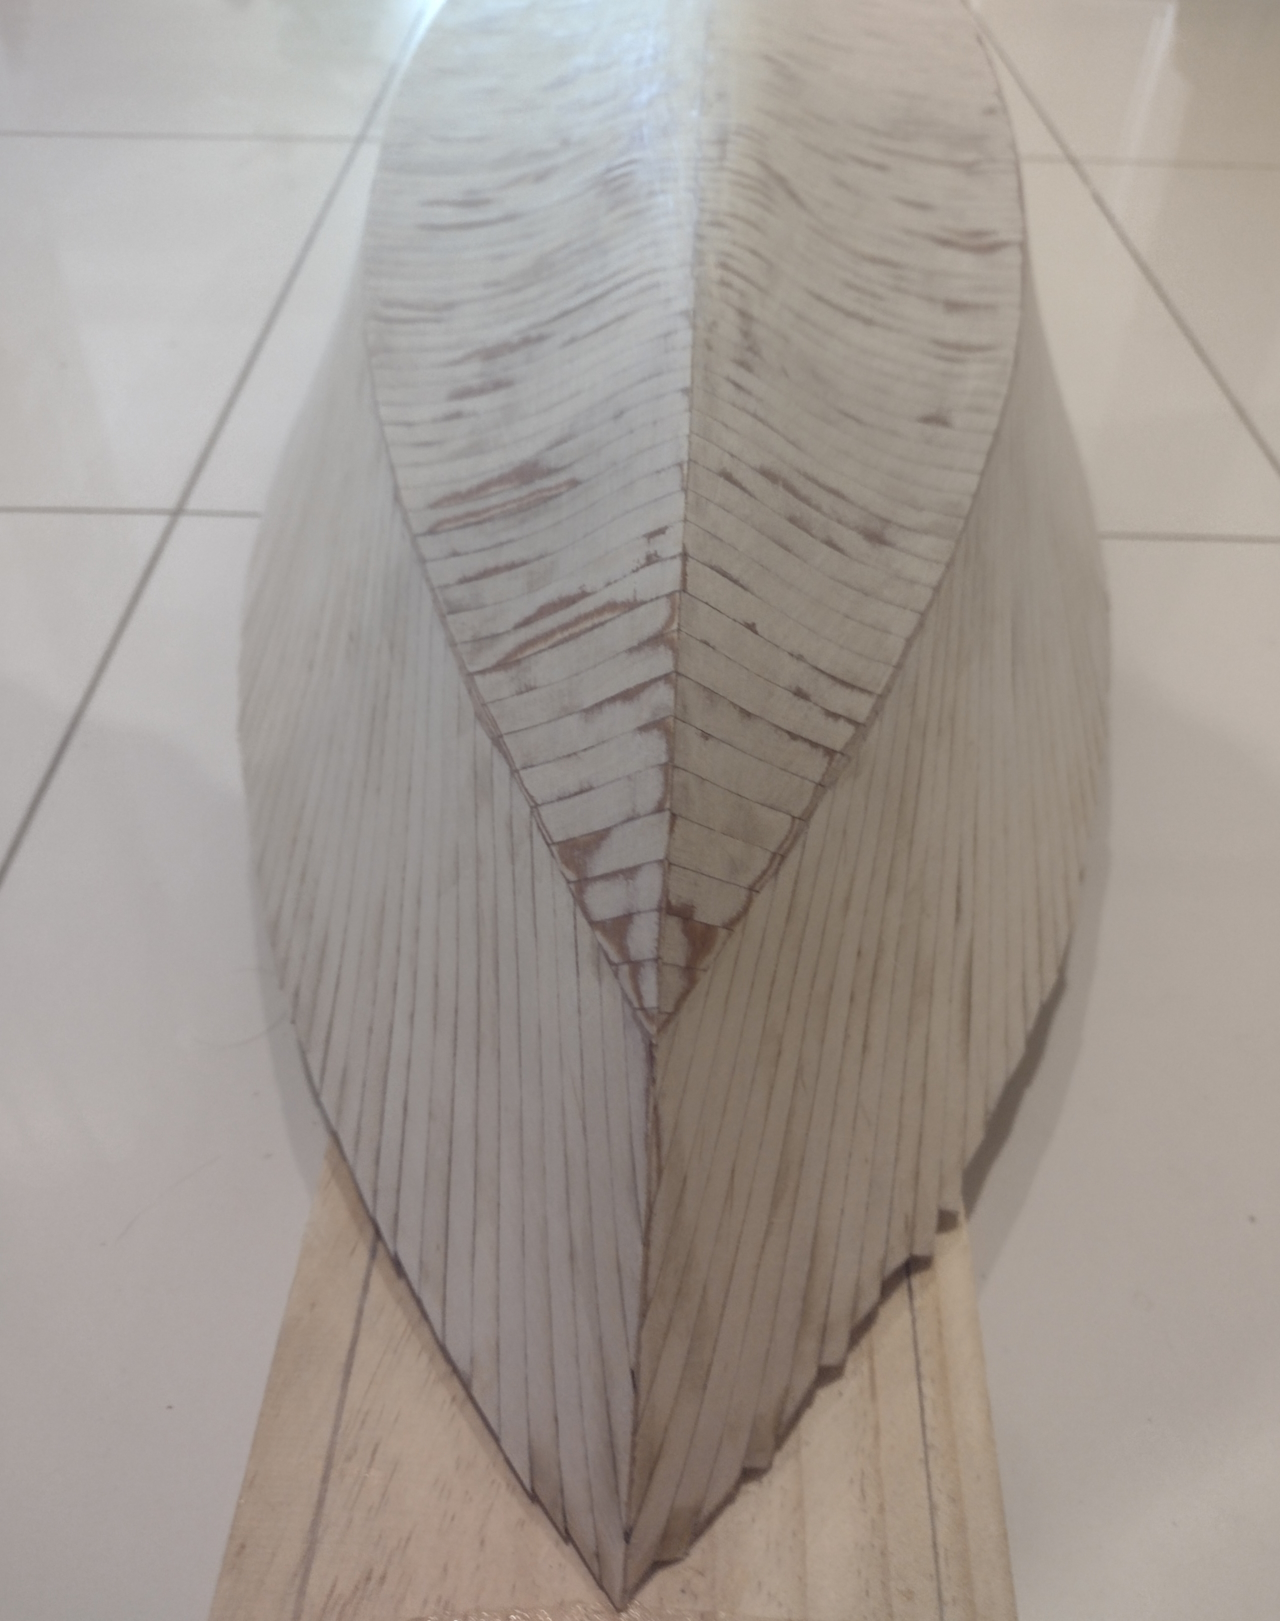
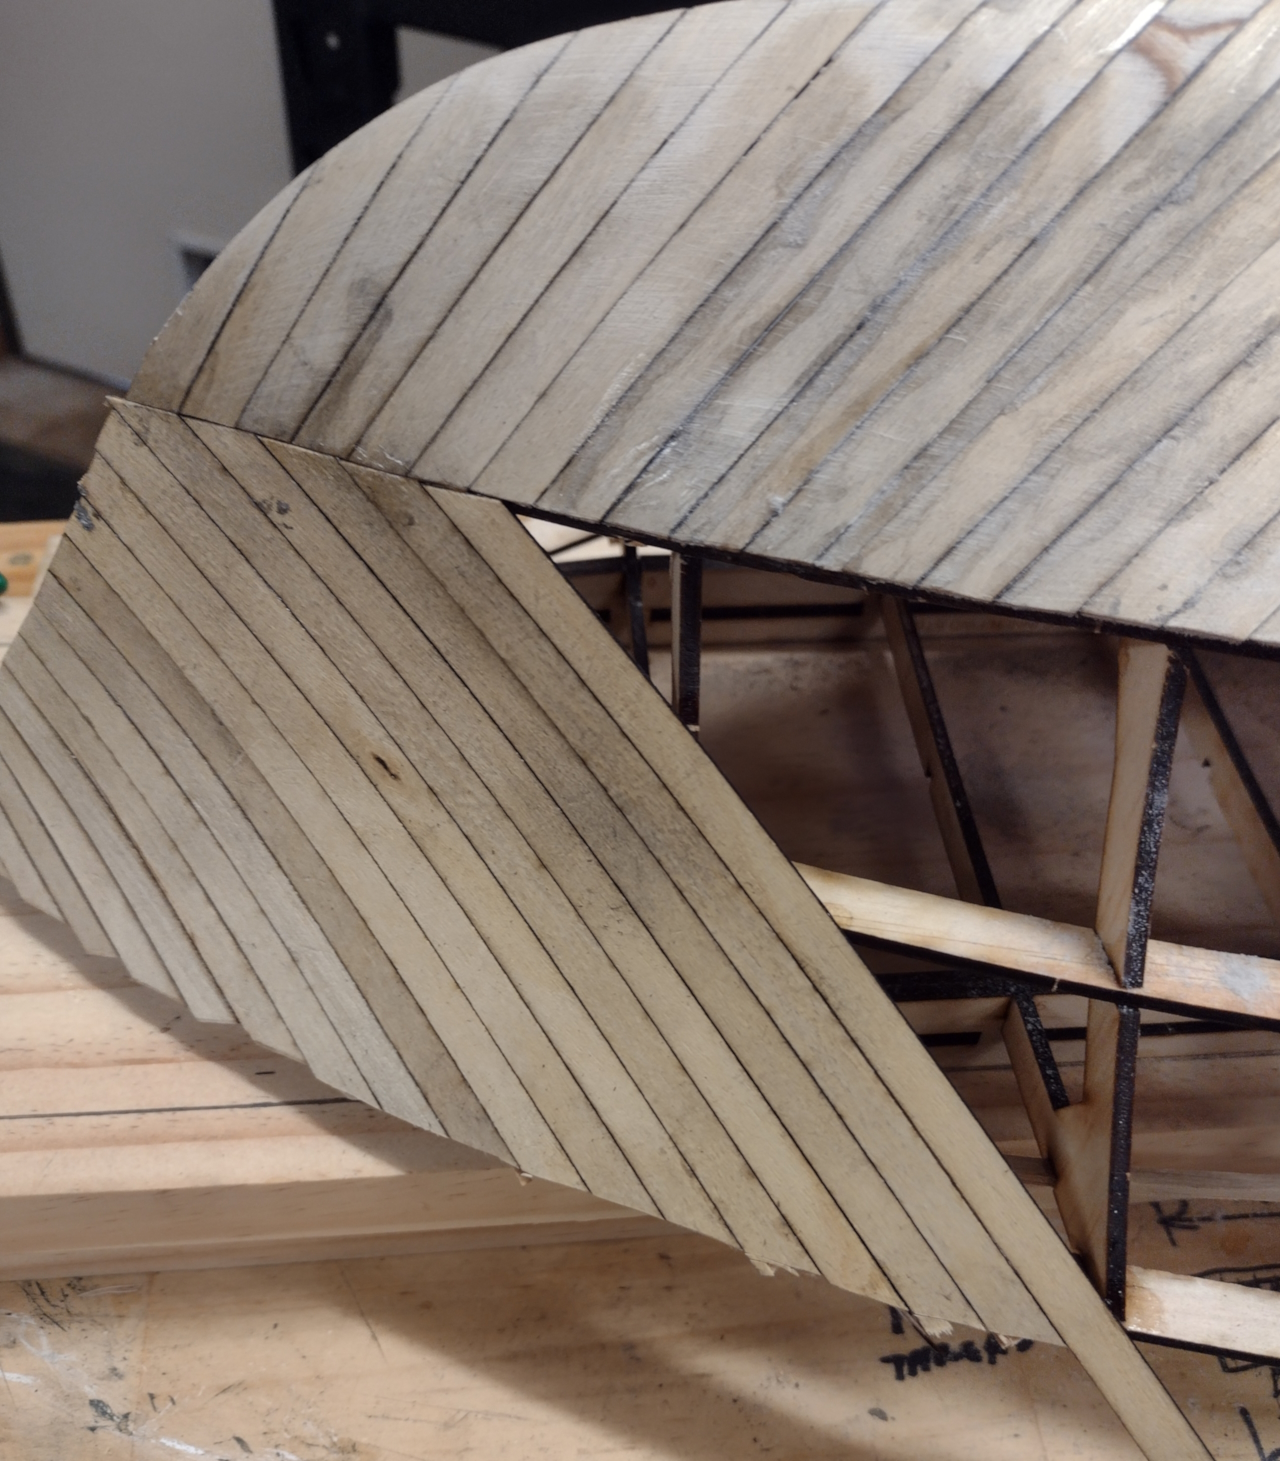
Planking is finished, I love getting to this stage, proof of the pudding. The best way I have found to clean cyanoacrylate (superglue) off your fingers is with PVC pipe cleaner!
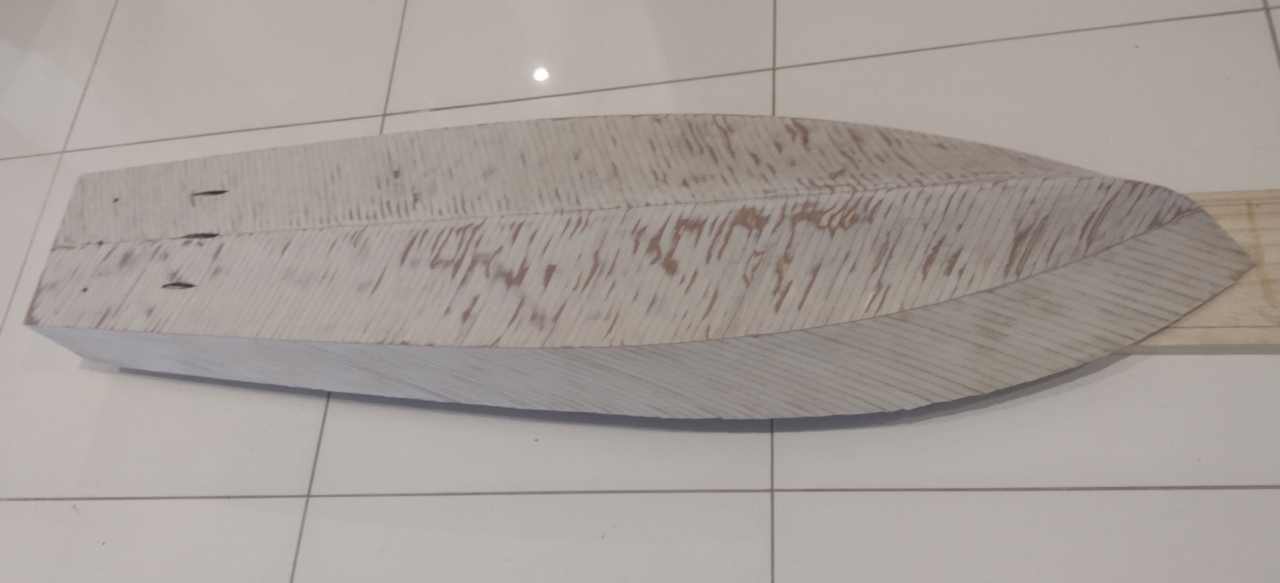
Planking finished, looking good, I really like this hull.
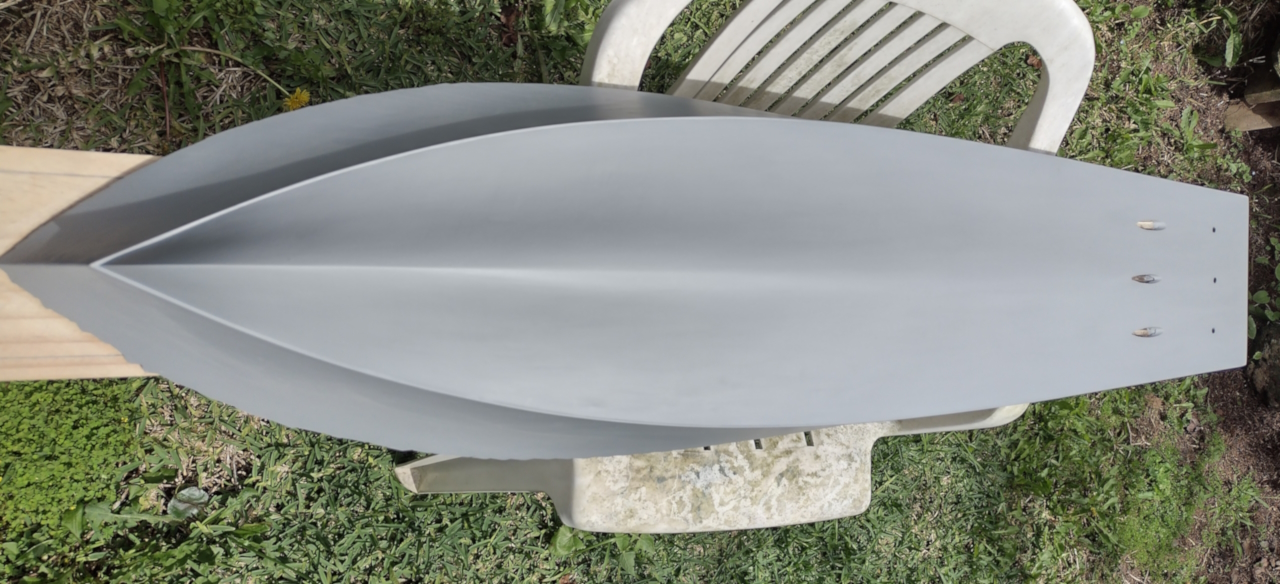
Painting, Argghhh!, first coats, drying in the sun!
Propshafts fitted and gaps filled with epoxy glue.
Planking trimmed off, painted another couple of coats and fitted portholes and rub rails.
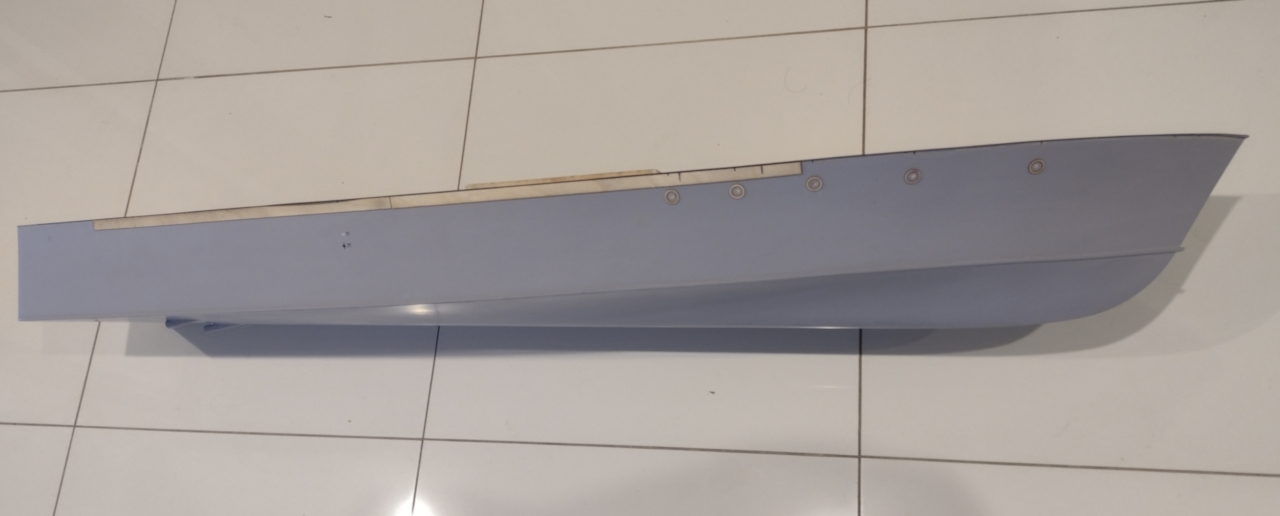
Side view with portholes and rub rails.
Subdeck mid sections fitted.
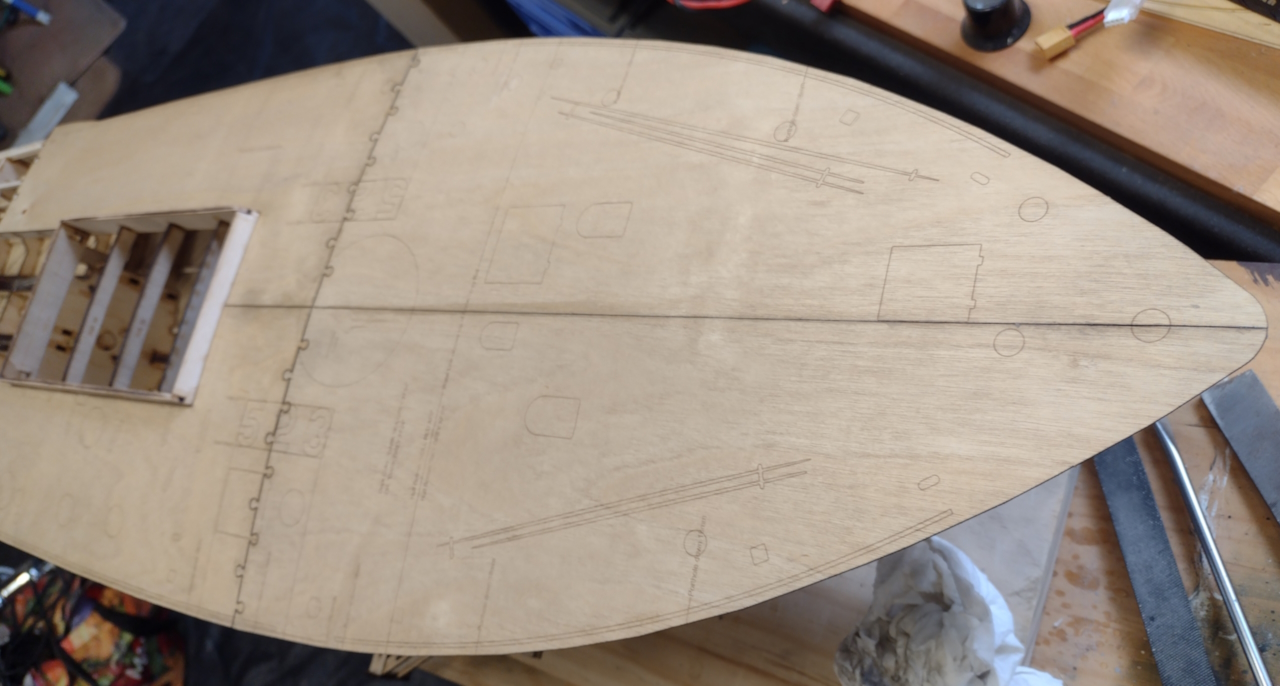
Forward subdeck sections fitted.
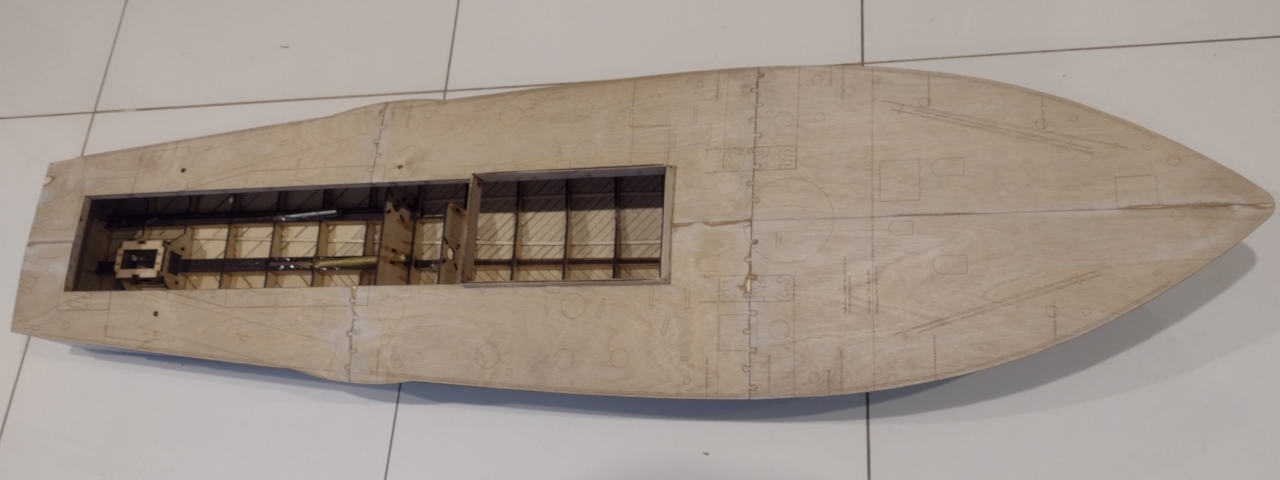
Subdeck sections all fitted.
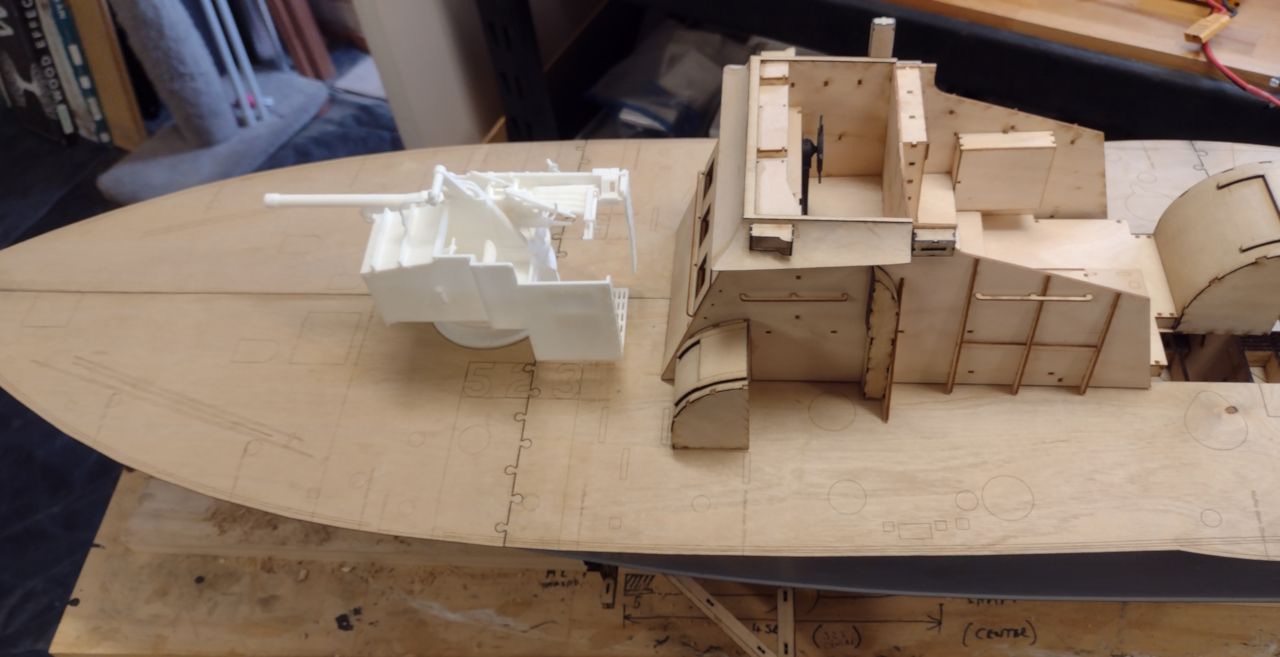
A trial fitting of the superstructure and other parts.
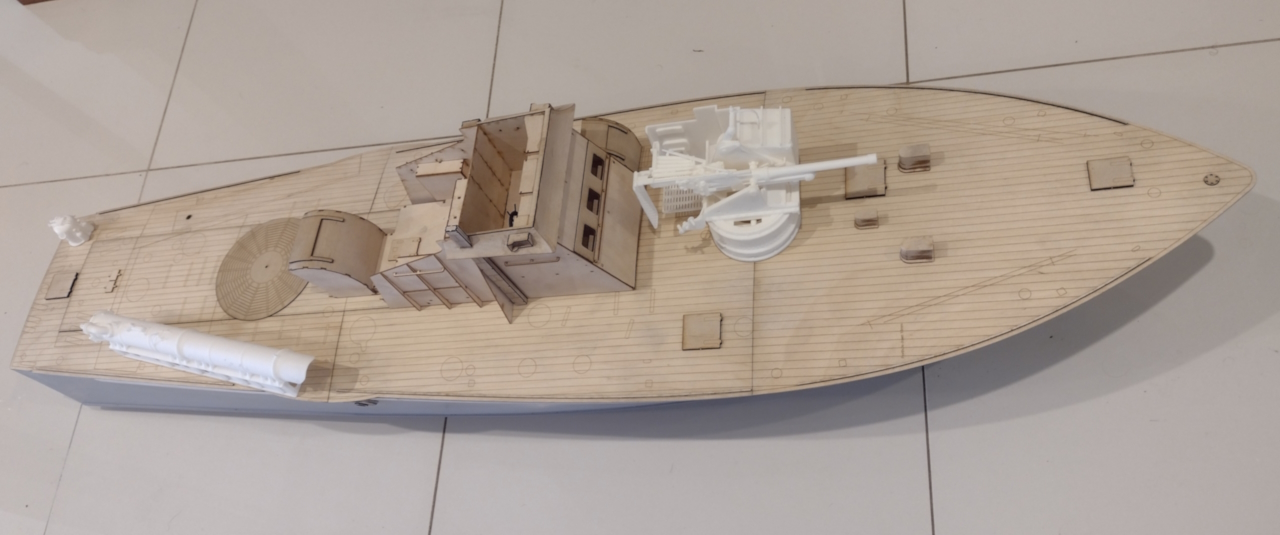
The deck layer is finished and another trial fitting of the superstructure and other parts.
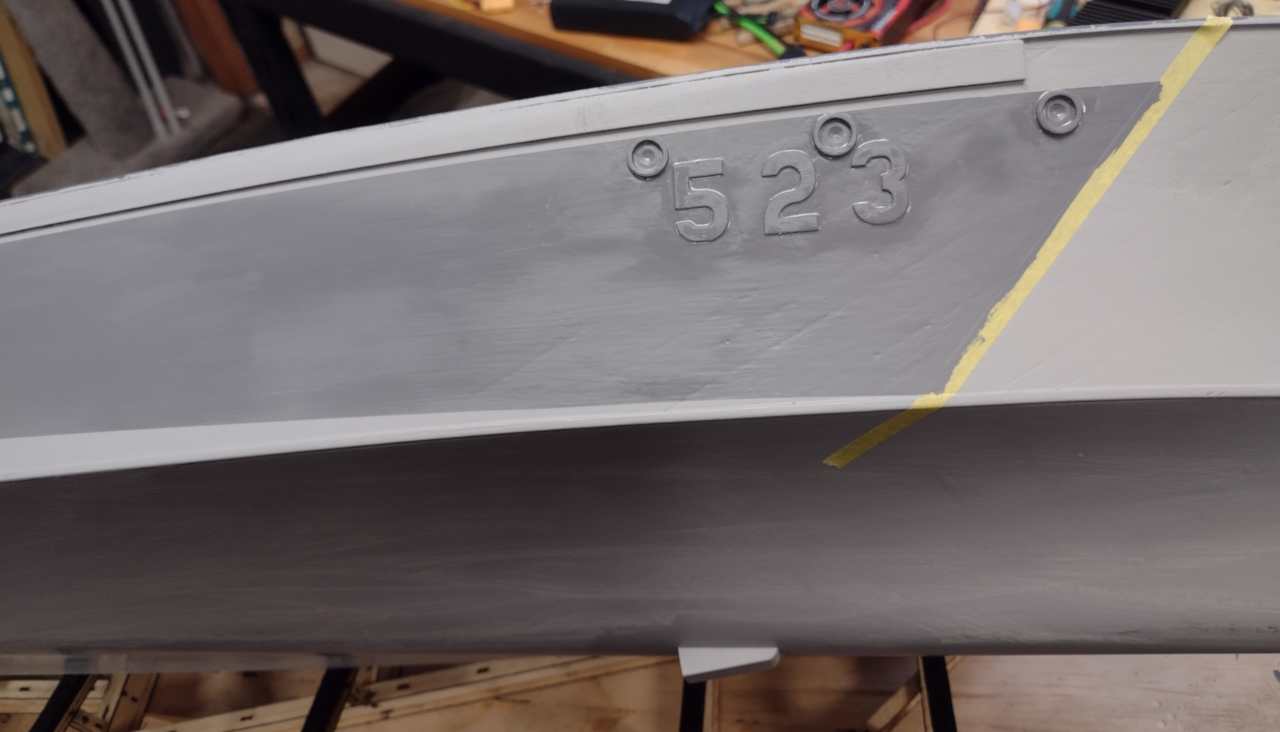
Some side detail painting, I tried using a laser cut stencil to paint the hull number and that didn't work out well, so I stuck the number on the hull and painted them black.
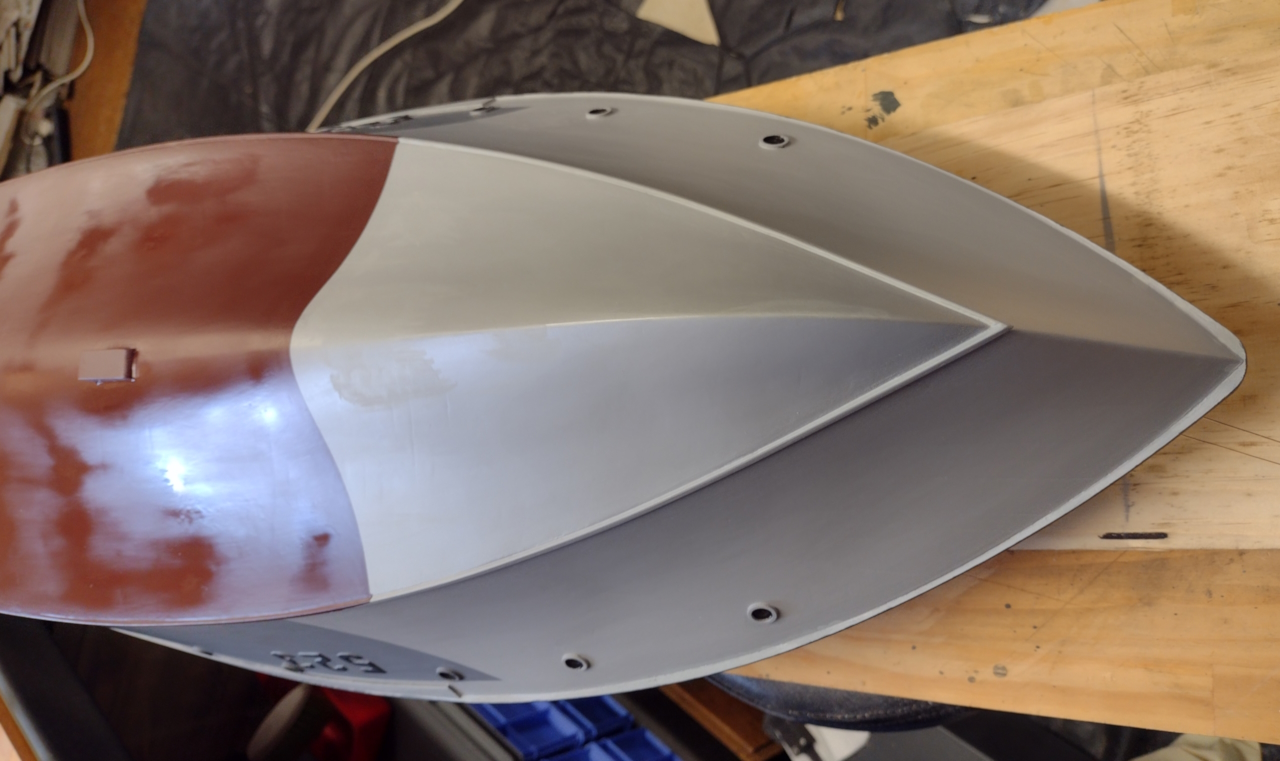
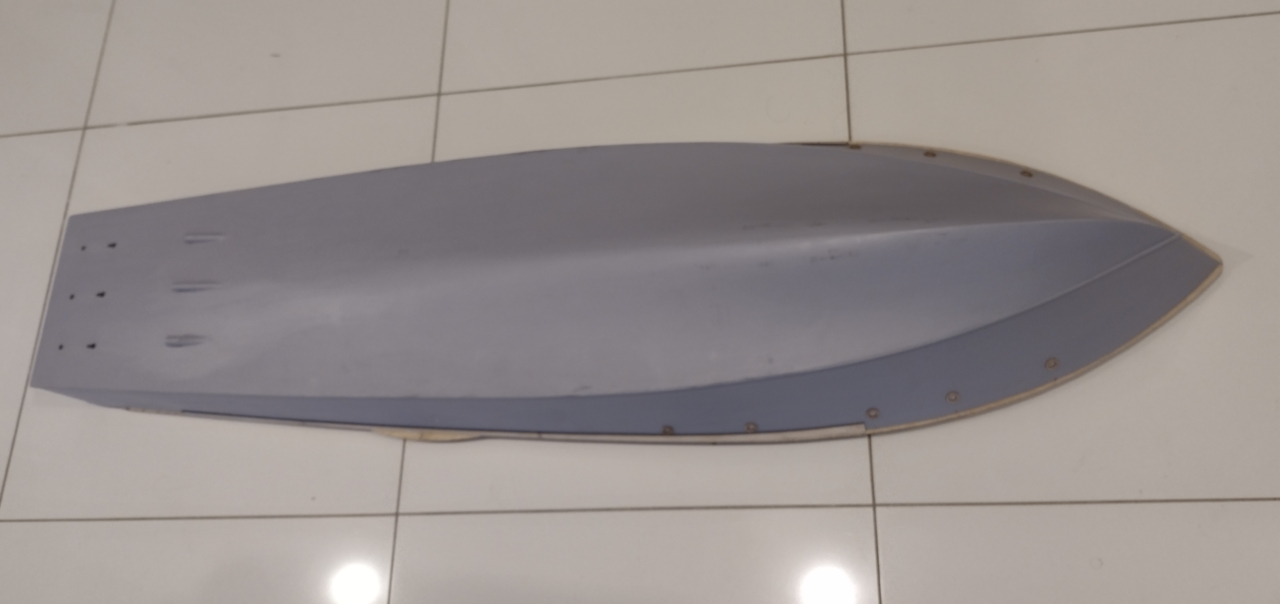
The bottom ""Hull Red" painted after the water scoop was fitted.
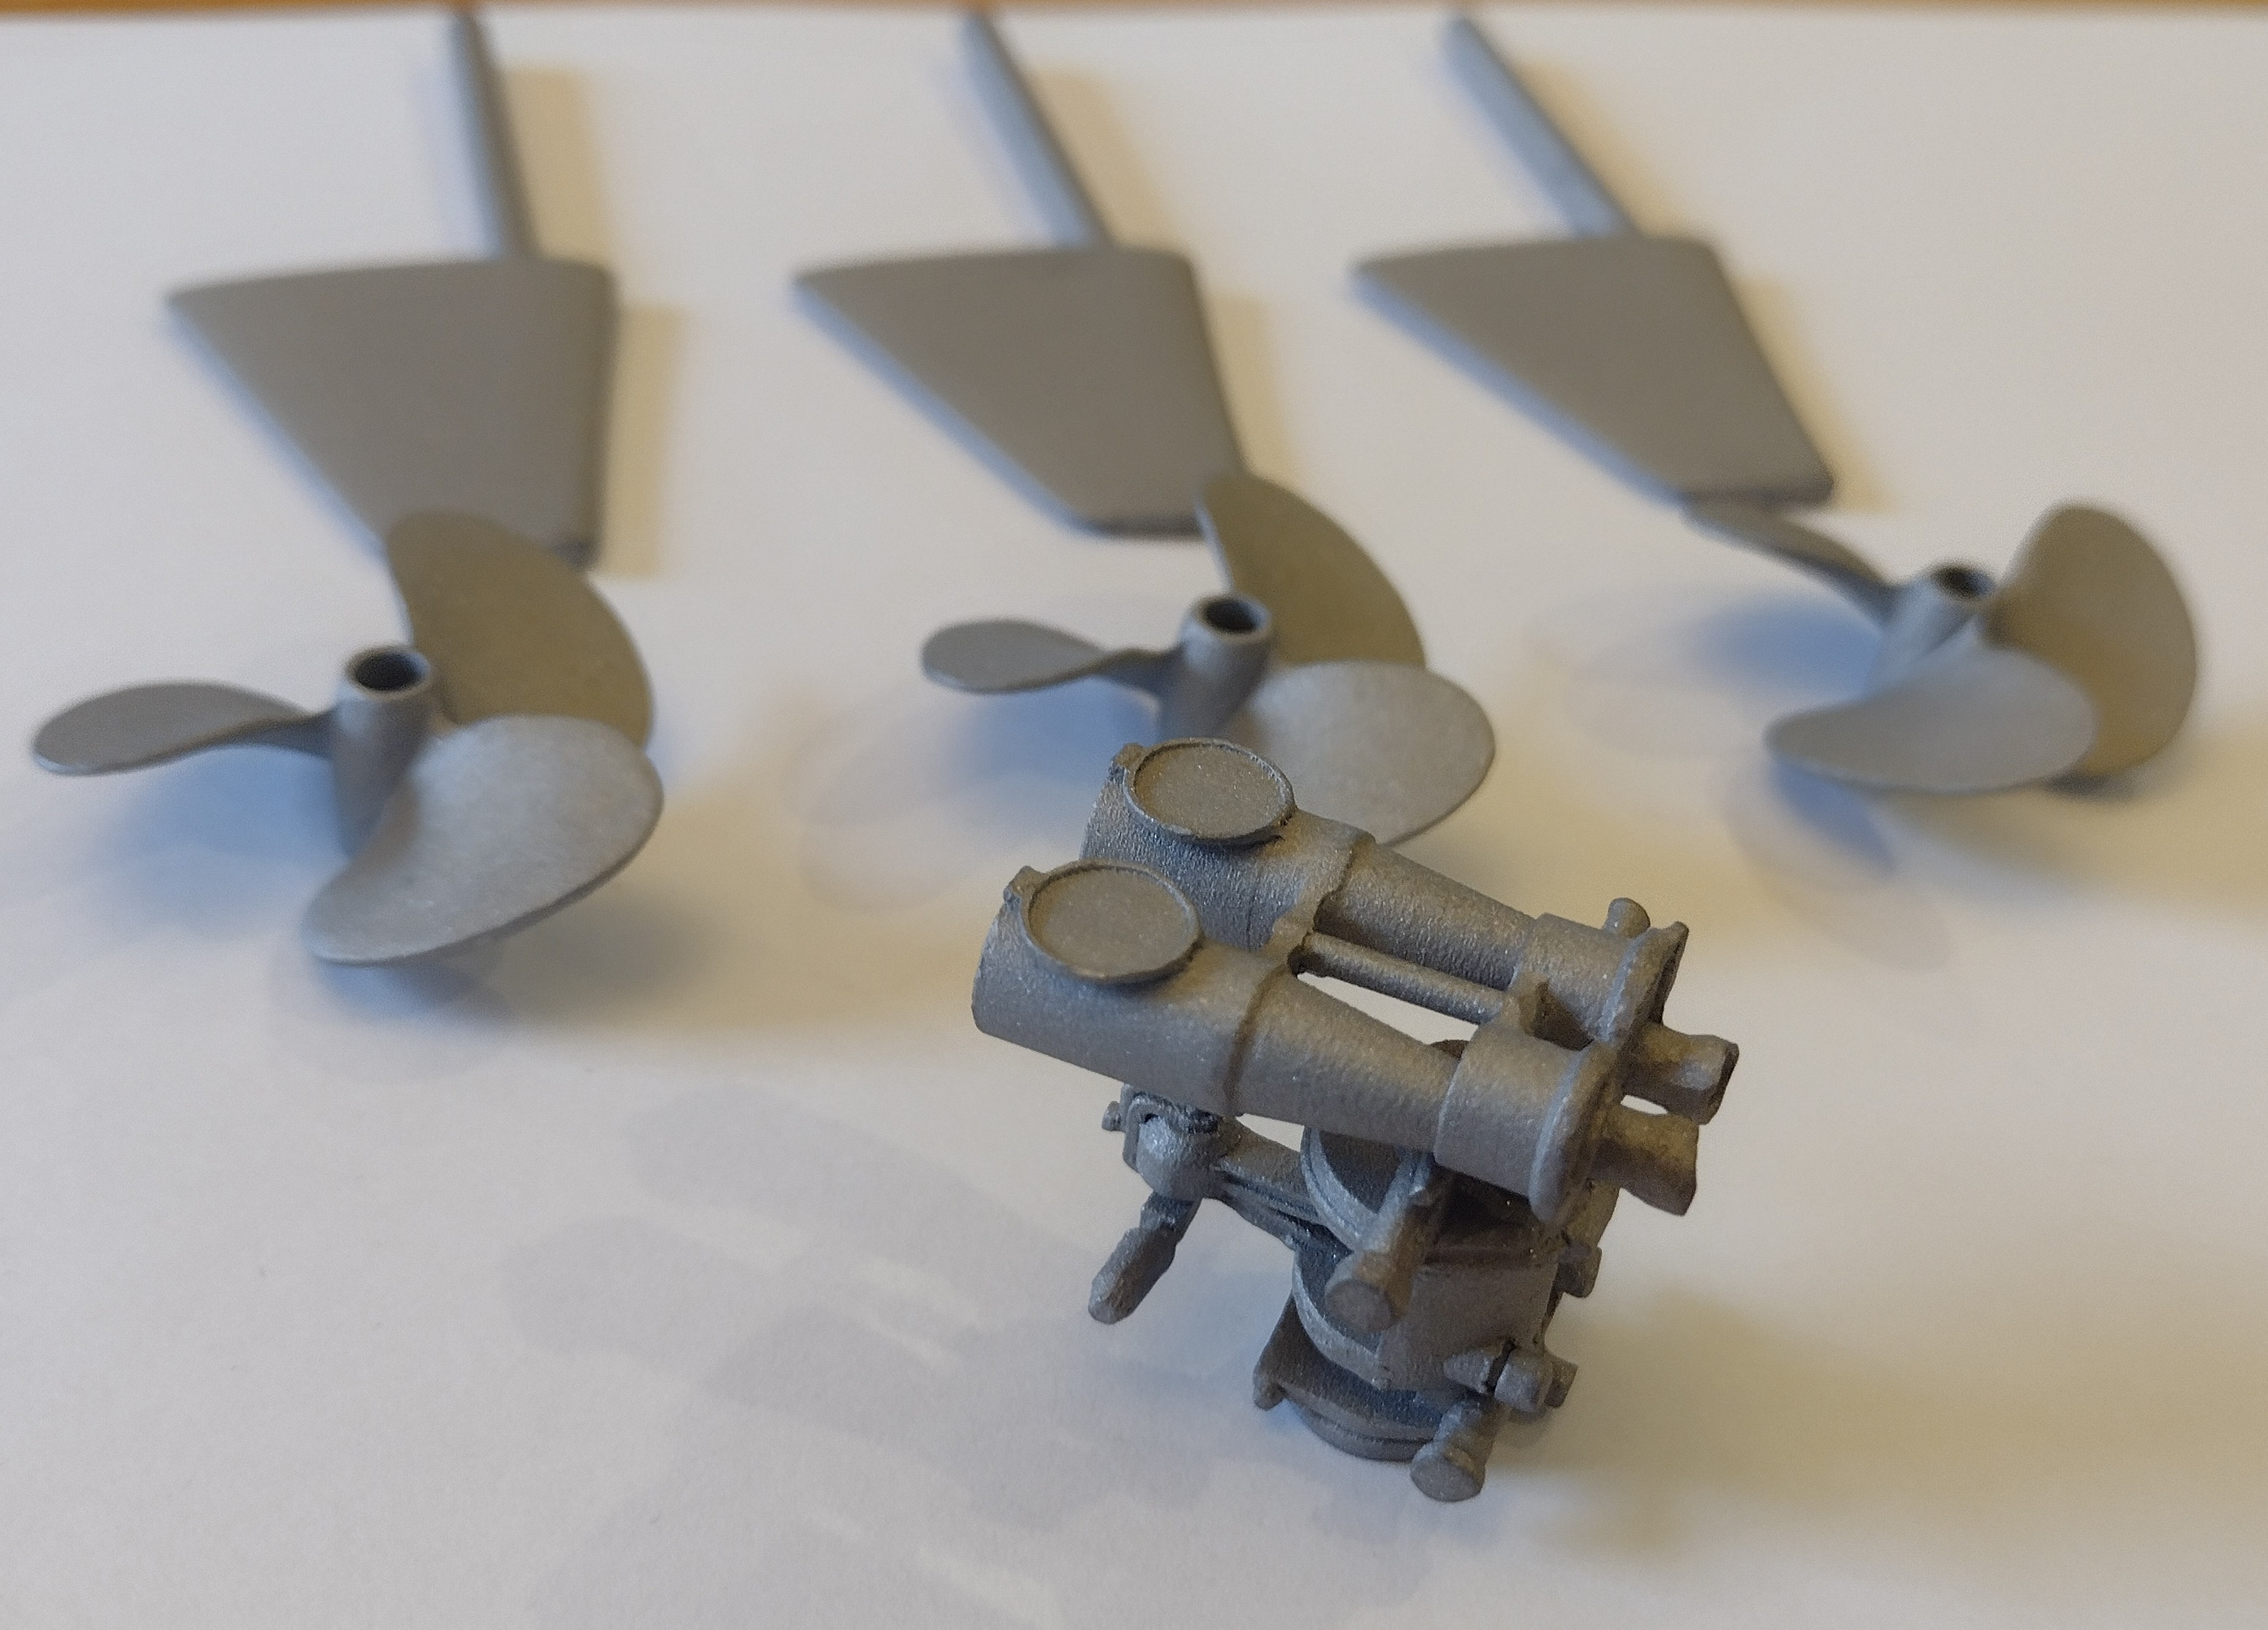
The new 3D printed stainless steel rudders and props (as well as a torpedo binocular for the sboot). These are my design props, same as the Higgins, only in stainless steel this time, just to try something different.
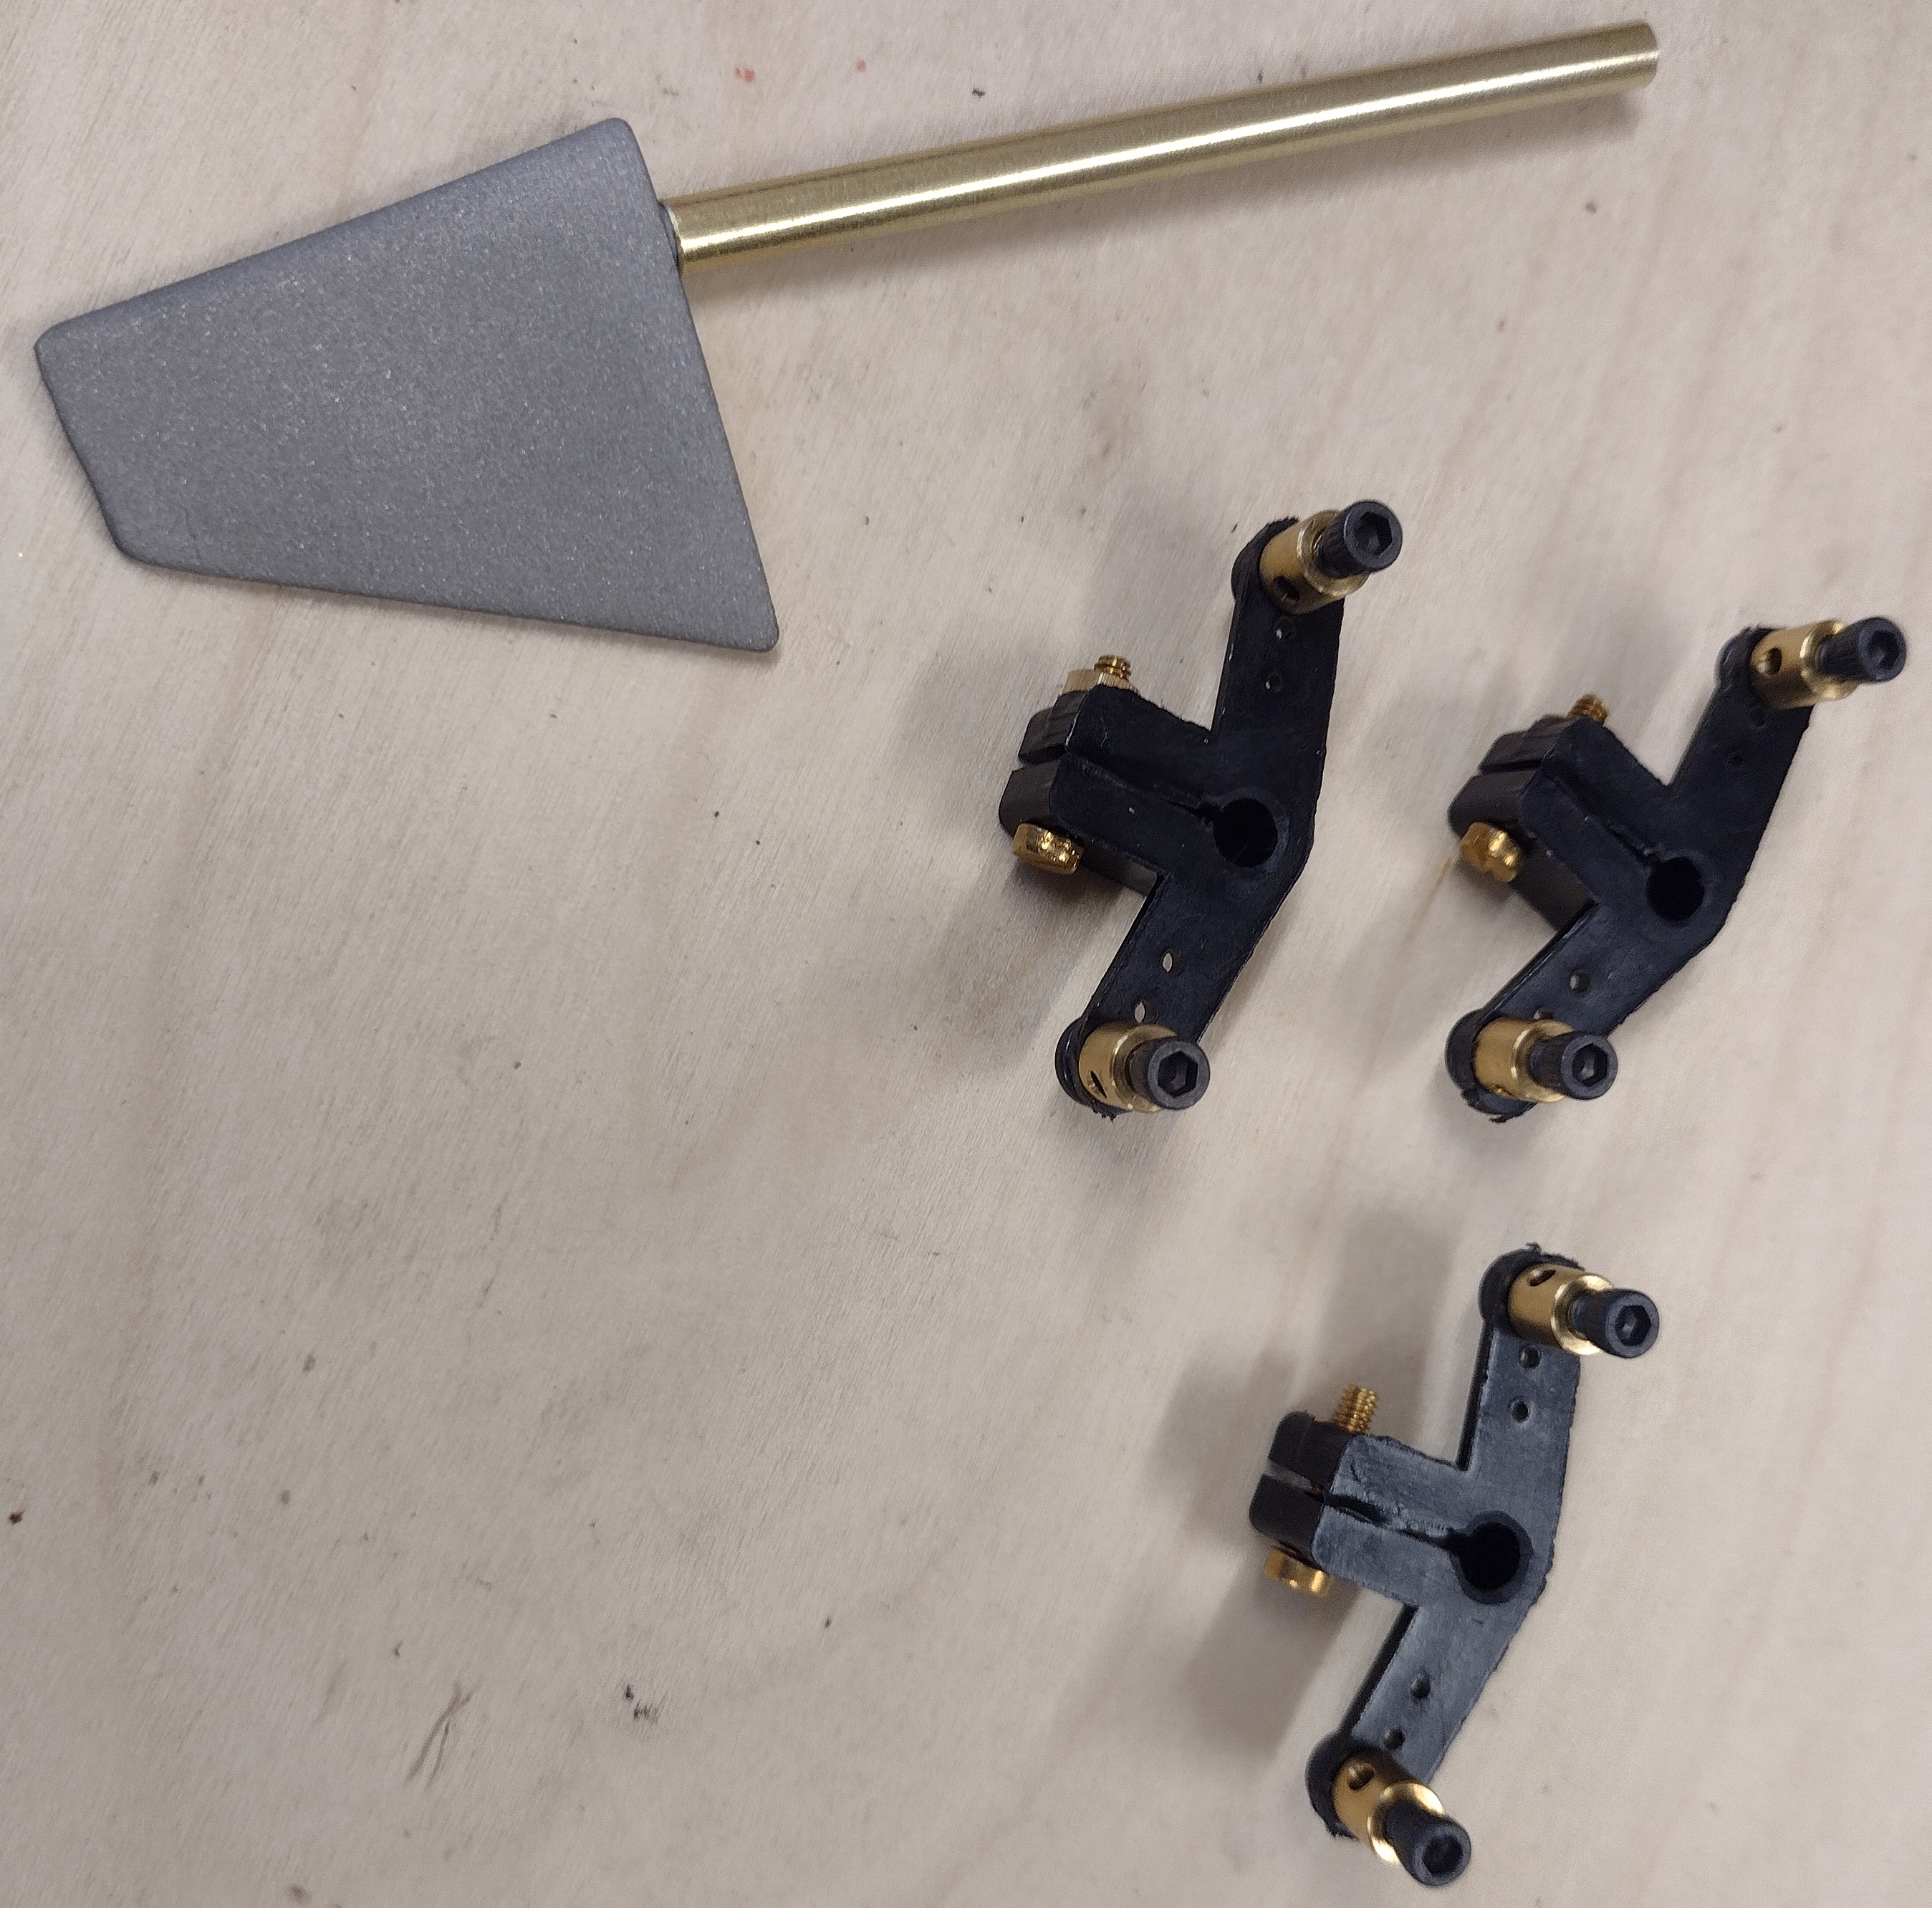
The new rudder and the three control "tiller" arms, shortened a little and fitted with linkage ends. The rudder shafts are designed to be 4.0mm diameter and need a length of 5/32" brass tubing to make them fit the plastic sleeve that fit's through the hull and also to fit the tiller arms. I needed to file the rudder shafts down a little as they were slightly over.
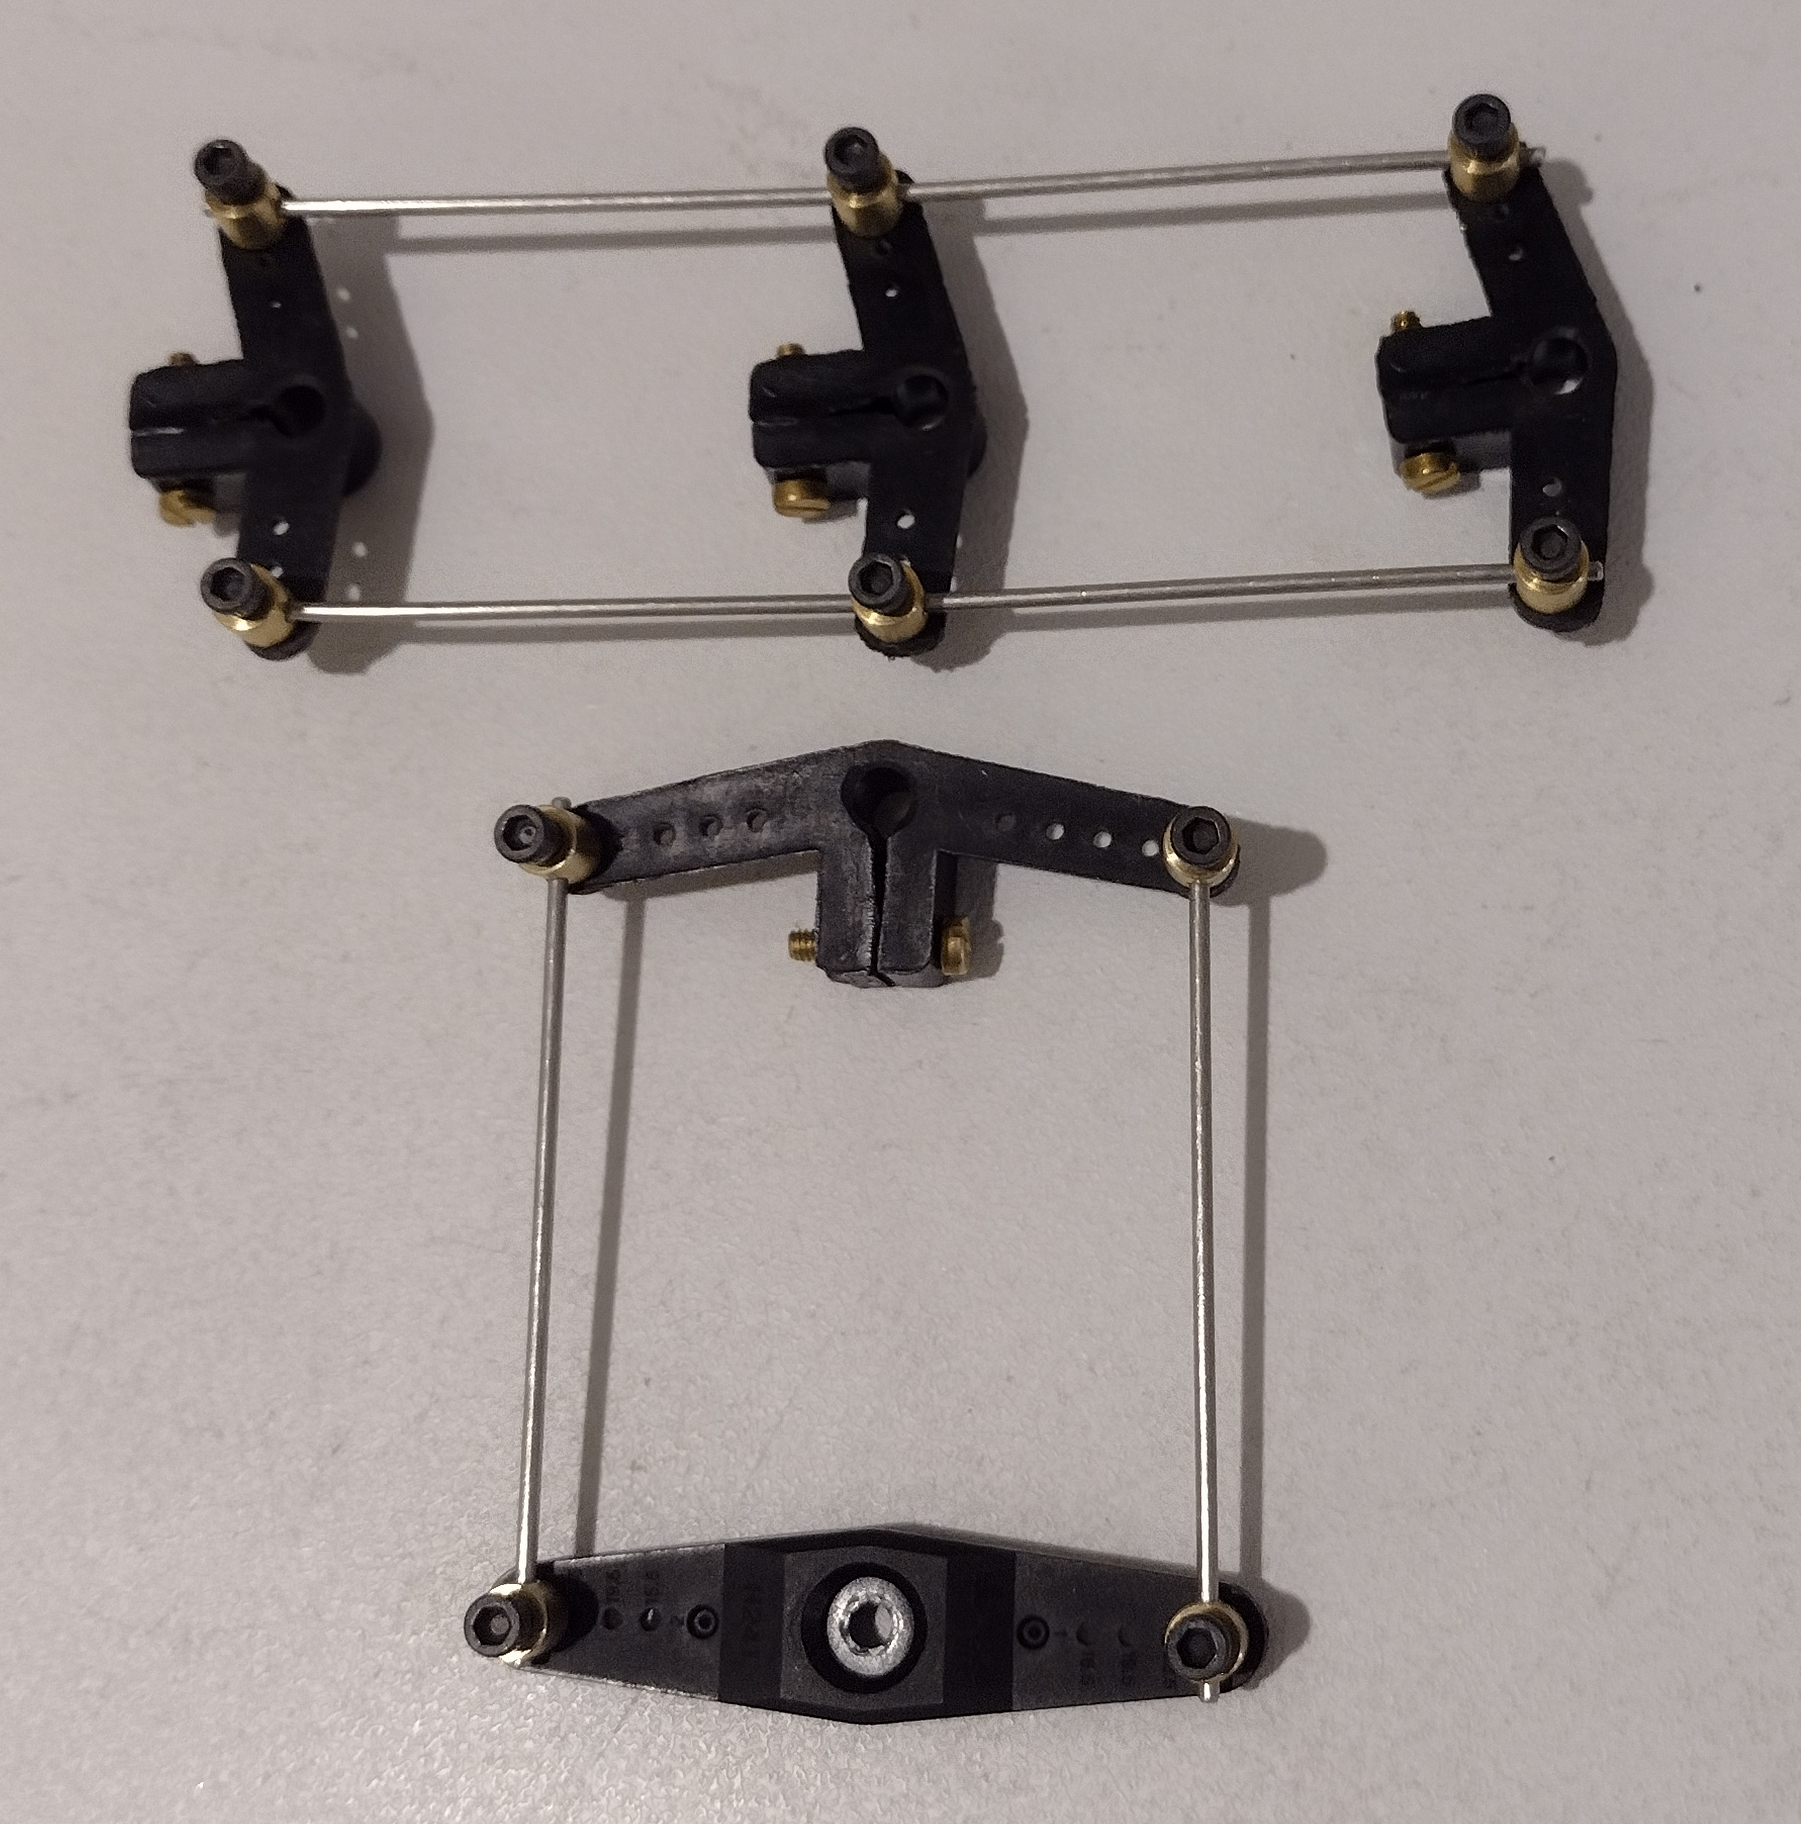
The rudder setup. The bottom set goes from the servo to the middle rudder and the top setup goes across all three rudders.
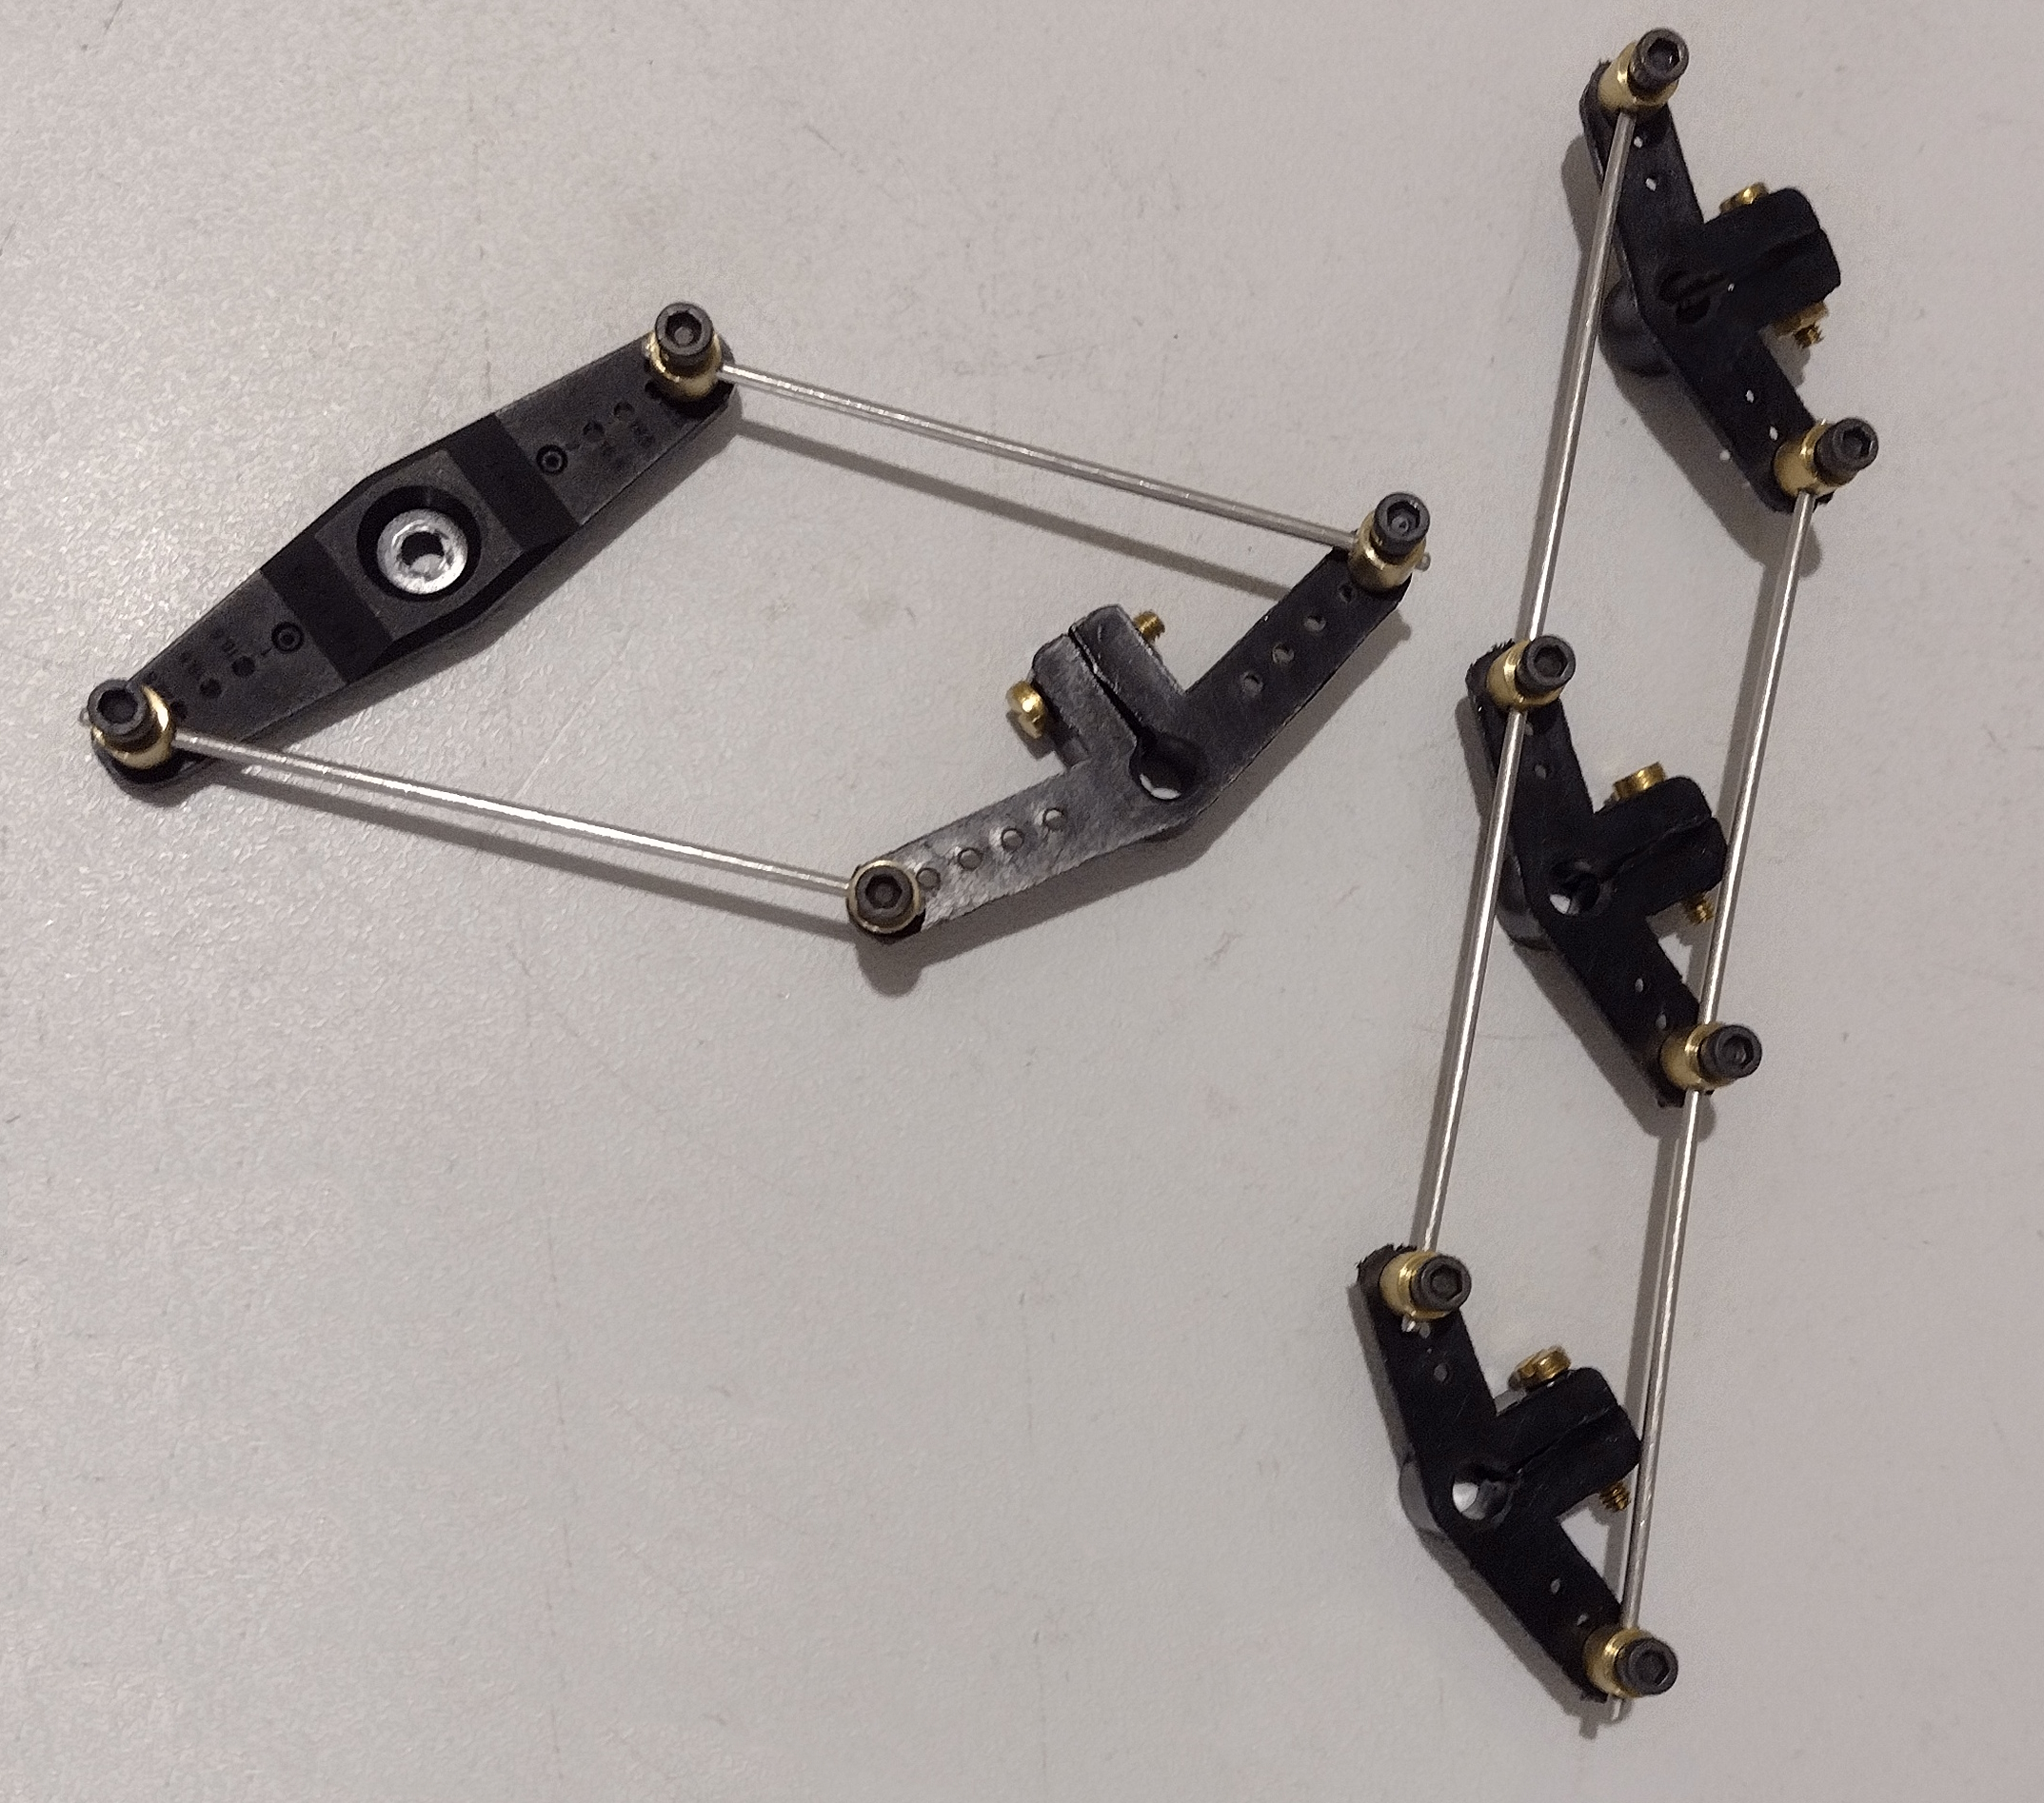
Another view of the rudder parallelogram setup, I've never used these brass linkage ends before but I must say I like them! Much easier to setup than the threaded type, where you have to keep dismantling and adjusting them by screwing in or out to get the correct length. These just have a length of 1.6mm stainless steel wire between and once in the right place, just tighten the grub screws, I adjusted them with the boat upside down and on the rudder shafts plugged into the bottom temporarily.
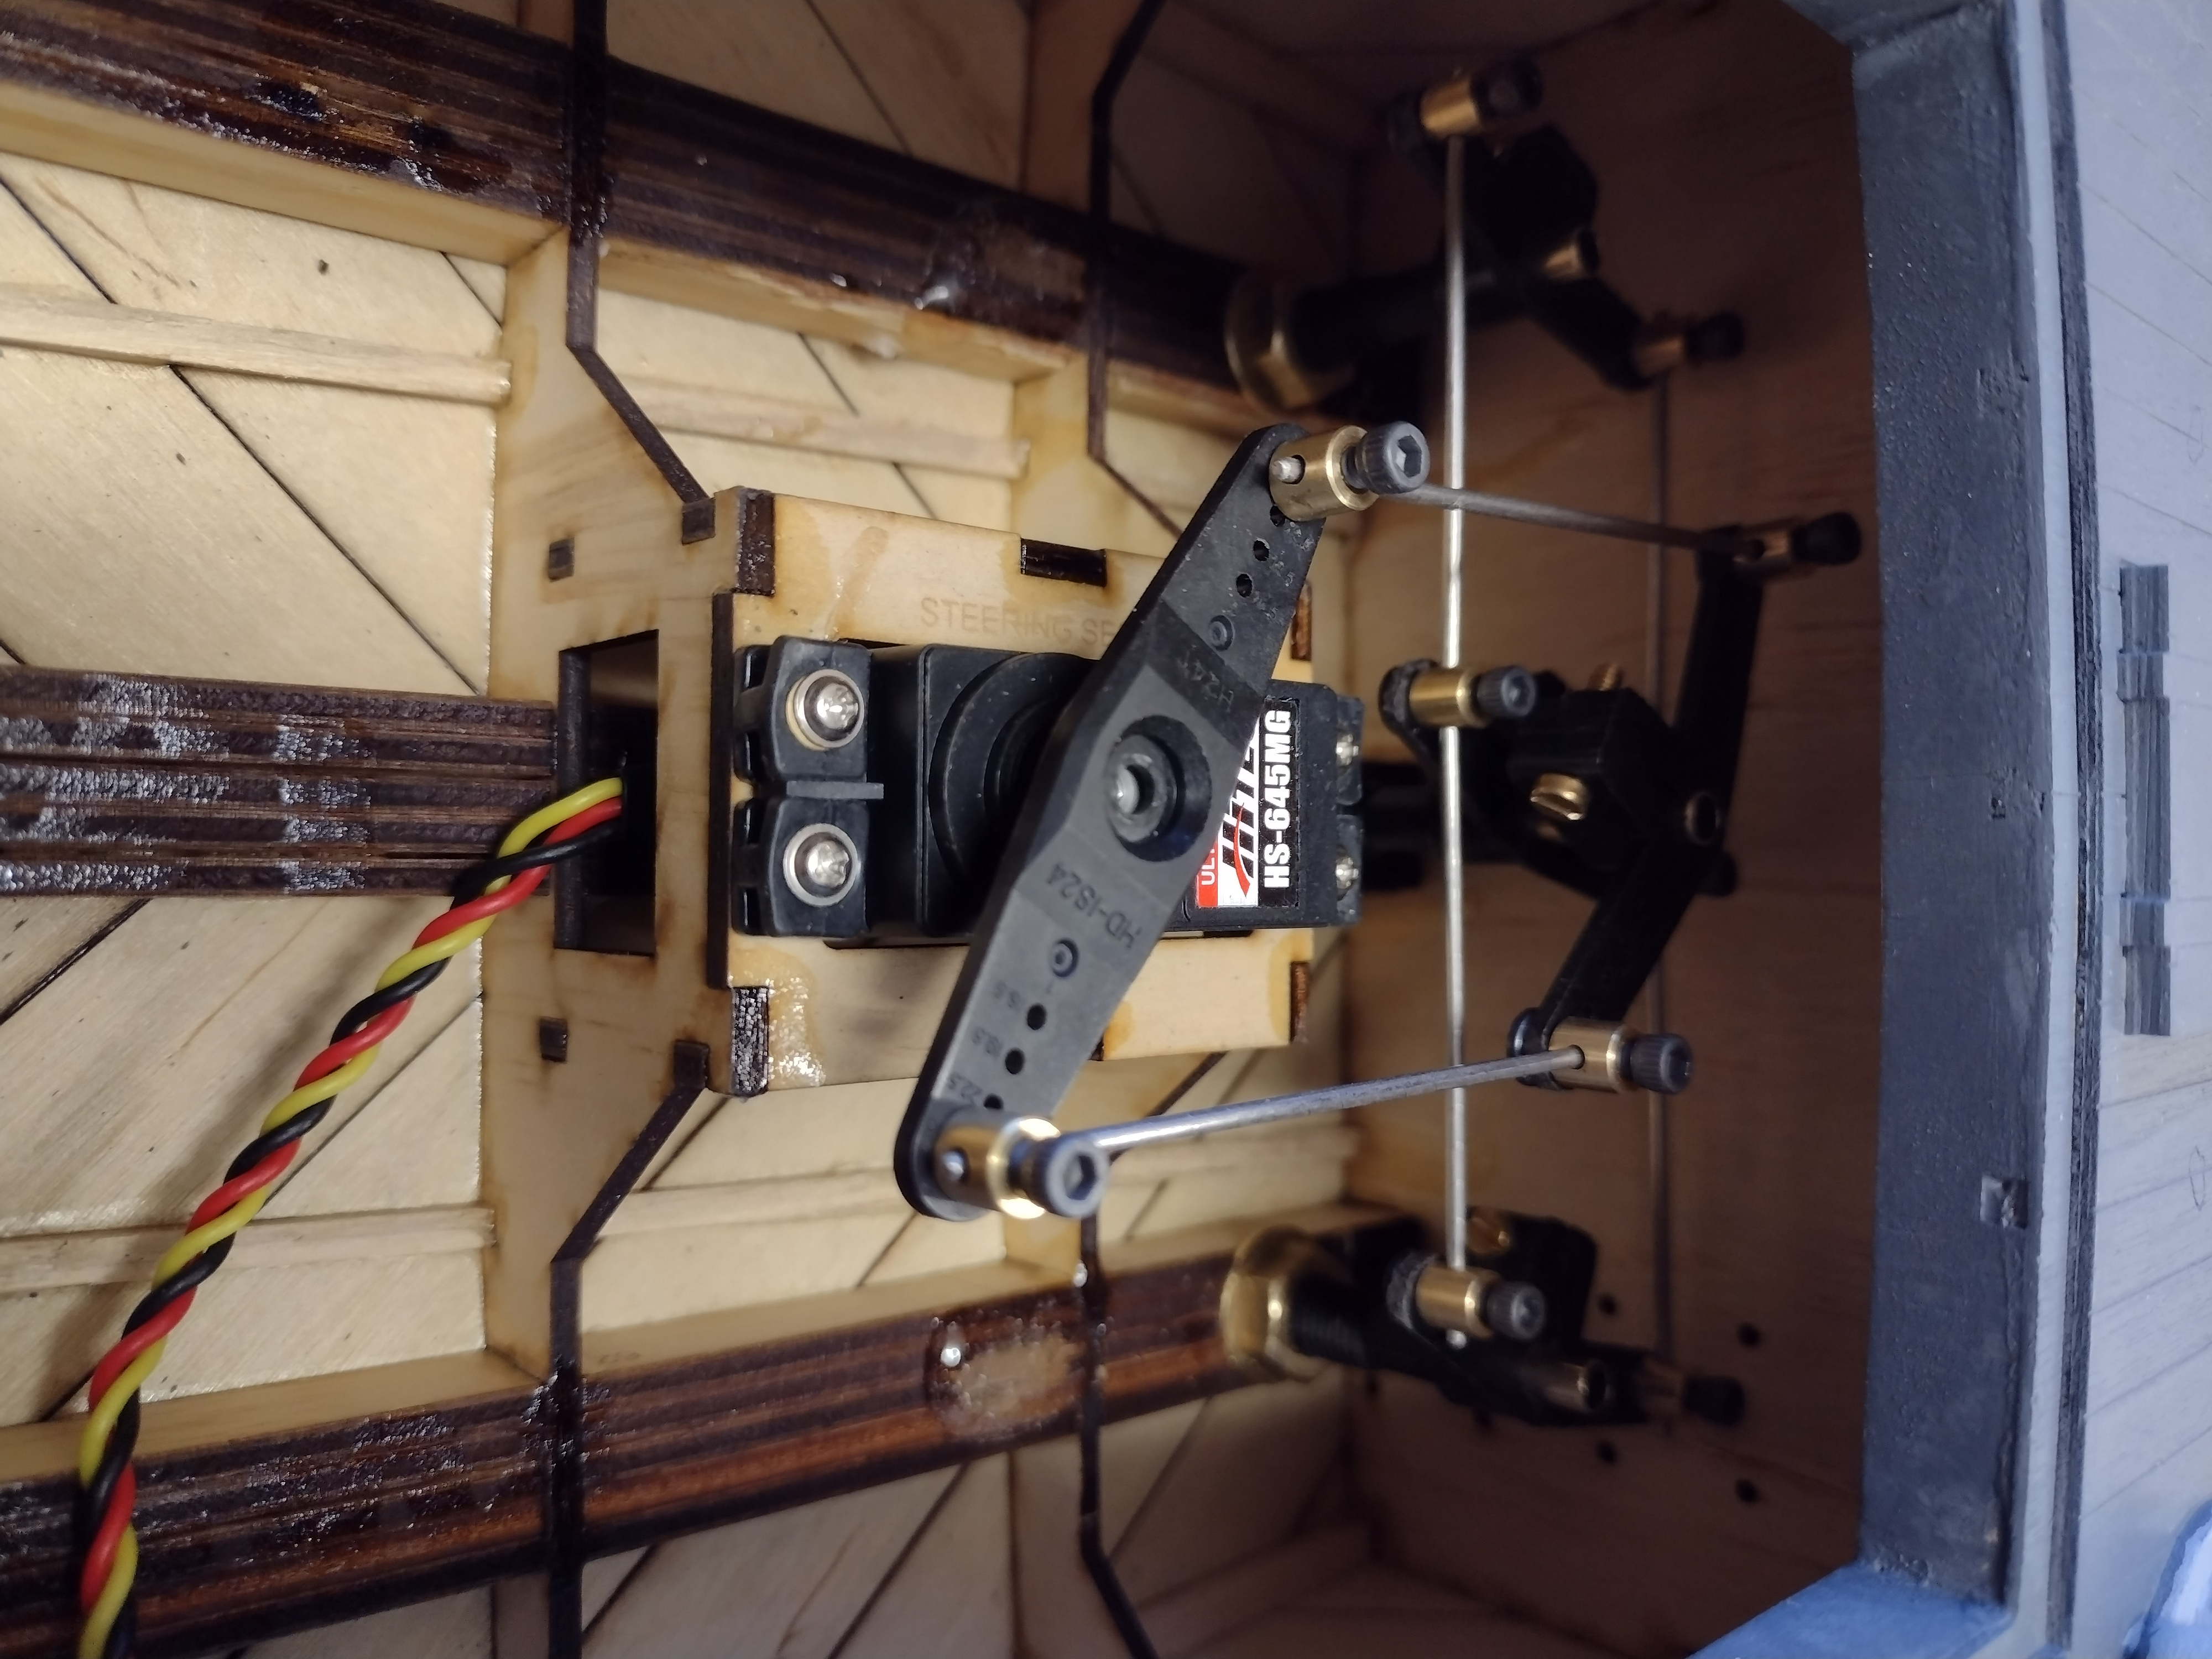
The fitted rudder linkage system, works a treat! very happy with that!
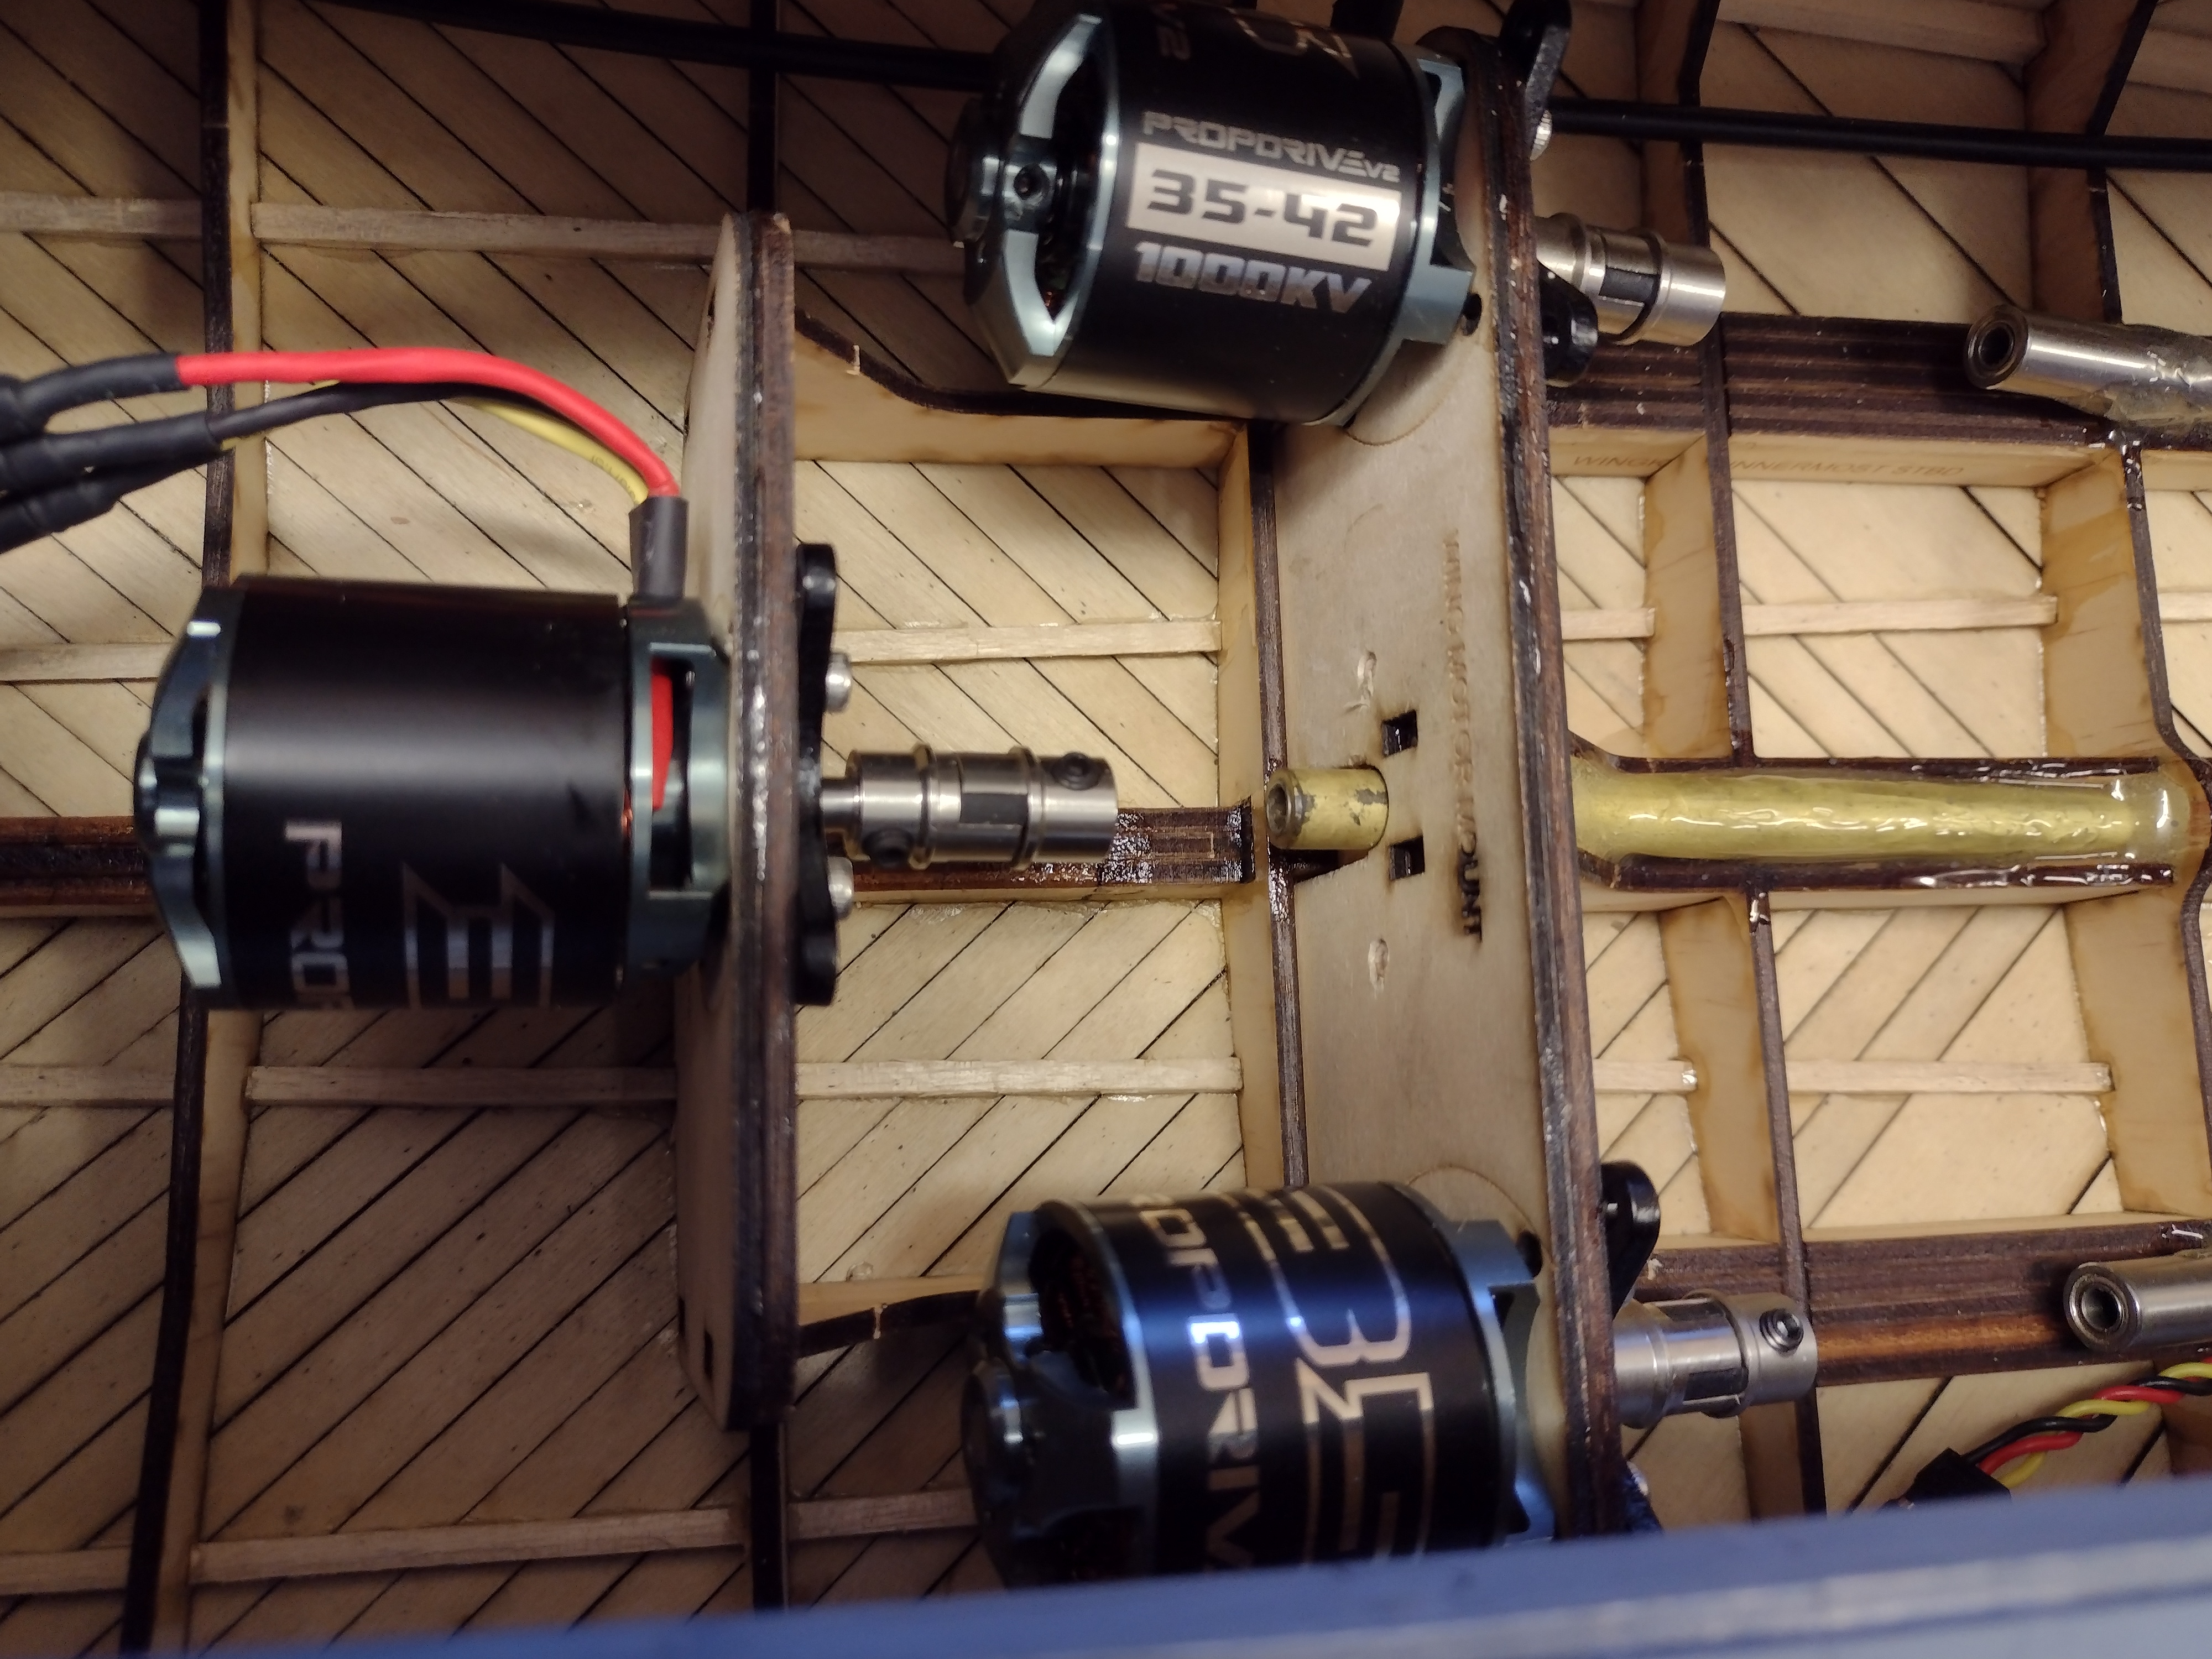
The three new motors fitted. These are 1000 rpm per volt (1000KV) so this boat should be quite fast!
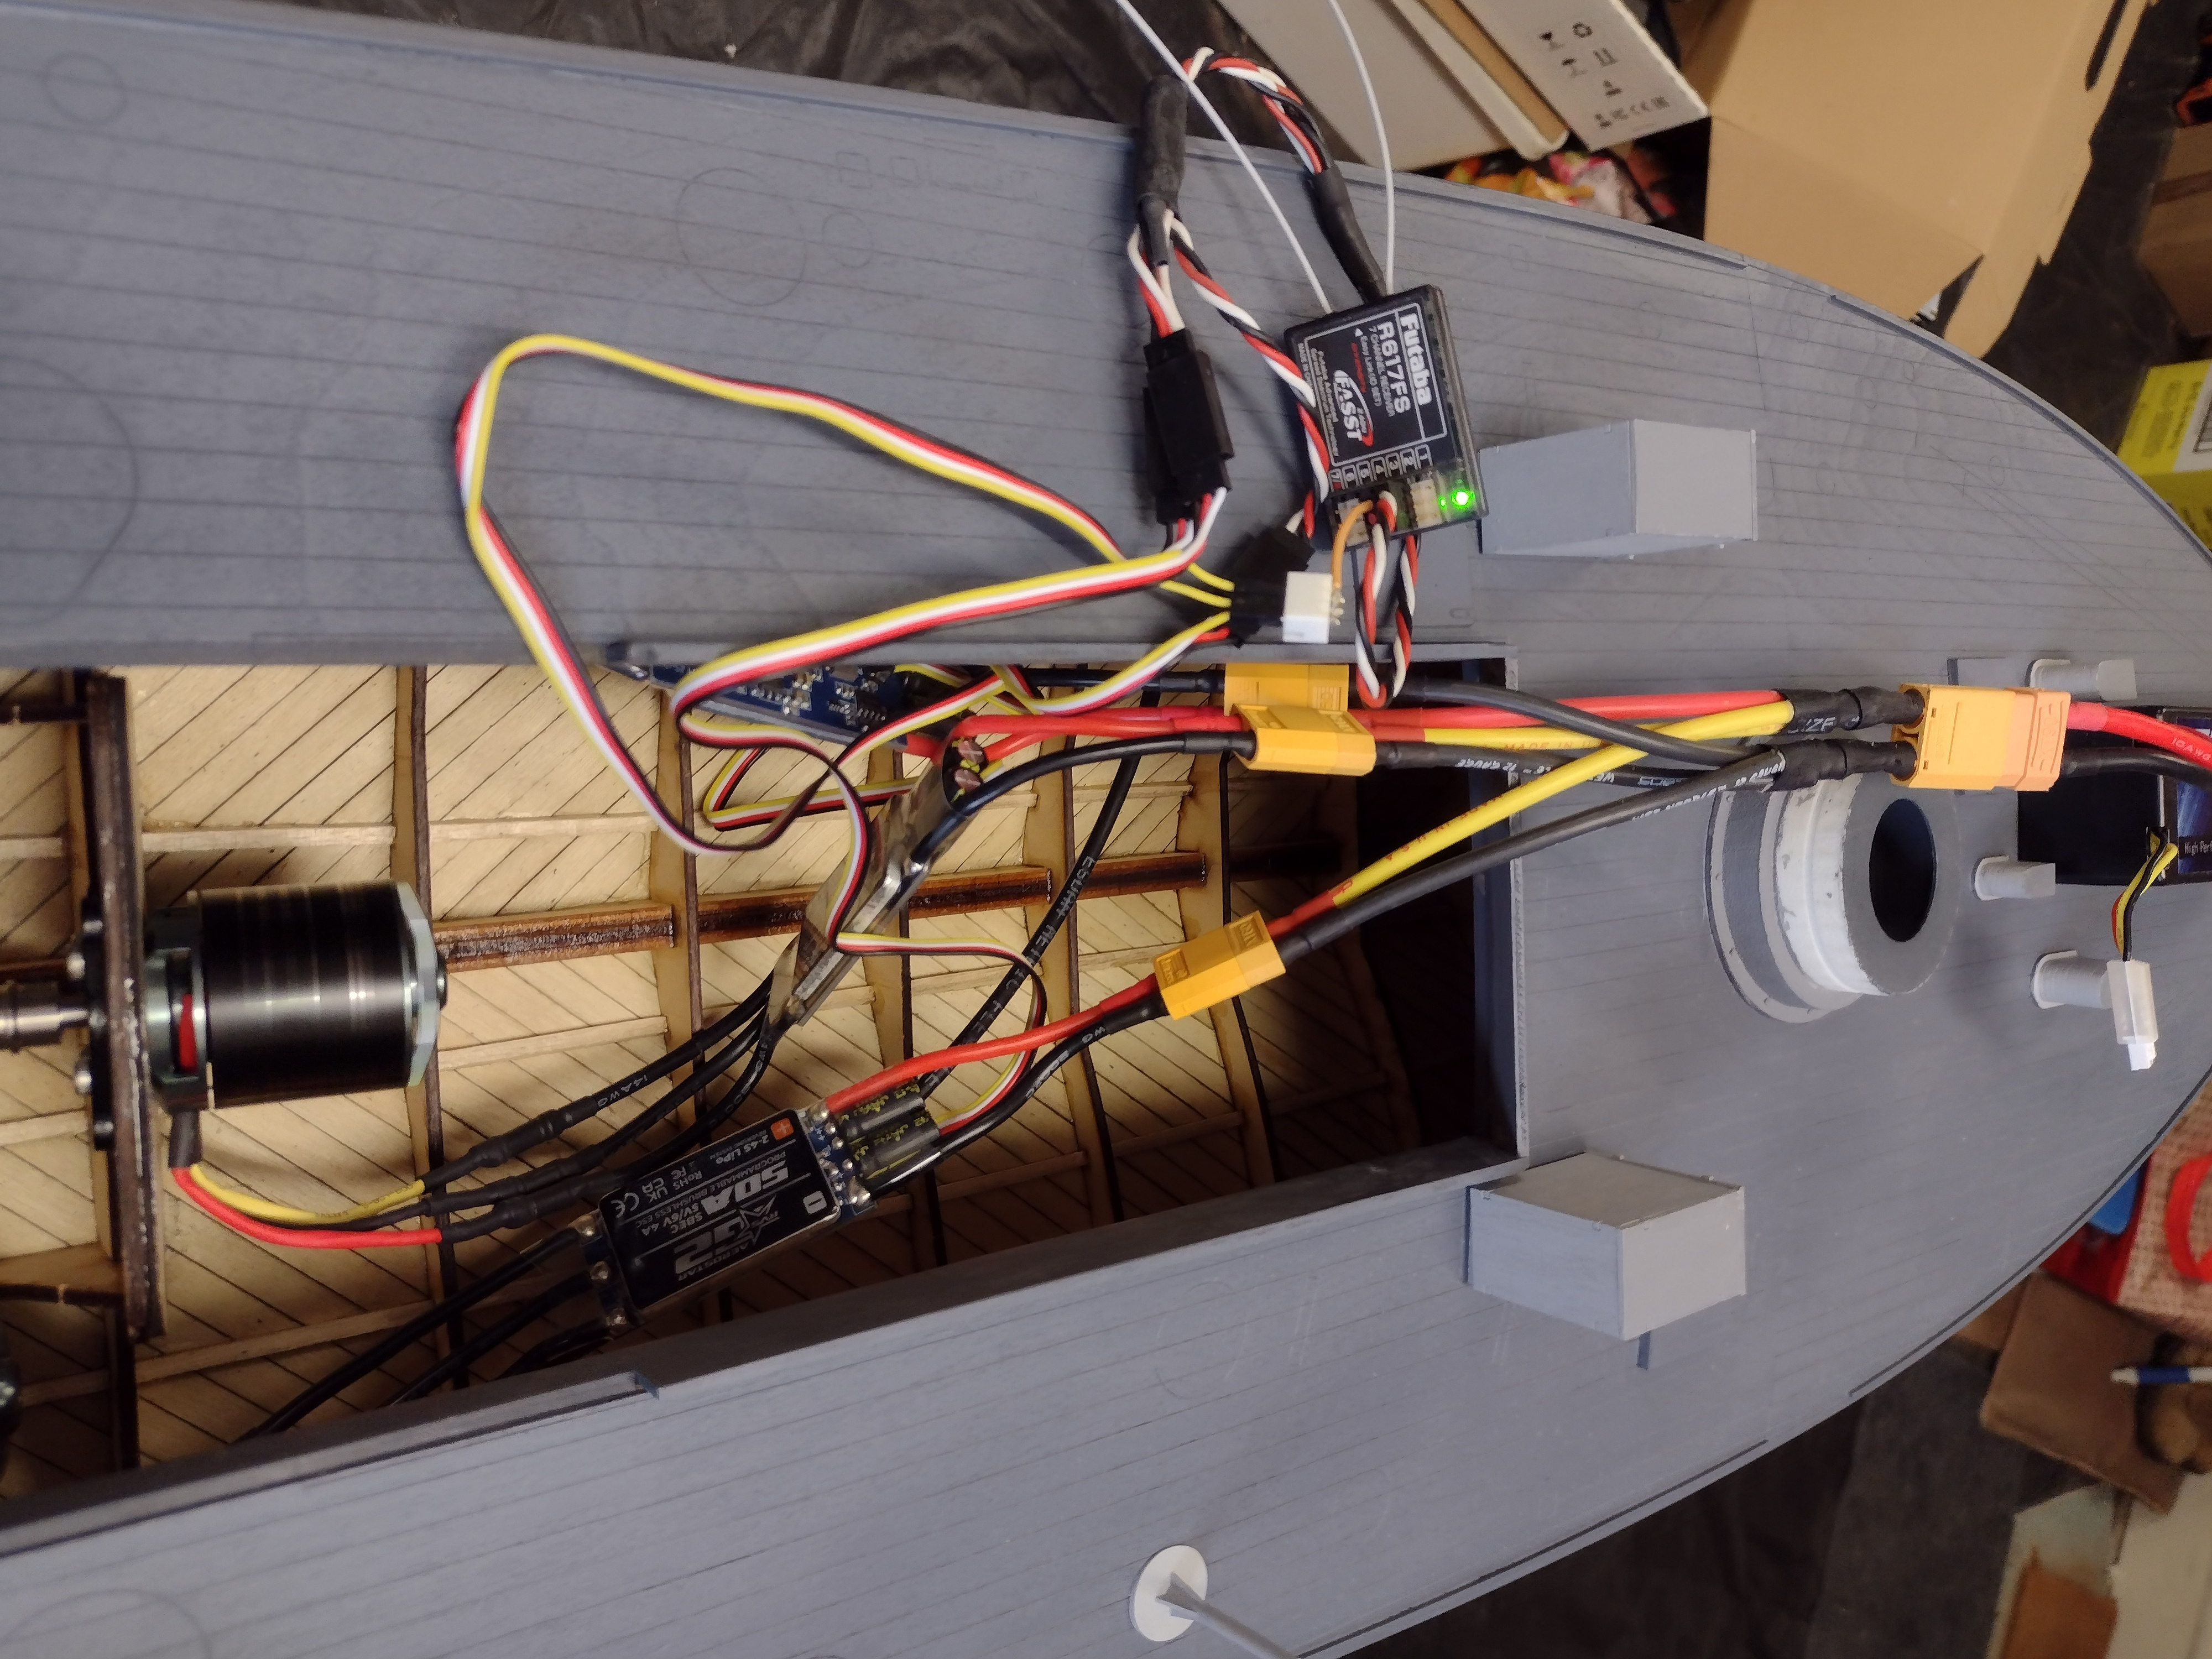
I am trialing a single 7200 mAH 120C battery (so seemingly capable of hundreds of amps!), running all three 50Amp ESC's and three Motors. I made up a three way heavy cable with an XT90 at the battery end and three XT60 connectors at the ESC end, I also needed a one to three servo cable for the speed channel and the ESC's have a separate input for forward/reverse so I need another one to three servo cable for that channel as well.'
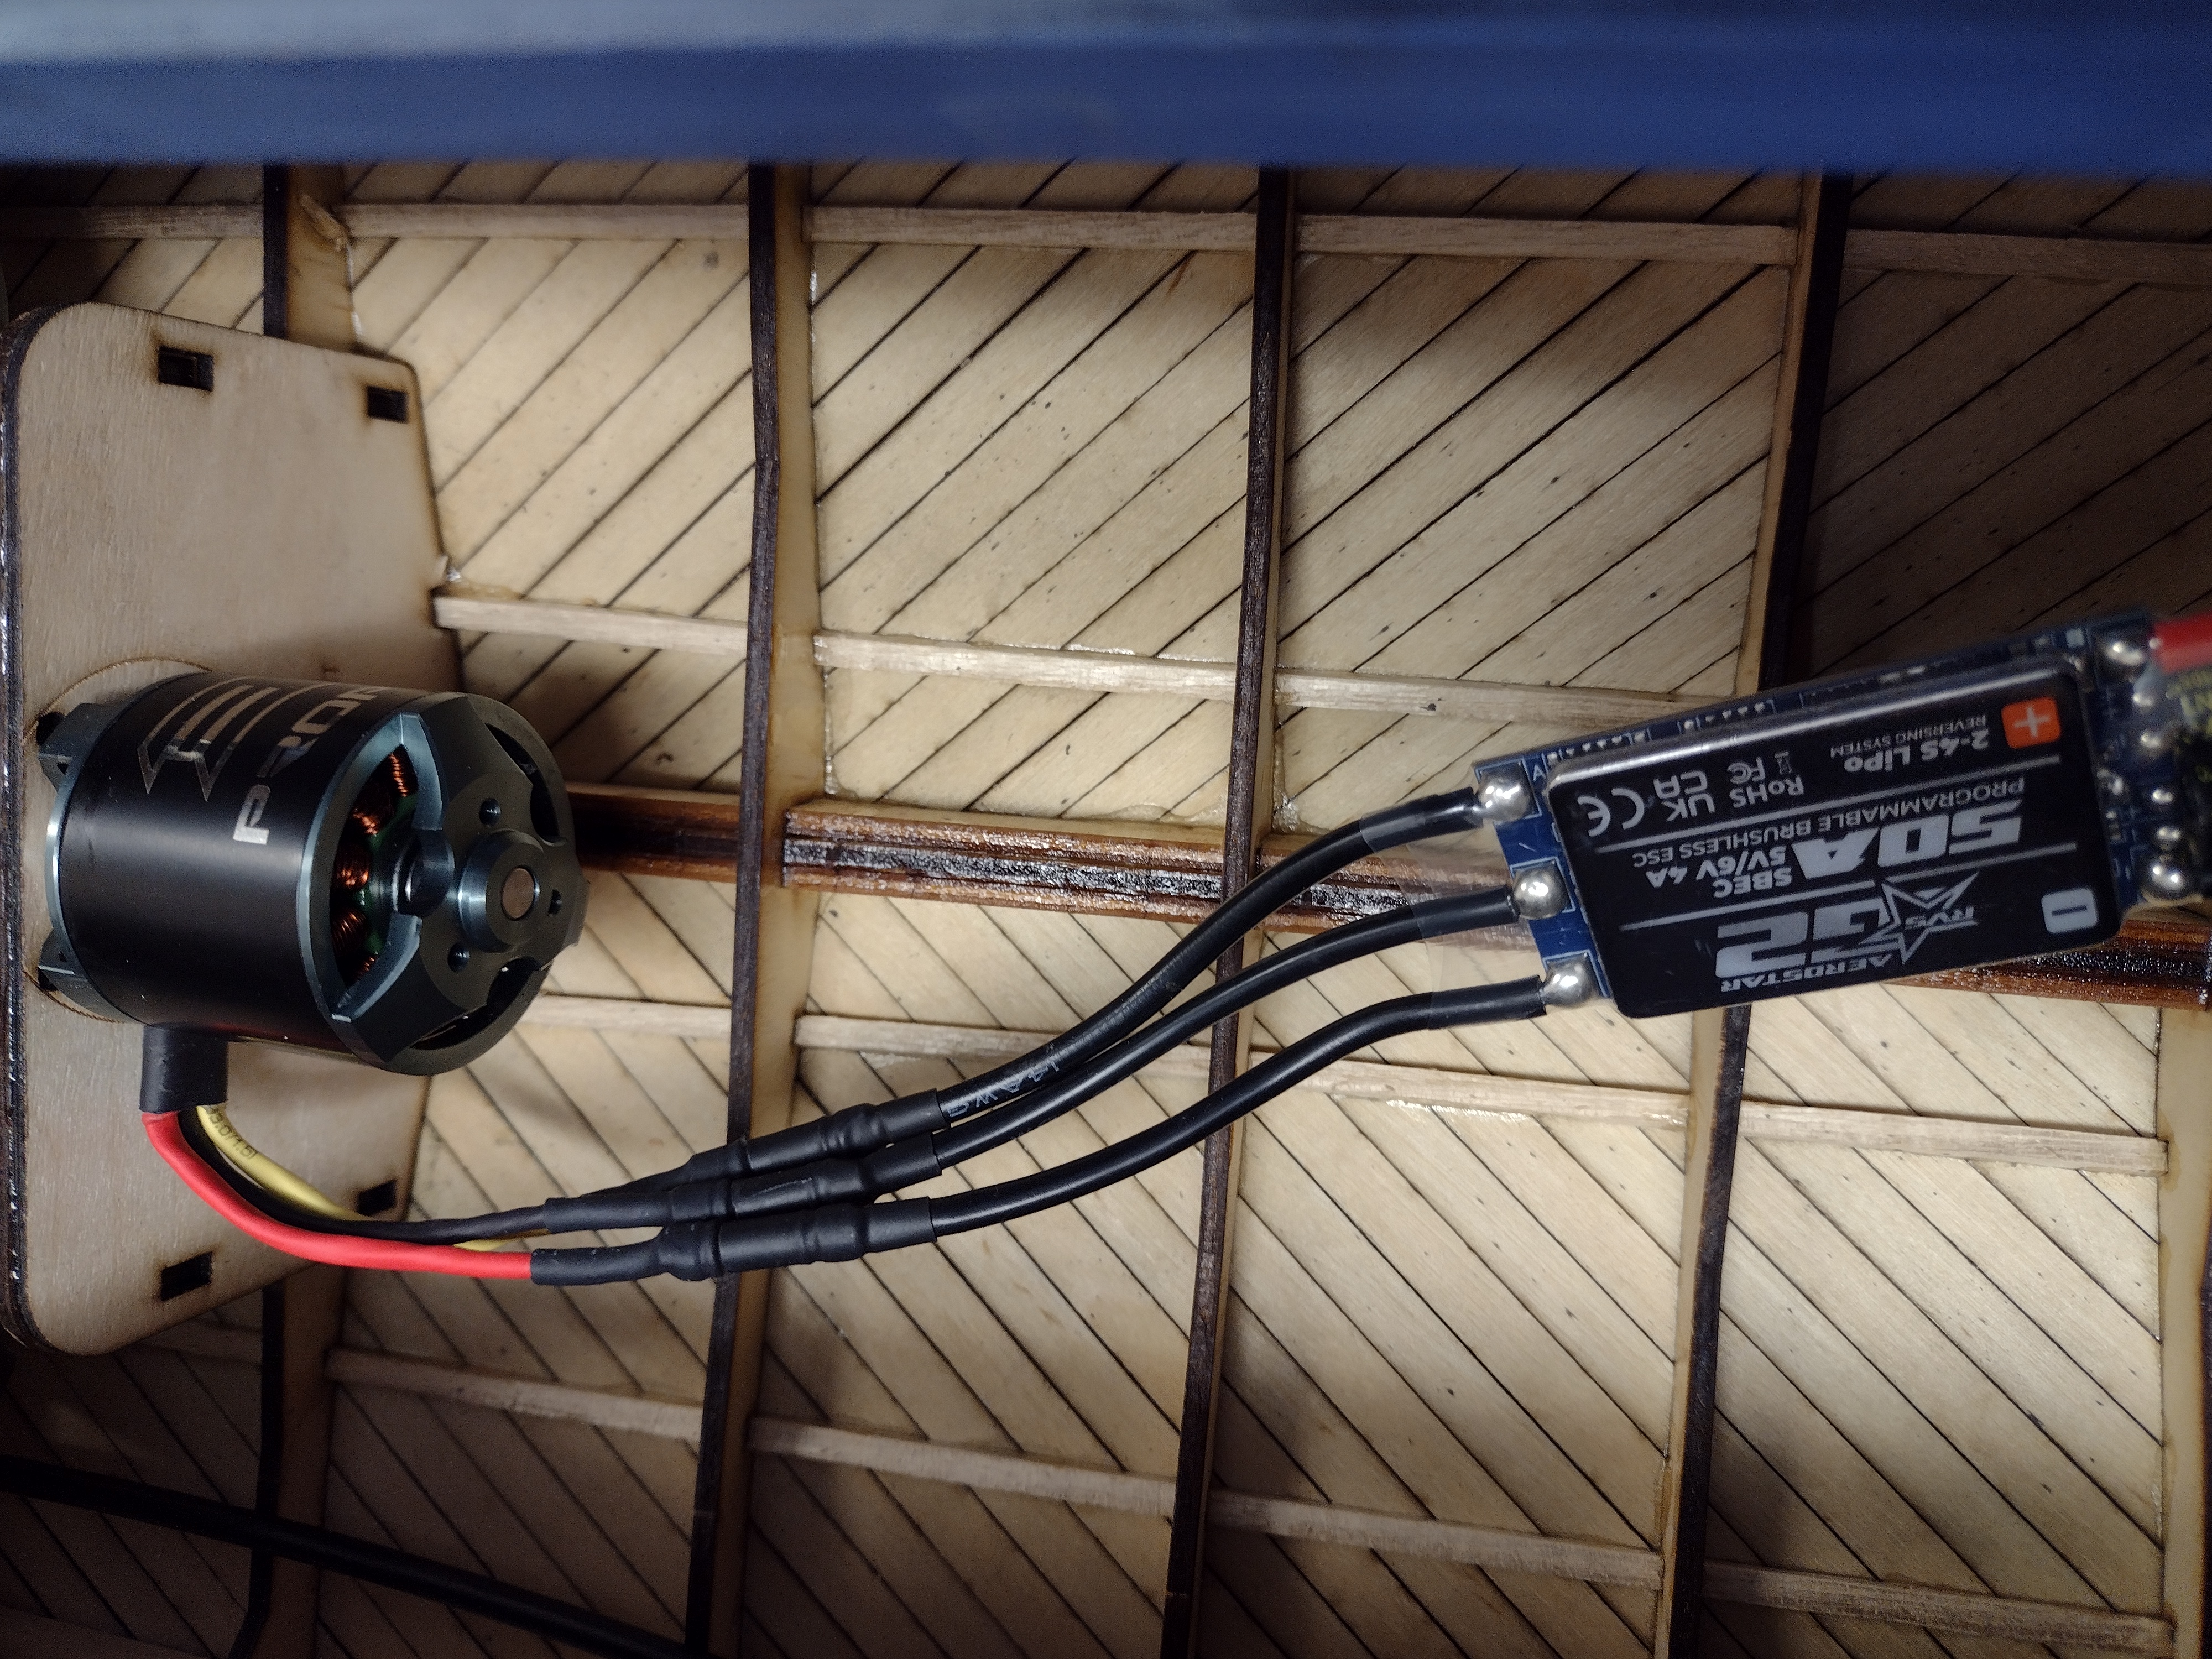
The new 50A Aerostar brushless ESC, I'm hoping these have enough grunt, the higher Amp versions were out of stock'.
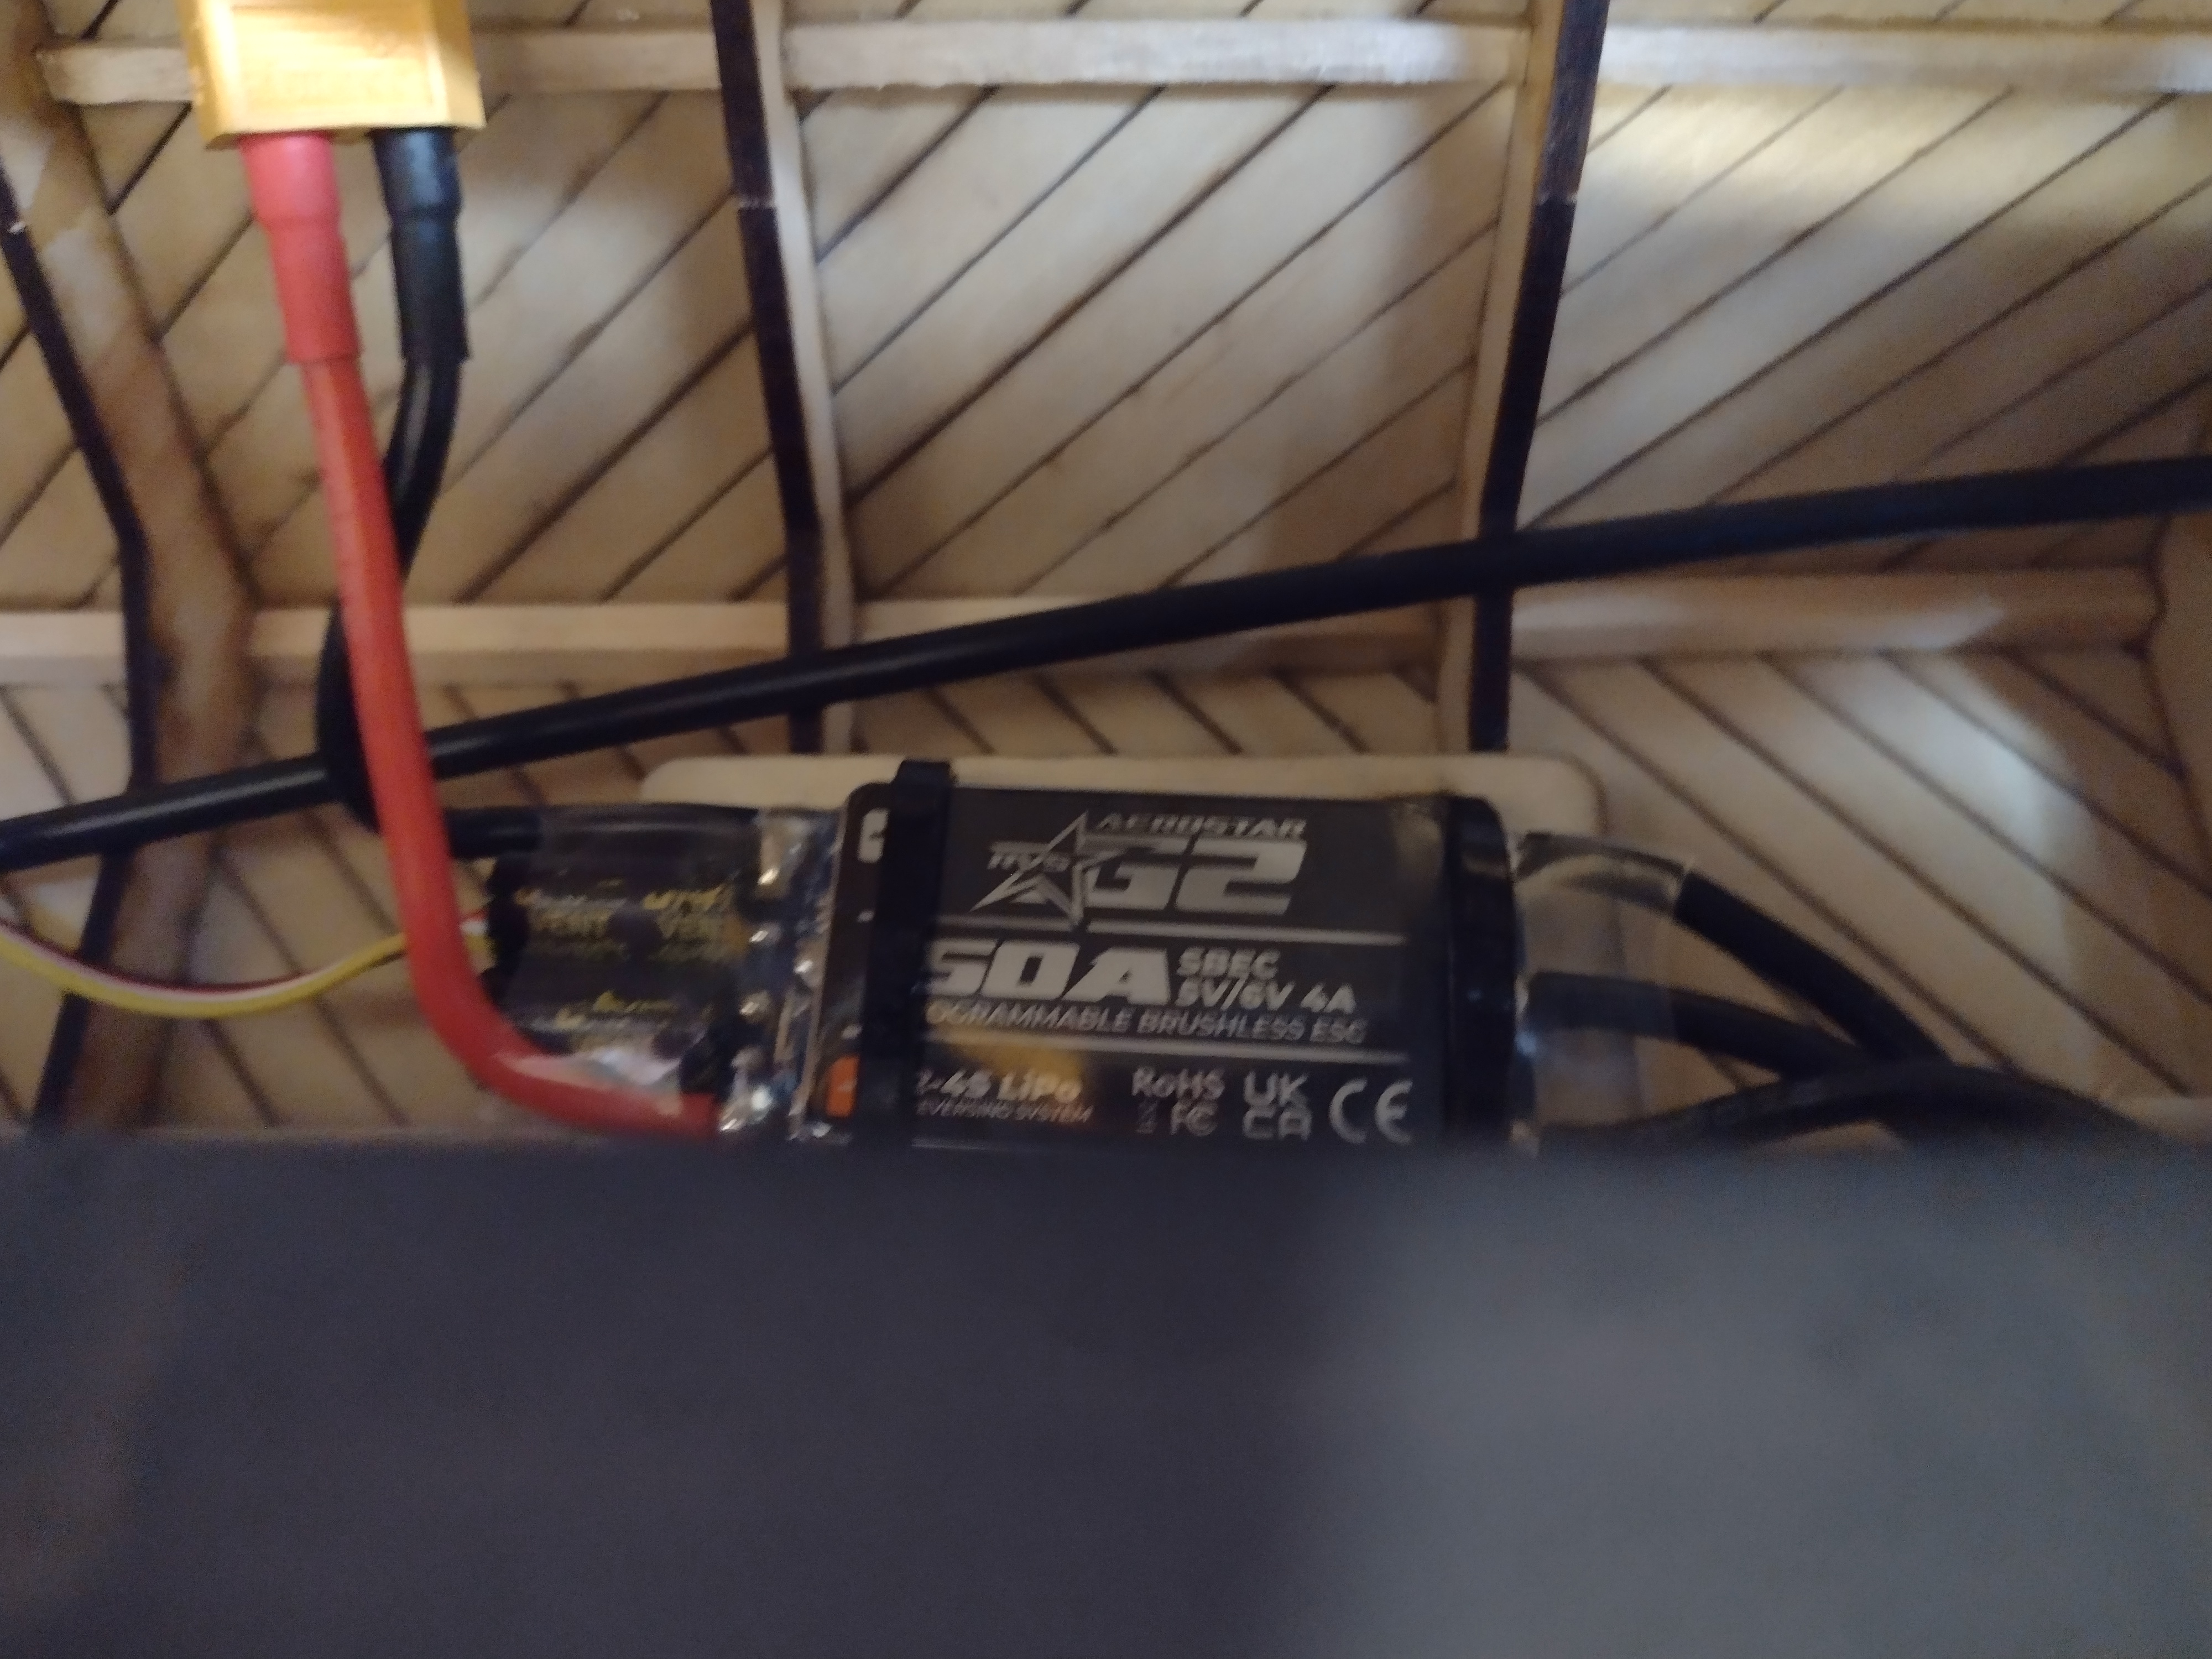
The ESC Mounted on the hull side, one on the port side and two on the stbd side.
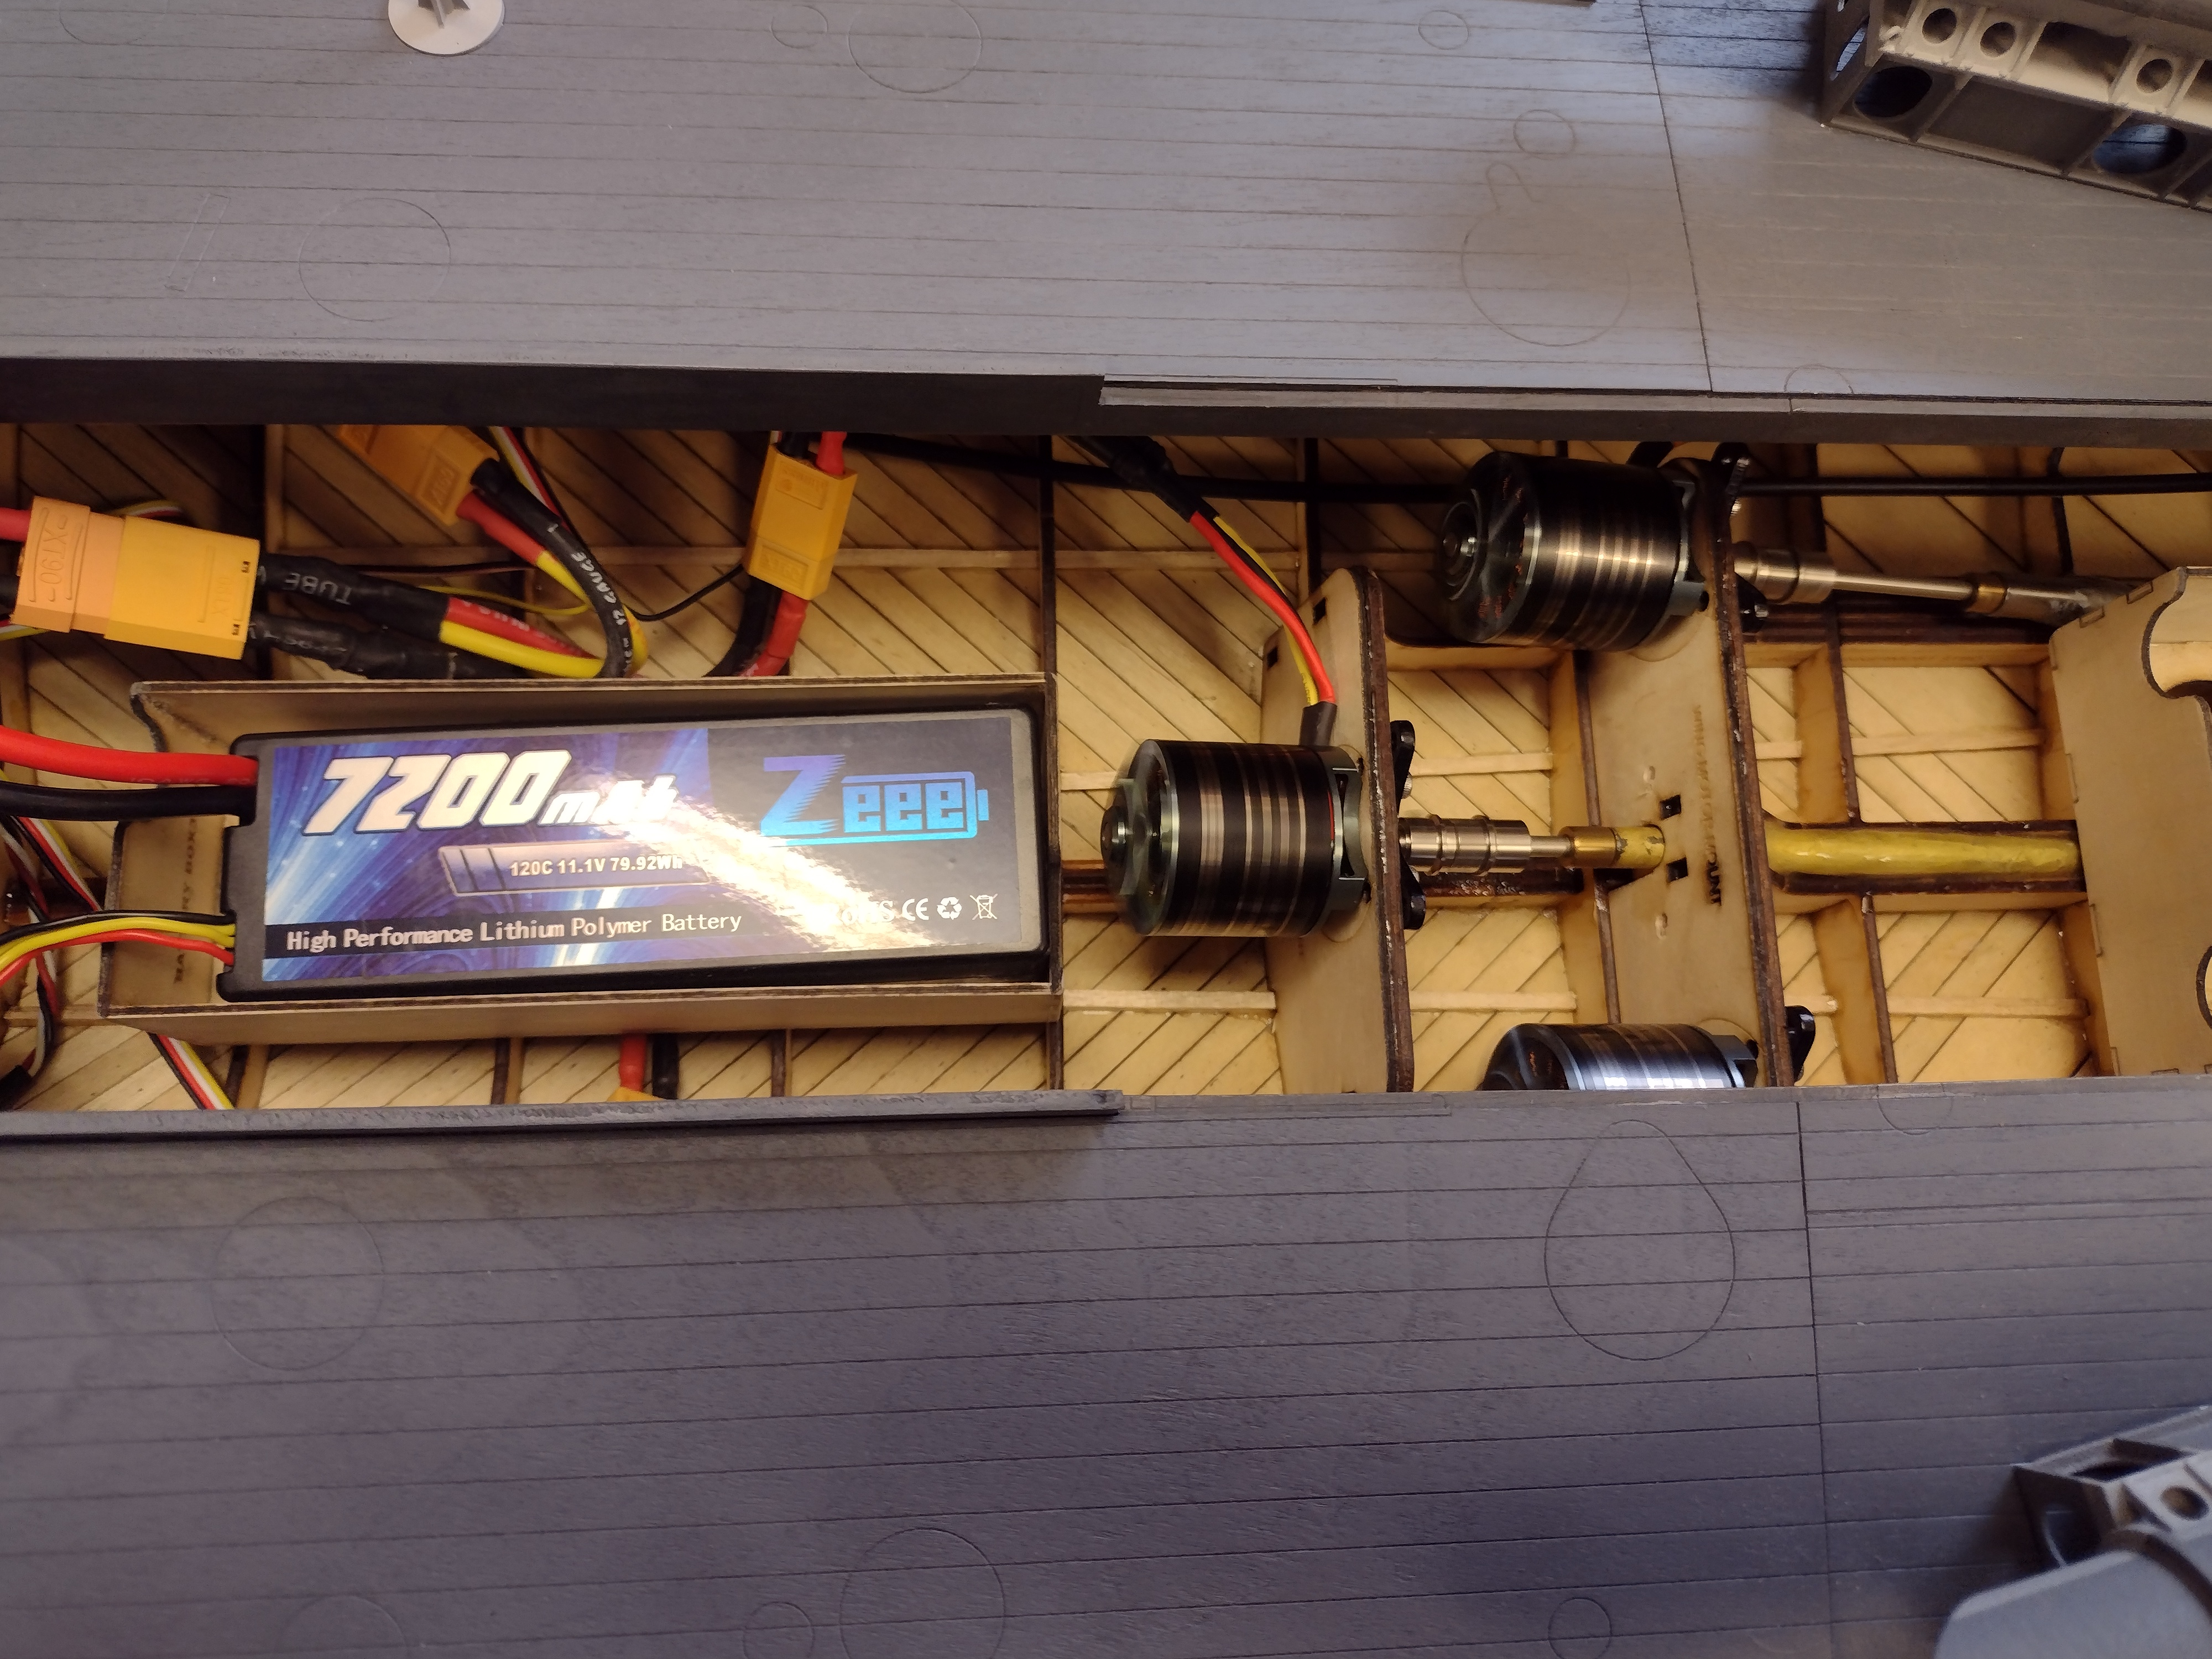
The new single battery box fitted, forward of the motors and all the wiring tidied up. I have put another double battery box at the rear, just in case my single battery idea is disappointing or in case I need to add some weight in the rear!
With a single battery the ESC's all fire up at the same time (when the single XT90 connector is plugged into the battery), unlike when you have three batteries that are plugged in separately, so you don't need the circuitry that I designed to isolate and separate the ESC signals. If I do move to three individual batteries I will need two of those circuits (see the Schnellboot electrics page), as these Aerostar ESC's each have an extra wire for forward / reverse that plugs into a separate receiver channel, This is a great idea as it means that forward and reverse have a full range of throttle stick movement on the transmitter and the forward/reverse can be activated by an unused lever, I currently have it on channel 4 which is the left / right action of the throttle on channel 3, so up/down is speed and left/right is rev/forward with the default as forward. Or it can be operated by any unused switch on the transmitter.
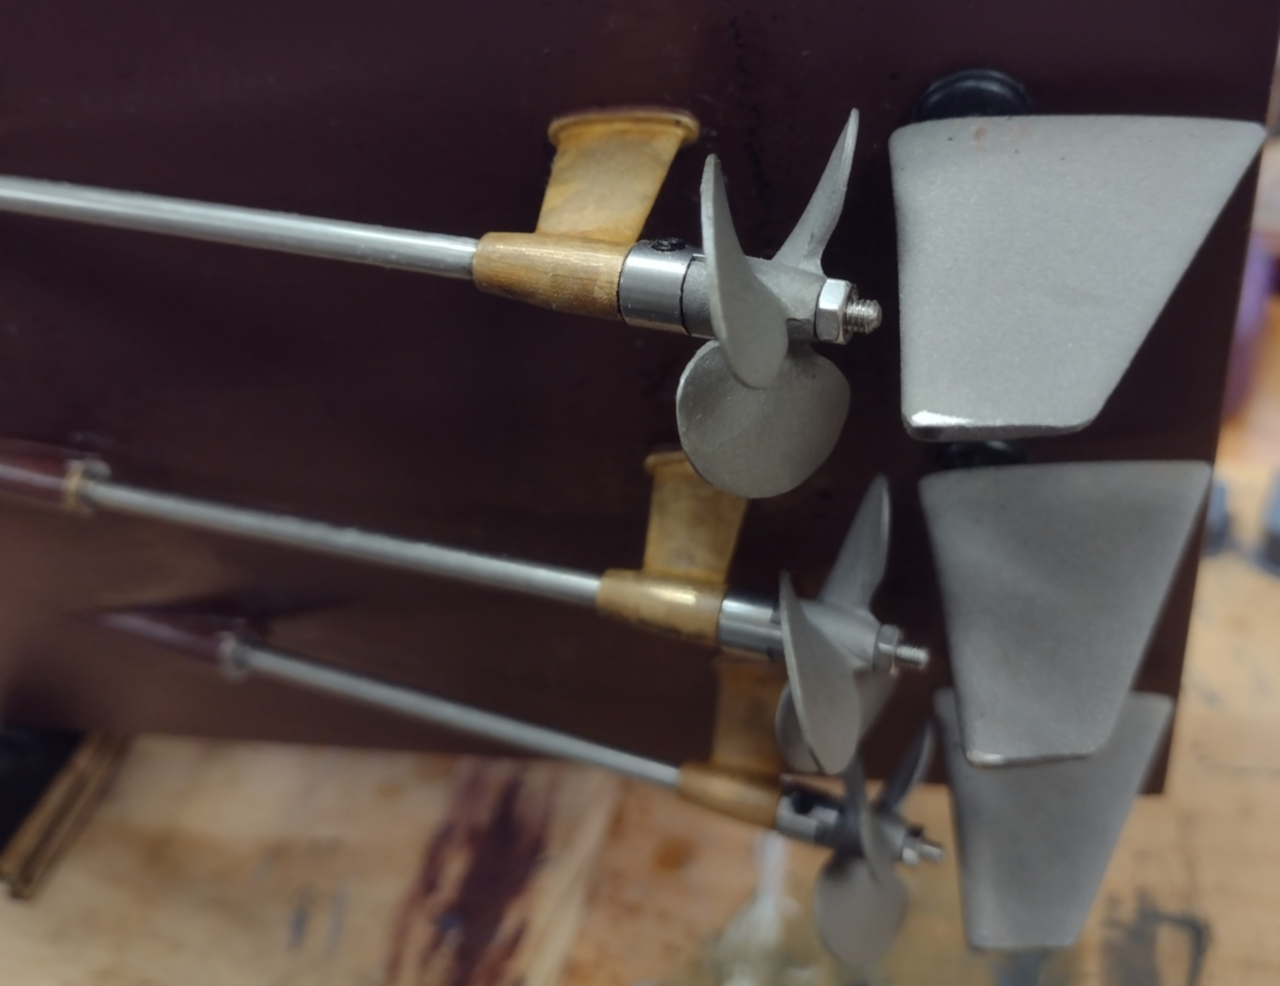
The new 3D printed stainless steel props and rudders and the new 3D printed sintered bronze rear struts!
The Vosper 1st launch, this is after a successful first test (video coming) with an 11.1V 3S battery and then updated to a 14.4V battery. The boat started making some not nice noises and I had to slow it down and return to the dock, to find that one of the struts has partially seized.
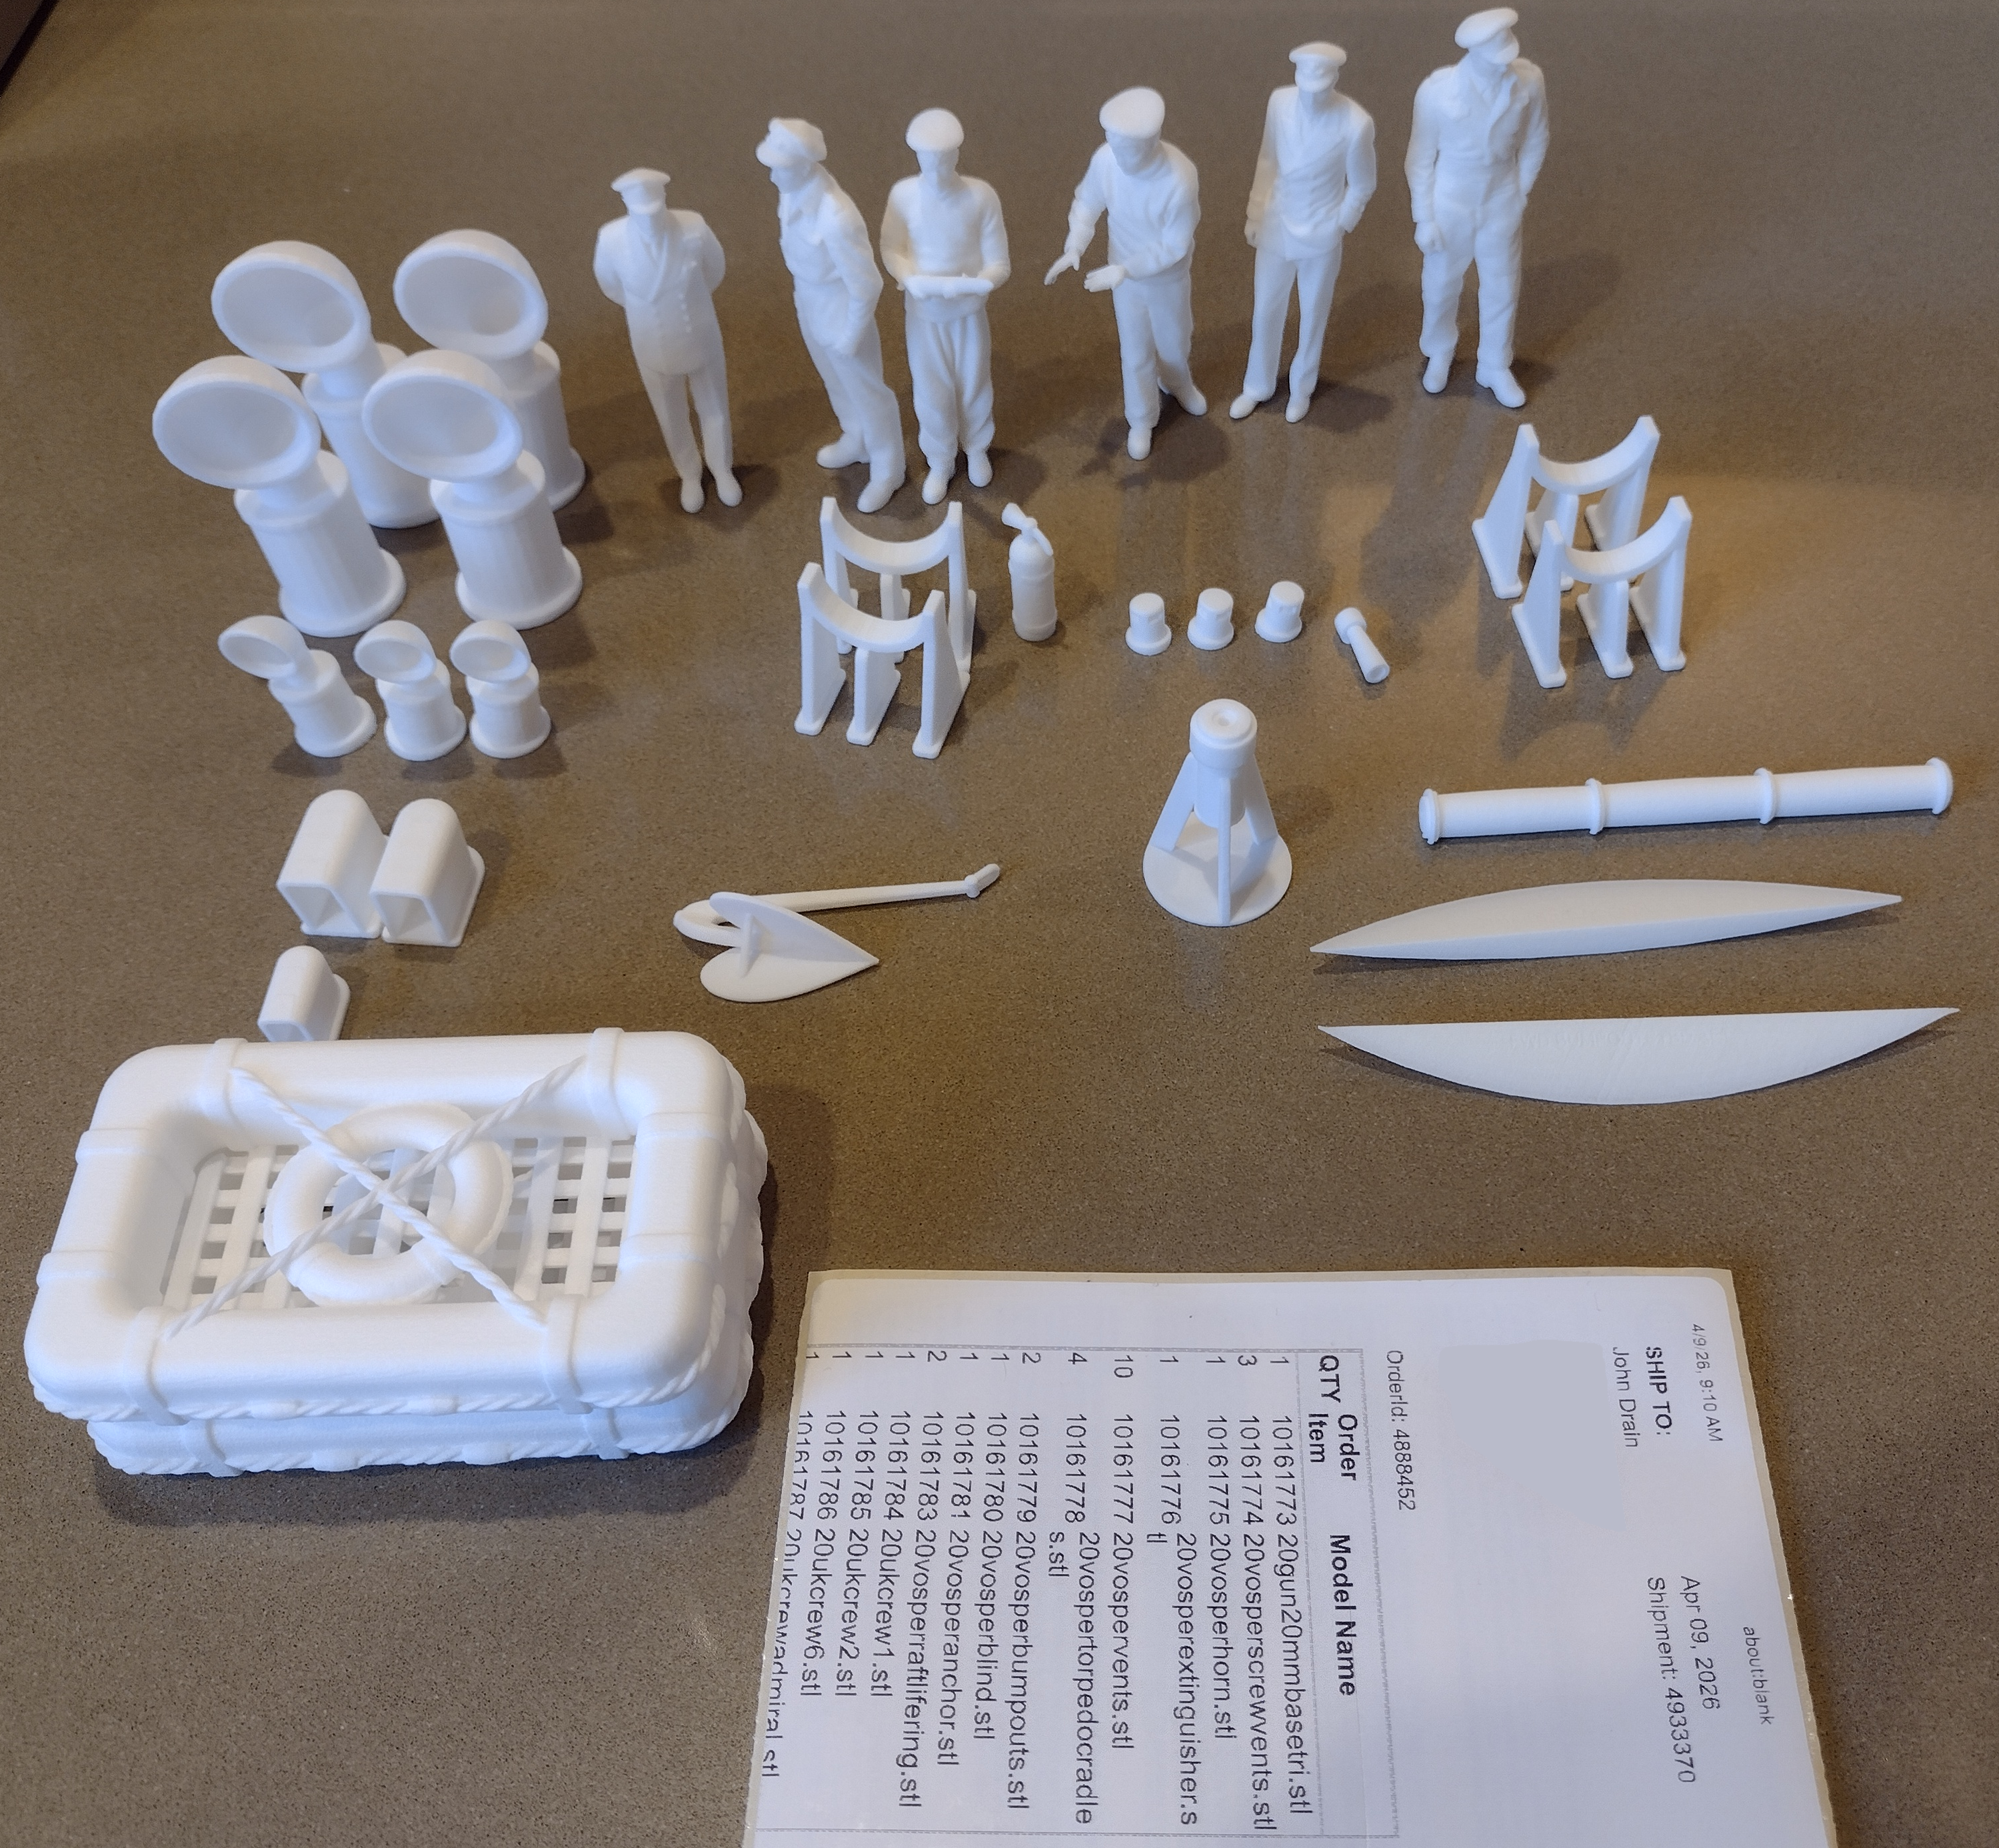
The new vosper bits and it's UK crew, that I just received from Shapeways, a couple of little issues but all usable and all updated.