German S-100 Class Schnellboot (Fast Boat)
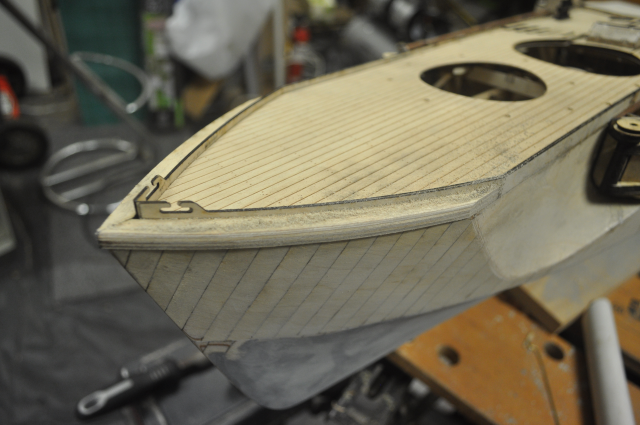
The SBoot Foredeck (or Forecastle, Fo'c'sle, or, Vorderdeck, in German)
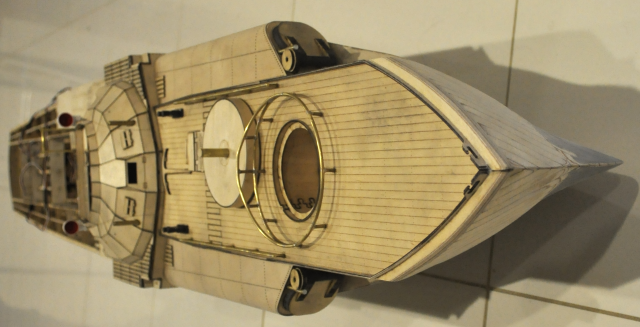
There are two decks on this beast, one at the front (the foredeck) and a much larger one at the rear ( the aftdeck), I decided that they should both look planked as I have one photo that shows the aft deck planked, however this photo is of a boat that was almost certainly re-fitted after the war as many of these boats were. I also have a photo with a comment written on it stating that the foredeck was "canvas covered".
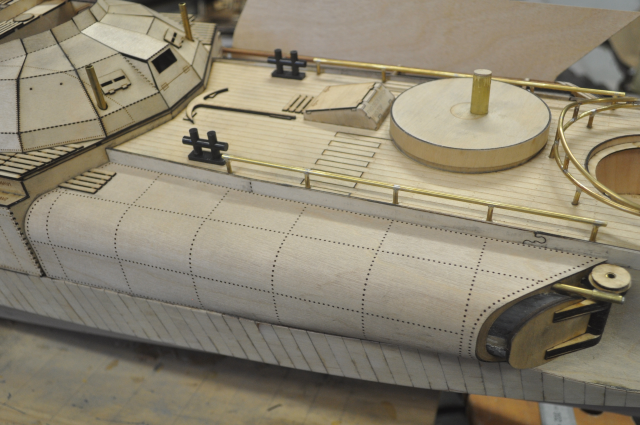
The foredeck on the model has two layers, a sub layer on which I have marked all the fitting details and the top etch planked layer which I haven't marked as much because, like the aft deck, you may not want to fit it out the same as me.
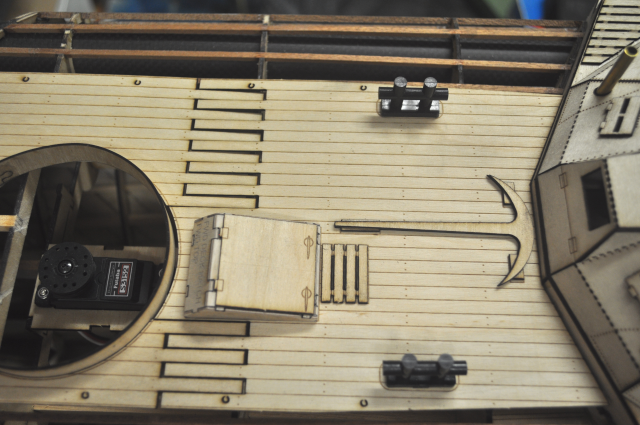
There are a number of deck cleats and bollards mounted across the foredeck, mostly for the anchor ropes.
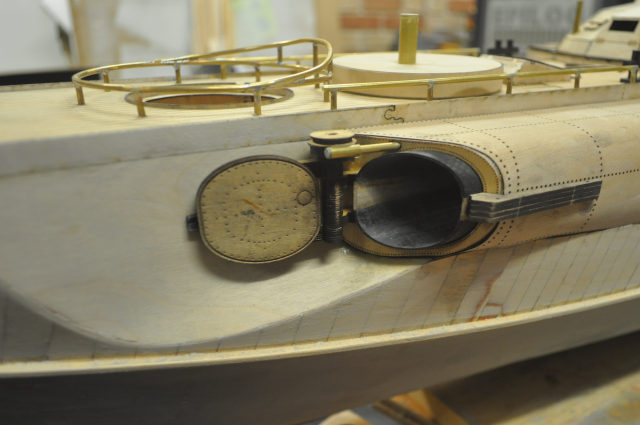
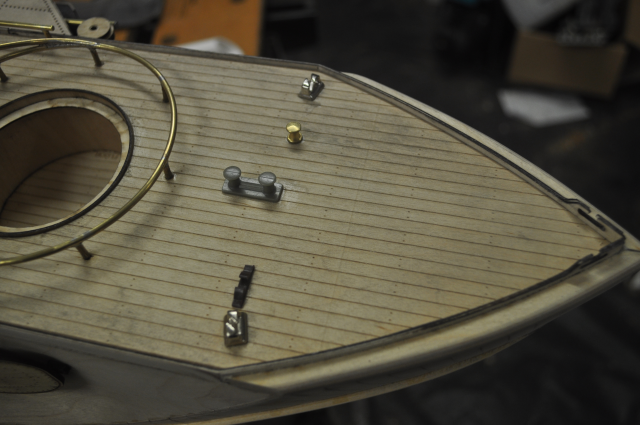
The port door lock fitted, these don't lock, they are only for show!

The starboard door lock fitted.
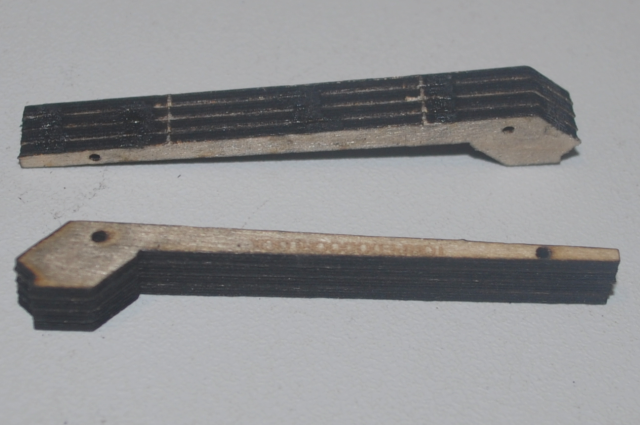
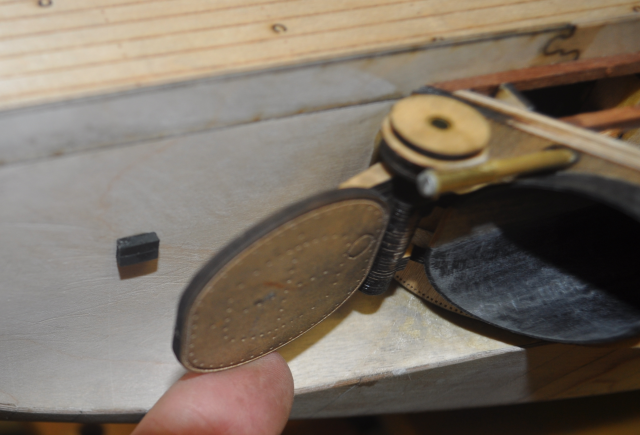
The torpedo door lock, made up of 4 layers of 2mm ply. The holes are used to line the pieces up.
The starboard torpedo tube covering finished and the port covering started. I totally screwed the first attempt at this as I didn't pre bend it, so I had to break it all off, sand it and start again. It's tricky as it tucks under at the forward end.
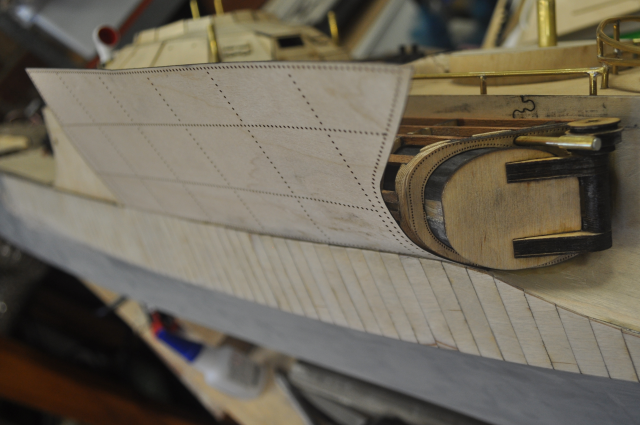
The torpedo tube covering starts at the bottom, I pre bent this with water and baking in the oven.
The forward gun depression rail and grab rails fitted.
A couple of bits of neopreen rubber act as a bumper for the torpedo door.
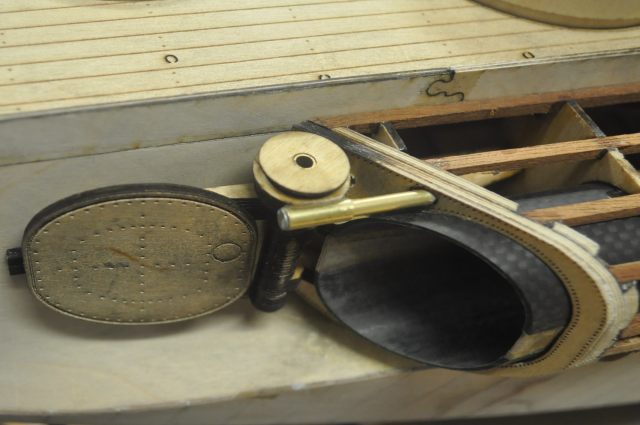
A couple of pieces of brass tubing and a nail head make up the torpedo door worm drive.
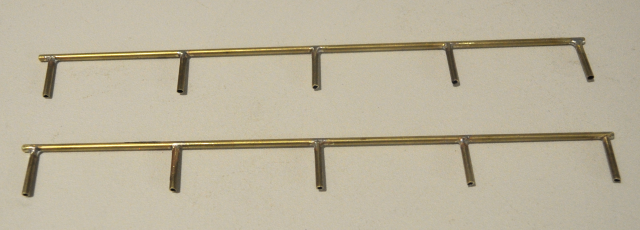
Port and Starboard foreward grab rails.
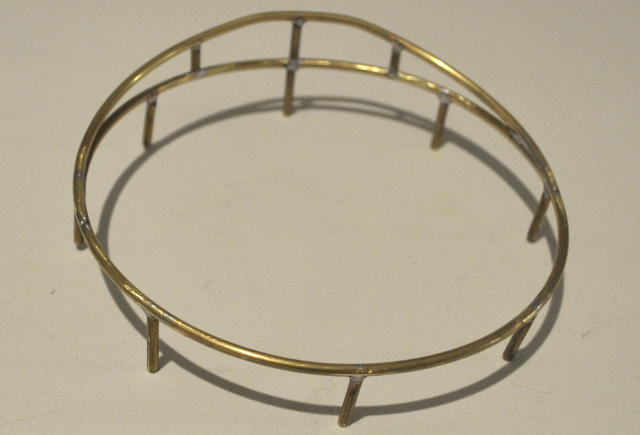
Foreward Canon depression rail made up from 2mm brass tubing bent around a coffee jar and 12mm (1/2") legs soldered on using the foredeck as a template, the raised section at the rear is to prevent the forward canon from accidentally shooting at the bridge as it rotates around.
The forepeak sections fitted and sanded to a radius.
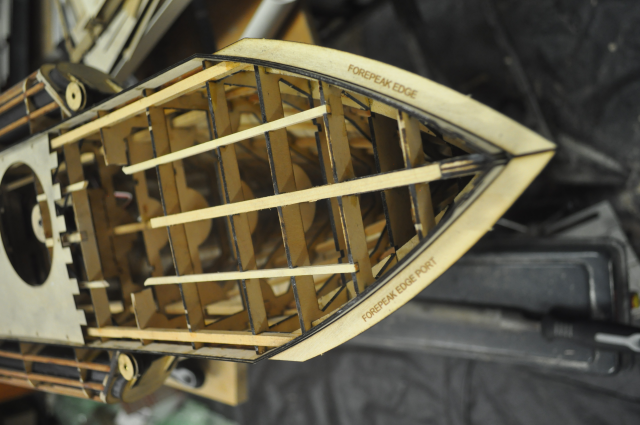
The forepeak sections fitted, this is three layers of 2mm birch ply.
Before we cover the foredeck we need to make the torpedo doors operational, as it would be more difficult to access once the deck covering is on.

Video of torpedo doors operating ( I need to slow them down)
The torpedo doors are operated by one servo and two rubber drive belts, because the doors are on opposite sides of the boat, one of the drive belts needs to be crossed over so that both doors open and close together, otherwise one would open while the other would close. I made up a three level capstan to mount on the servo so that the starboard "crossed over" drive belt could leave at the bottom level slot on one side of the capstan and arrive at the top level slot on the opposite side, then the drive belt doesn't rub against itself where it crosses. the port side belt runs in the middle slot. I bought a set of video recorder neoprene drive belts of all sizes from the local electronics store (Jaycar Electronics) the ones I used are 2mm square in profile, I needed to cut them and feed them around the capstan on the torpedo door assembly, through the holes in the torpedo door surround and around the servo capstan and then glue the two ends together somewhere in the middle with cyanoacrylate glue.
Another video from the front.
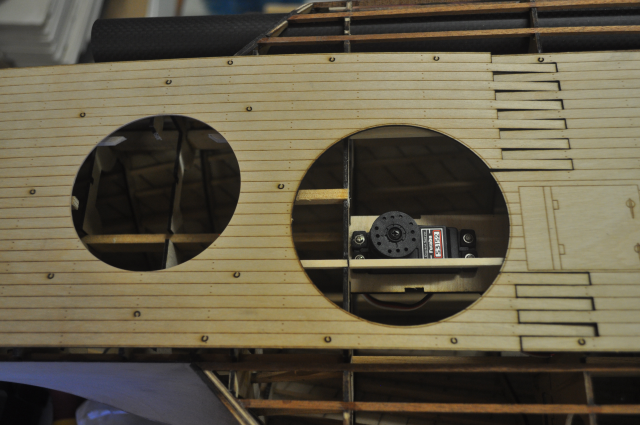
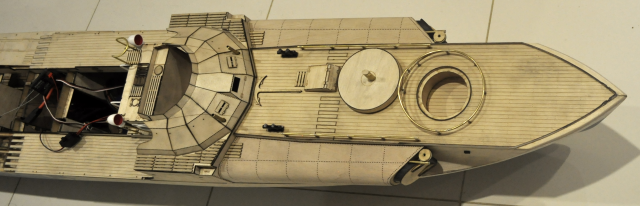
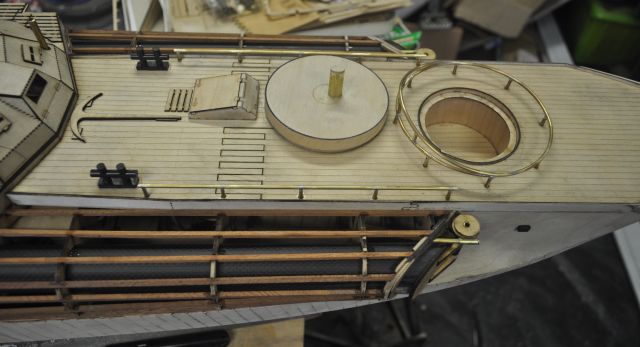
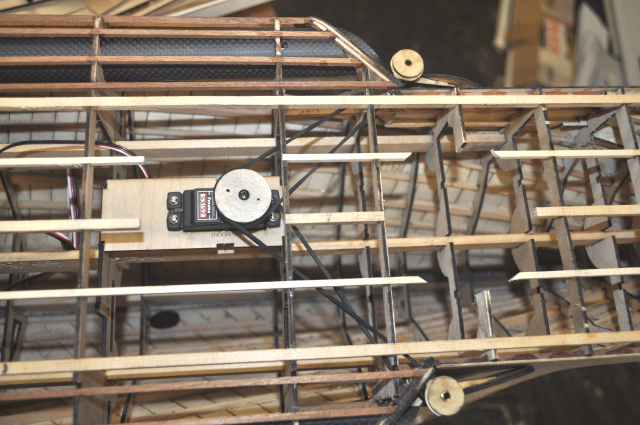
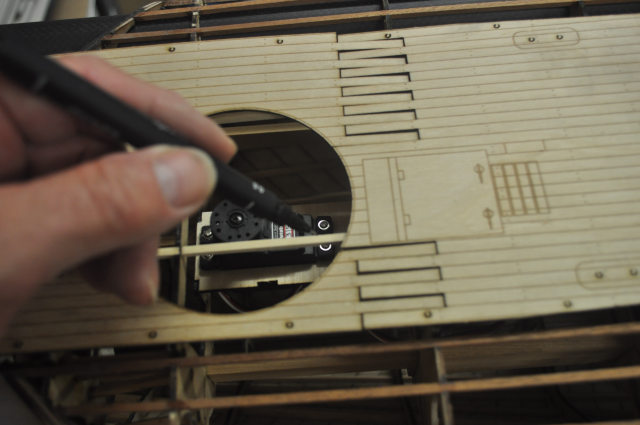
This shows the two main holes in the foredeck, the smaller left hole is for the forward gun tub and the larger right hole is covered by the removable gun cover and conveniently gives access to the torpedo door servo.
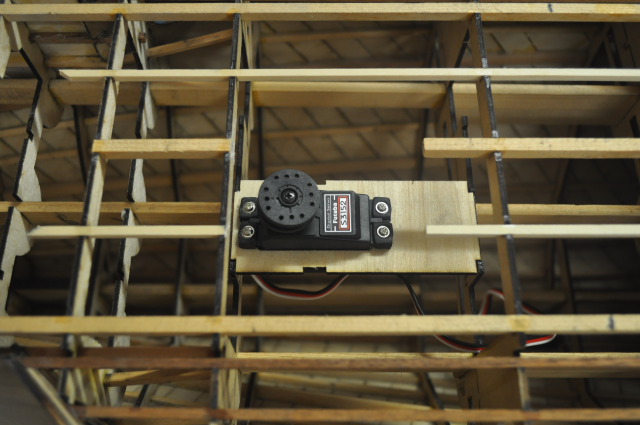
This shows the servo mount and the deck beams that have been removed to make access.
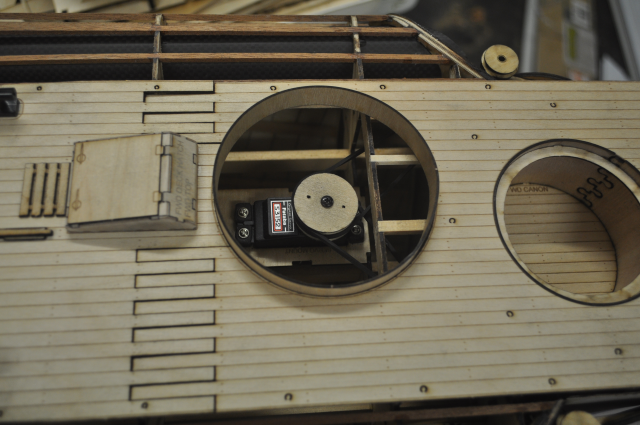
This shows the forward gun tub in place and a few other details.
Another view from the side.
I put the foredeck temporarily in place in order to mark the deck beams so that I could cut them out at the right places.
The deck beams cut out for the gun tub.

The forward gun tub temporarily in place, I even planked the floor of this.
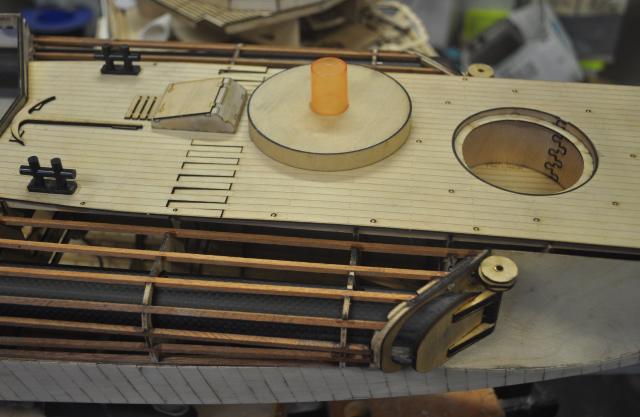
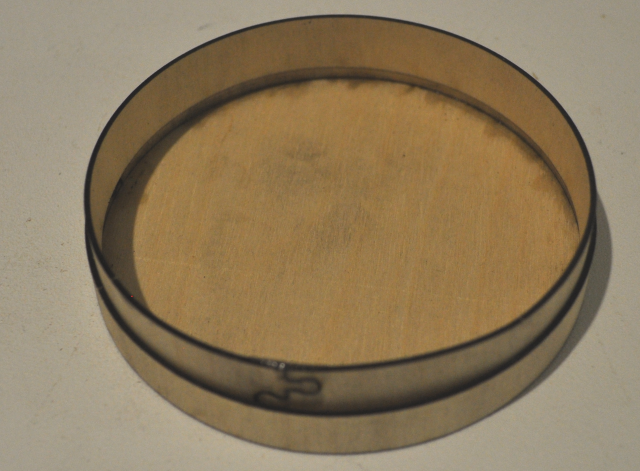
This shows the removeable forward gun cover which fits over a circular upstand to keep it in place during operation.
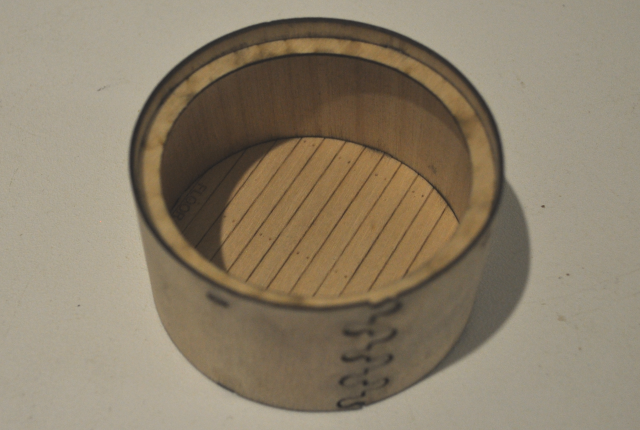
The forward gun tub made up, again I made this by wrapping the outer wall around a drink can and holding it in place with rubber bands, I soaked it in hot water for an hour or so and then baked it in the oven for 1/2 an hour or so at about 50 degrees C (120 deg F).
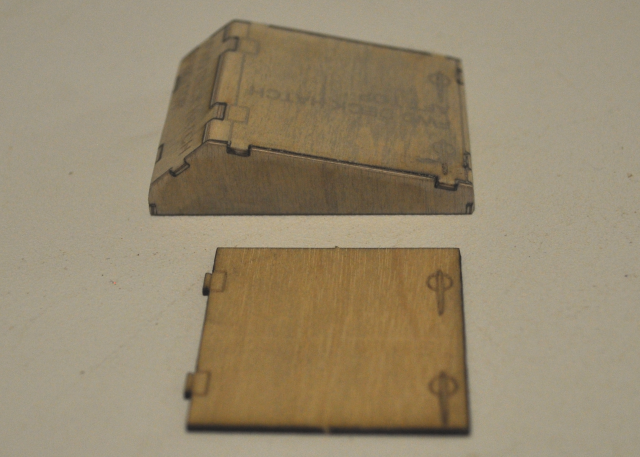
This shows the forward deck hatch assembly, if you wanted to you could cut out the hatch hole and glue the hatch cover in place in the open position. This would have been raised and angled to the rear to keep the north sea out.
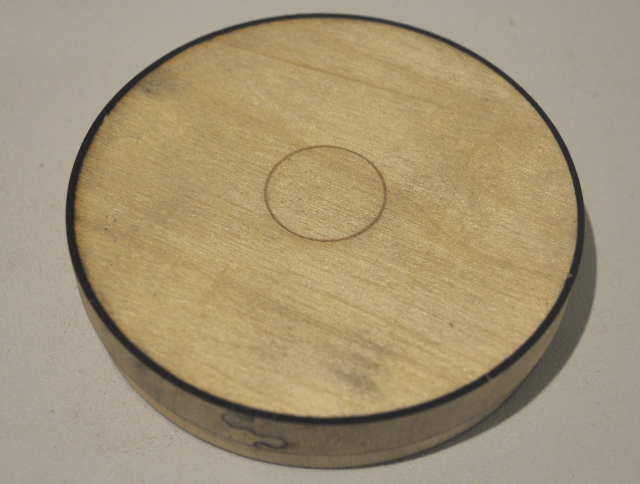
This photo shows the removeable gun cover with the circular upstand fitted inside it, the upstand will be glued to the larger hole in the deck later, this upstand holds the removeable cover in place and prevents water from the foredeck getting into the hull below it. Again the outside circular parts can be wrapped around something about the same size with rubber bands, soaked in warm water for a while and then baked in the oven at around 50 deg C (120 deg F) or left to dry overnight.
A Glueing TIP
When using cyanoacrylate (a.k.a. superglue) on one of these end to end jigsaw joins, put the join together and lay it on a polythene plastic bag, put C.A. glue on the joint and fold the polythene bag over the top and push down on top with your finger. This pushes the cyanoacrylate into the joint crevices and sets almost instantly and you don't get glue all over your fingers. It's like magic!
The gun cover from above. This makes a very convenient access hatch to the torpedo door servo.