The SBoot Rudders and Struts
(for the German S-100 Class Schnellboot (Fast Boat))
For the 1/20th scale Schnellboot model I needed to make Struts for the main and wing propshafts as well as Rudders.
These need to be reproducible for other kit buyers so I decided to make them from laser cut acrylic and get them cast from Silicon Bronze the same way as the struts and rudders on Hull-2.
The Schnellboot is more complex however so it has taken me a while to complete these.
I bought some 2mm thick black acrylic sheet and cut the shapes out including some small holes for guy wires to keep them in line.
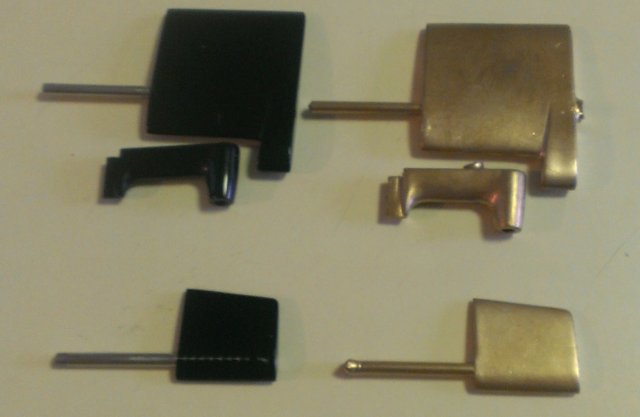
The picture below shows the rudders and main strut almost complete and I have used superglue to fill in some indentations after the first round of shaping with a file.
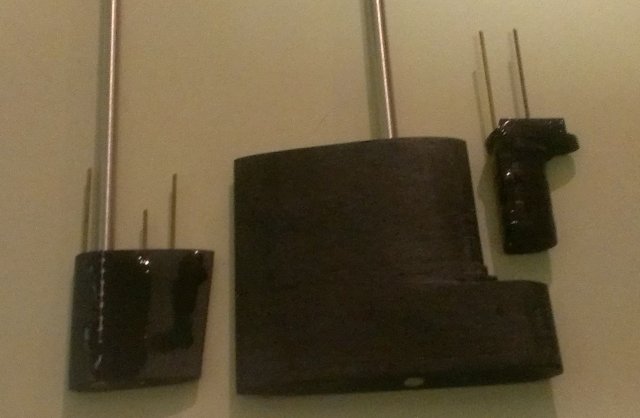
This is what they will look like, the main rudder is too big so I cut a piece off the bottom.
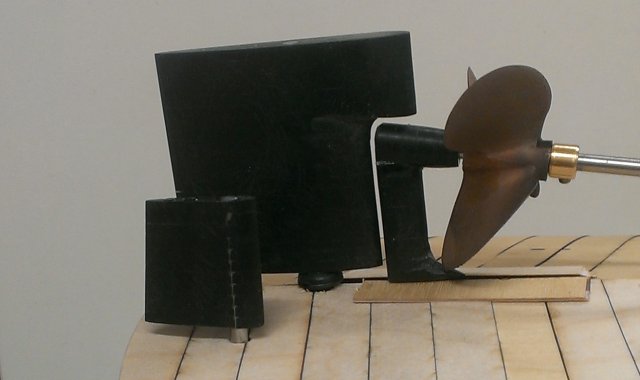
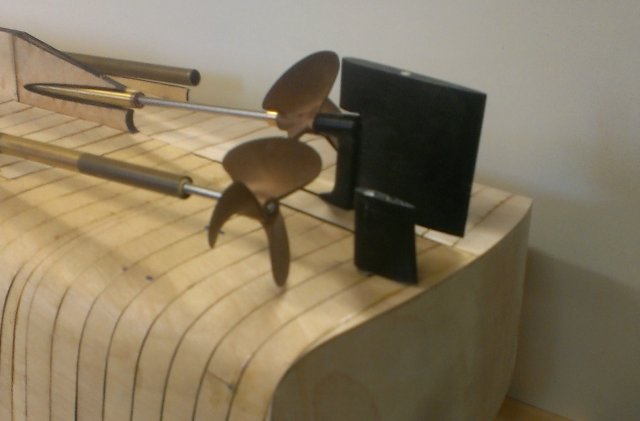
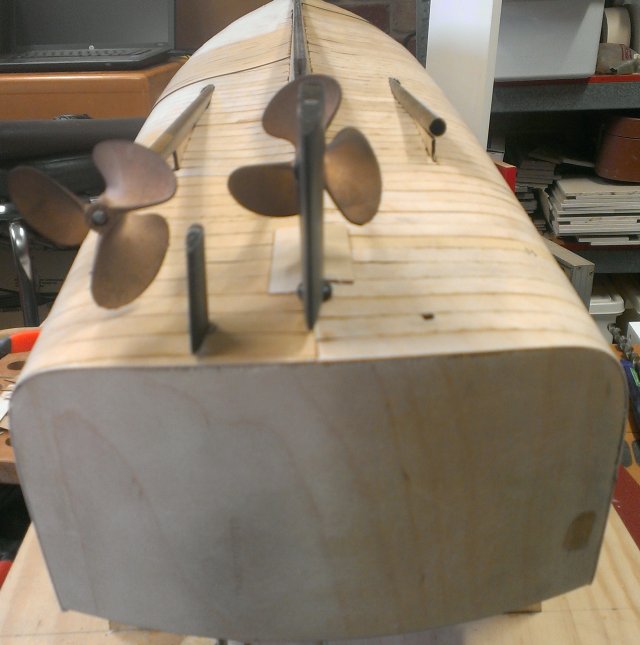
After much filing and polishing I had these cast from Silicon Bronze and apart from large "sprues" they came out great.
The main rudder is massive and heavy!
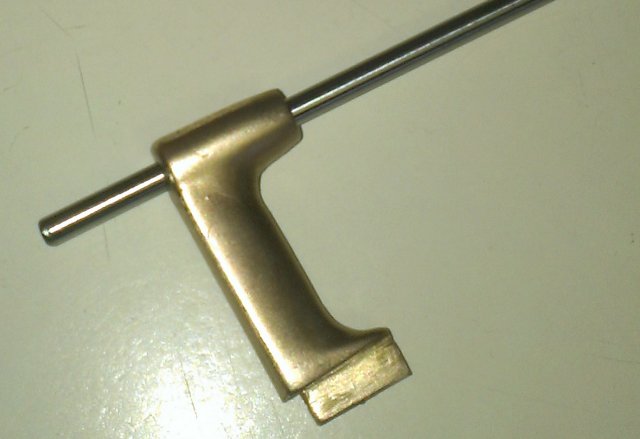
I drilled out the main strut to 4mm and fitted the propshaft and filed off the sprue. It could also be drilled out to 5/32" if preferred.
The Wing Struts:
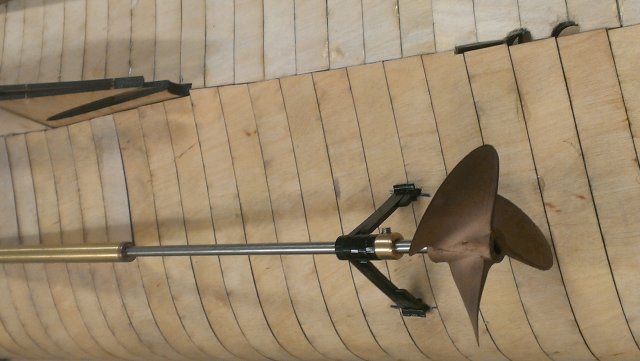
These caused me a lot of thought on how to make them until I came up with the idea of laser cutting them perpendicular to the propshaft.
I did a small test group of parts to see how it would work.
I then designed the complete set and again allowed for many small 0.6mm brass wires to hold the structure in line.
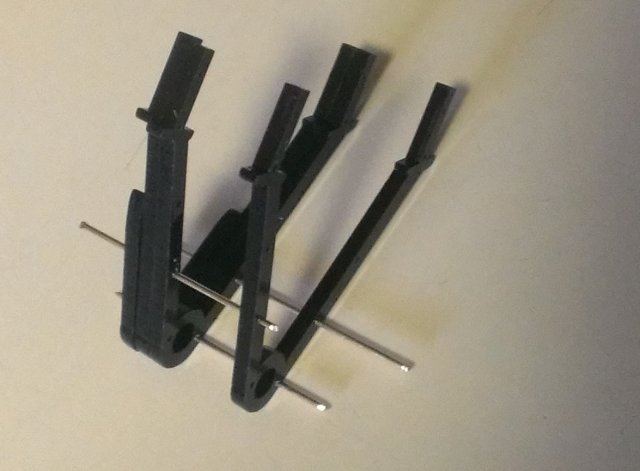
The complete strut. I need a left and right (port and starboard) version of these struts.
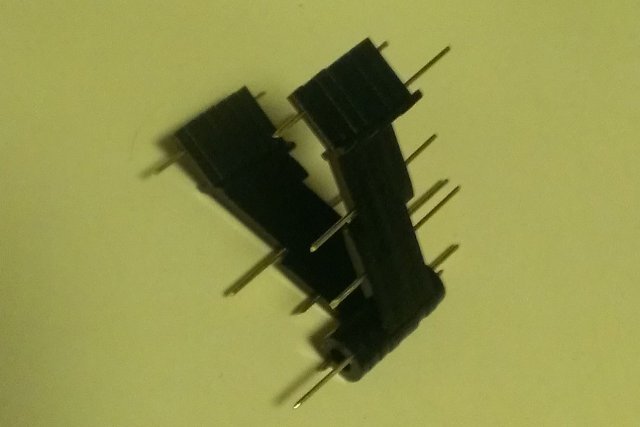
This is the two struts finished and polished ready for the casting process (May 2016)
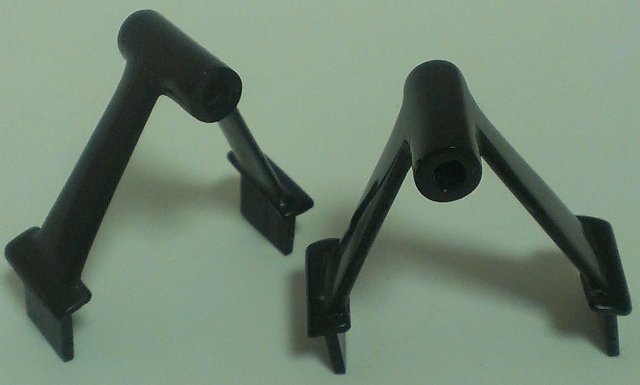
Whoohoo I got the cast struts back today (24th May 2016) and managed to do a bit of work on them as well.
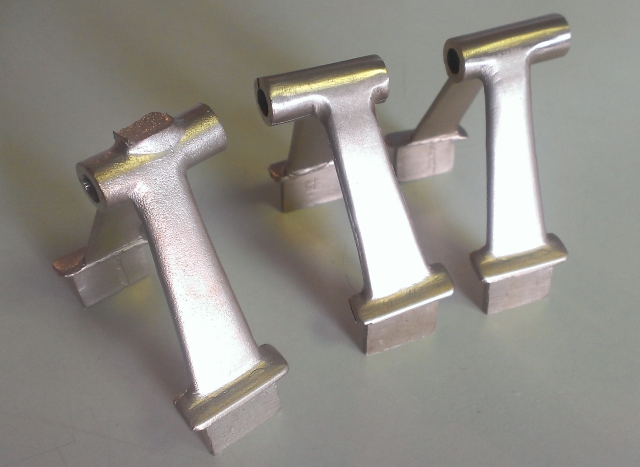
This picture shows a strut as received, there is a large casting "sprue" on the shaft boss which needs to be filed off as in the port and starboard struts on the right, I filed and then sanded with some 800 grit wet and dry emery paper. I also bored out the shaft holes to 4mm diameter.
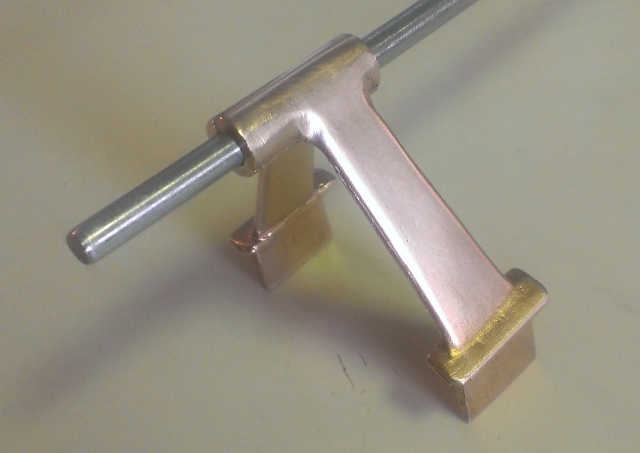
This is the finished strut as it will sit on the propshaft.
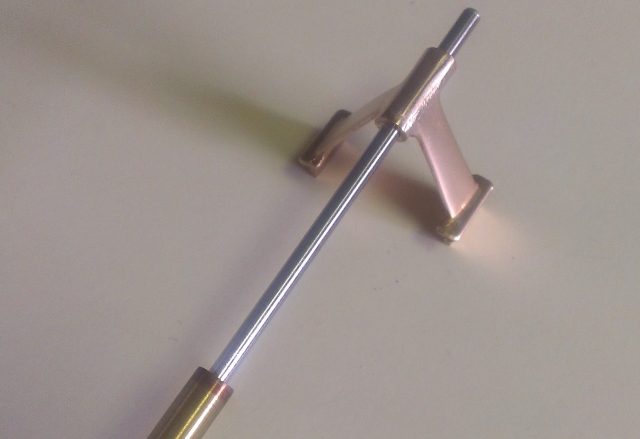
This shows where it will sit relative to the propshaft housing.

I want to investigate the LLurrsen rudder effect, so the two outer small rudders need to turn in opposite directions from straight ahead to more than 30 degrees outwards, so here I tried hooking them up to one servo, this works for those on a budget but not well enough I thought, so I fitted the third servo so there is one for each rudder. The thing I wanted to show here though is that I made the rudder to servo linkages by straitening out some heavy paper clips, this allows you to try all sorts of things very cheaply and easily without worrying about wasting expensive brass or stainless wires, until you get the right operation. These would not be strong enough in operation against the water current but great for experimenting on the bench. The main rudder is big and so are the motors and props so there needs to be servo linkages on both sides to stop them from bending and to add extra strength. I may find that I need a servo with more grunt as well?
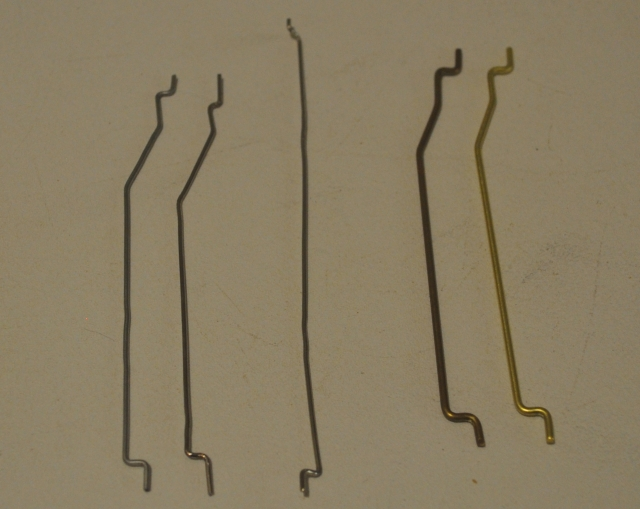
Once happy with the paper clip versions you can bend up the real linkages, here I have used 1/16" solid brass wire, again this may prove to be not heavy enough once the boat is moving.
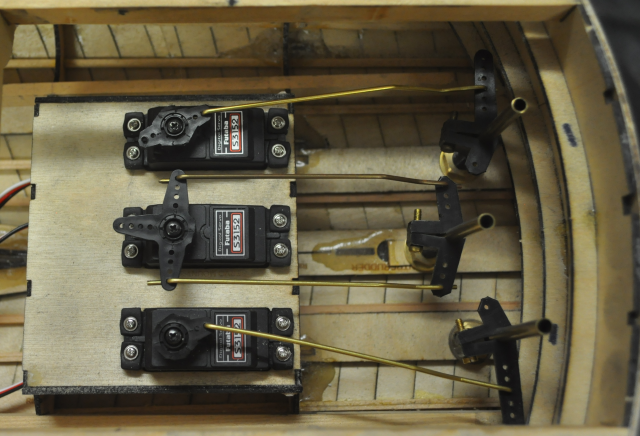
The finished linkages in place. The two outside servo's are connected to the same receiver channel with a "Y" cable. Both servo's turn the same way so the linkages are opposing. I am using channel 6 on my Futaba as it has a control knob so I can turn it from CCW for straight ahead to any angle up to around 45 degrees and it will stay there, perfect! The LLurssen effect uses the outside rudders to swing outwards (opposing) to about 30 degrees and then back in to around 17 degrees, this seemed to add a few knots to the boats speed. The setup that I have here will only work for straight ahead as the wing rudders won't "track" the main rudder, well not yet anyway and I just want to experiment.
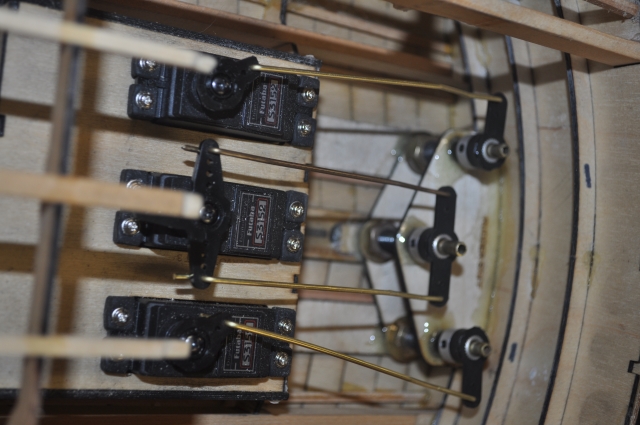
After experimenting with the rudder linkages above I decided that the top ends of the rudder tubes needed to be supported more and the rudder tiller arms needed to be a better quality and more secure, as this beast has awesome power and a very large rudder, so I made up a rudder stiffener, put one at the bottom of the tubes against the hull bottom and another at the top of the rudder tubes and fixed to the transom curved beam. I then put some epoxy around the rudder tube tops. The tiller arms have an aluminum hub and a grub screw holding them onto the rudder instead of just a plastic clamp. I can also get to the grub screw from the hatch fairly easily.
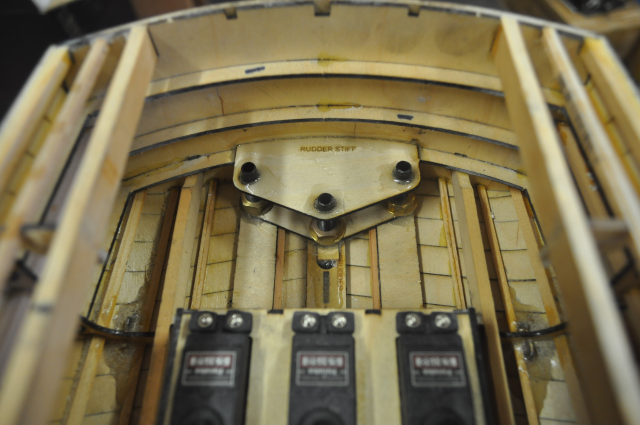
This photo shows the rudder stiffeners epoxied in place, I also put a small amount of epoxy around the nut that holds the rudder tubes in place so that they don't accidentally unscrew. These stiffeners add an enormous amount of rigidity over just the tubes.
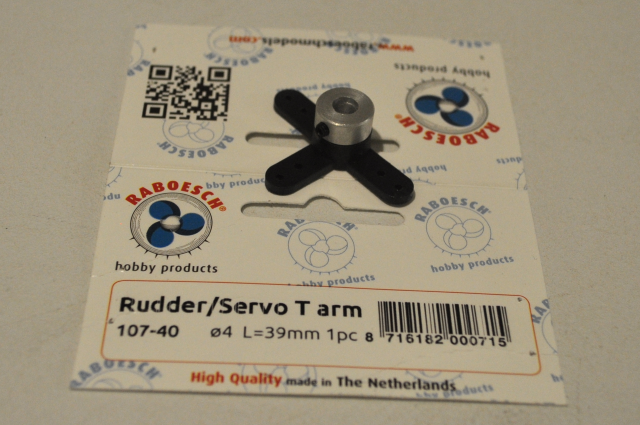
This is the rudder tiller arm that I chose (except that I needed 5mm not 4mm so I drilled them out).
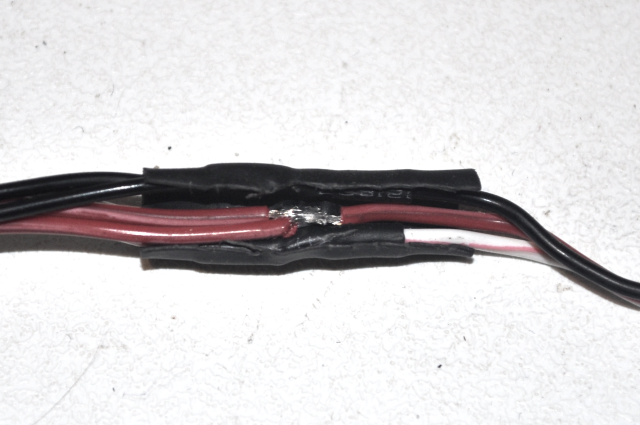
I bought a GForce (high quality RC accessories) servo "Y" cable, to be able to operate both outer rudder servos to test the Llurrson effect, however I turned the receiver on at one stage and nothing was working and a burning smell was evident, I touched the cable and it was really bloody hot but only on the single section before the "Y". I quickly turned the receiver off and pulled out the cable, it was hot! I checked the end connectors which were OK and I checked each servo plugged directly into the receiver which was luckily still working so I cut the 'Y' joint and found that only two of the three cable joins were insulated and a sharp solder joint had pierced the insulation and shorted the red (plus) and black (minus) wires. When you make a cable like this you stagger the joins, you don't put them side by side and you insulate all three wires not just two of them!!! I have enough energy in this model to do some serious damage and I don't want this kind of junk to burn my boat, that has many thousands of my hours in it, thank you Mr GForce. I will be checking every join and buying another brand.
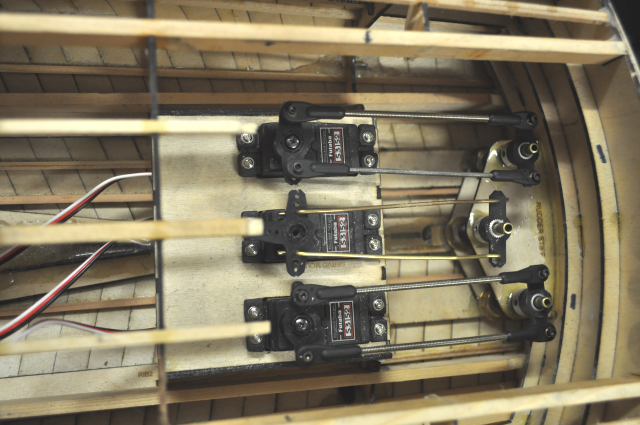
Here I have replaced the outside rudder linkages with two staright linkages with ball joint ends so that all three servos and rudders operate normally with as much torque as possible so that I can run the rudders to track each other normally or add an electronic LLurrsen effect controller later. This way I can attach the main deck and still play Llurrsen effect later.
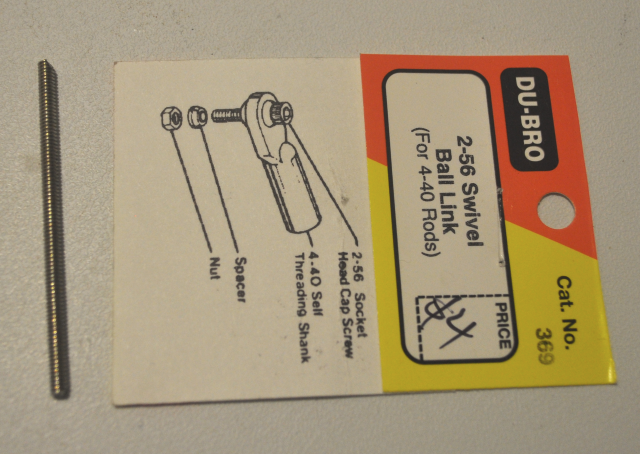
This is the ball link that I used. They screw onto "all thread" and therefore are adjustable in length.